Posts: 4,011
Threads: 0
Joined: Nov 2010
02-15-2021, 10:26 AM
(This post was last modified: 02-15-2021, 03:58 PM by bandit571.)
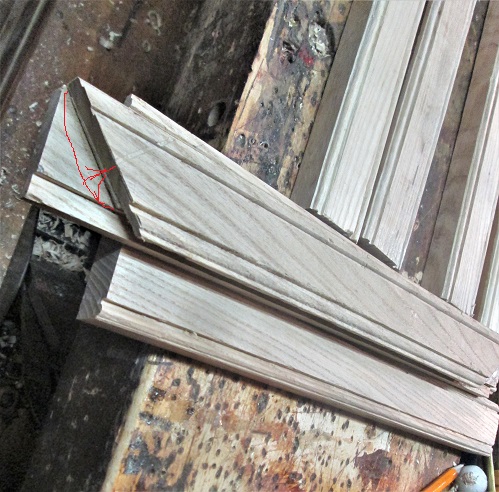
The rails take a few cuts...
A 45 that goes half way down from the show face. Then that #68 saw to rip the waste off...usually have to chisel a bit..
Where the 2 cuts almost meet...
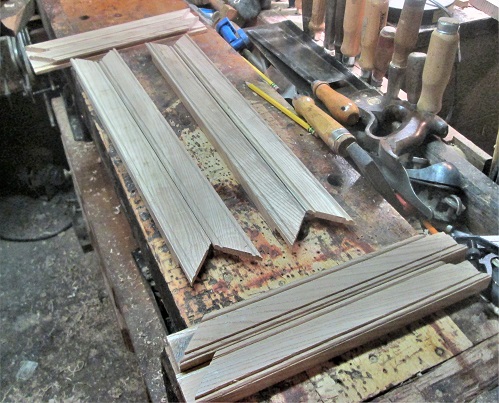
The stiles also get two cuts...
One to make the half lap cut....nibble away at the tablesaw ( quicker) with the rip fence set as a stop block for the width...then either the tablesaw or a mitrebox. to cut the 45 in the show face..

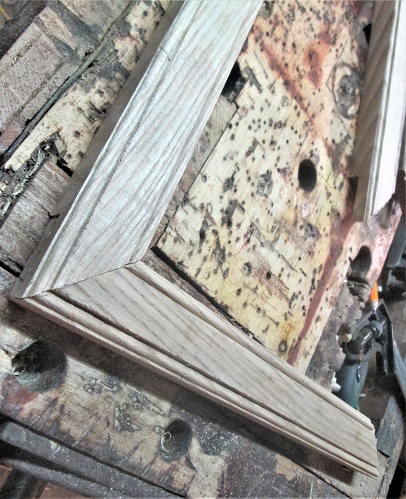
I can use one of the rails, to check the fit of each stile's joint...
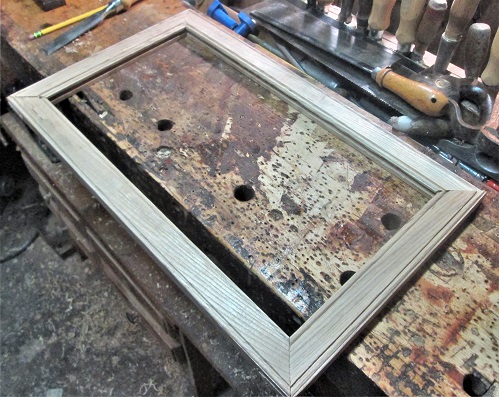
And..even an entire frame...

2 frames are now ready...Need to get two panels ready..
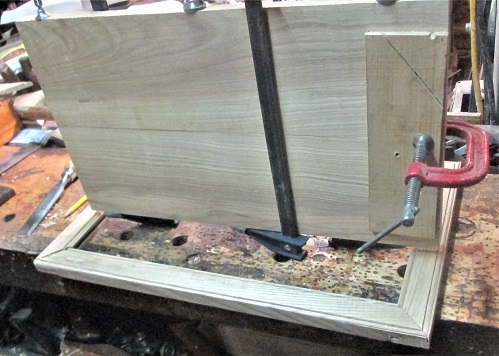
They need the clamps removed, and the glue joints cleaned and flat...
Some faces look better than others...

You aught to see the other side of this one...
Ends need to be squared off, length cut down to the proper size...and the width ripped to the correct ( I hope) width.. then, plane and sand the panels smooth
And hope this doesn't happen....That #62 Low angle Jack likes to tear out in Ash, after all
Stay tuned....raising a panel ( or 2) is next...

Show me a picture, I'll build a project from that
Posts: 4,011
Threads: 0
Joined: Nov 2010
Raising a panel...Can be done with a dedicated plane ( don't have one) a fancy router bit ( nope, don't have one) use a Stanley No. 4 like Paul Sellers does..or...
Set up the tablesaw...by tilting the blade..
To 15 degrees, or so....setting the rip fence..
1/2" from where the blade comes up through the table.
I have a slider, that slides along the top of the rip fence. Foam pad to keep things from slipping..
End grain ends are a bit narrow, and might drop down into the saw...this keeps things steady...the long grain sides are long enough they don't need the slider, and they don't fit, anyway...so :

steady pace through the cut, IF you happen to stop...the wood gets burned..With any luck, you wind up with a raised panel like this..
Then reset the saw...I need rebates milled around the edges. on the insides. Blade back to 90 degrees...1/4" cut by 1/4 " deep...Run the two panels through on the flat..
Then stand the panel up, and rip the waste off...then comes the part about fine tuning..
Long grain gets the router plane, cross grain gets the #78....test fits..
Pare as needed..

Want a nice gap-free fit.
Stay tuned...glue up day is a-coming


Show me a picture, I'll build a project from that
Posts: 4,011
Threads: 0
Joined: Nov 2010
Sitting here, waiting on glue to dry....might as well get caught up

Door #1 has been glued up....then the clamps removed after a day....and Door #2 is now sitting in the clamps..
Needed a batch of small cauls...
To use with a c clamp at each corner...
As this is where the glue will be...
Need a 3rd hand...
to hold the stile still...while I add glue , a rail, 2 cauls/pads, and the c clamp..
Check it for square....then rotate...ad the other rail. Then over to the tablesaw's top...add the door's panel..
Making sure the panel is facing the right way...then try to add the other stile....clamps, cauls, and more clamps ..
With the c clamps all on one face, they act as a stand-off, and make the other clamps easier to apply....Door #2 took a couple extras...
You can see Door #1 sitting there, on the floor, for now....had to bring it back up to the bench....was a hair out of square...
We can fix that...plane and sander. I also filled and sanded the door front..
Then was trying to decide on a handle for the doors....
Too small? Too Big, wrong type? Or...go with a closure type, instead of two magnetic catches on the inside.....Also have a towel rod to drill for, under the bottom shelf...then decide on what flavour of stain to use.....
Stay tuned....getting close to adding the hinges...
Show me a picture, I'll build a project from that
Posts: 4,011
Threads: 0
Joined: Nov 2010
Door #2 is out of the clamps...

Door #1 has it's 2 hinges mortised in place....
Both door have been set on the case...
Only to find out the case itself is out of square

Means a trip to Lowes, today. And pick up a 1/4" x 24" x 24" Handi Panel of plywood.....glue and screw two edges into square..then pull the case itself back into square, and glue and screw it in place so it stays there.....

Appears I also have a "Door Stop"...

Stay tuned...

Show me a picture, I'll build a project from that
Posts: 4,011
Threads: 0
Joined: Nov 2010
Plywood has been bought, along with the screws to attach it with. Plywood has been trimmed to fit....factory corner left at the top. Idea is to screw and glue one edge..
Centerline of screws was added a bit later...first, a big pipe clamp was used..
Until that gap at that corner closes up....then glue and screws to keep it there...including the center line, where the middle shelf is at...flip the case over
And see IF the doors line up better.....than they were...
Towel bar is a 5/8" dowel rod.....used a 5/8" Forstner bit.....only to find out, one of these two was measured wrong....thinking it is the rod...anyway drilled a hole..

And a hole up from the bottom for a screw....mark the rod for length, and trim it..
Dab of glue on both ends, and a screw..
And, then the hinges for Door #2....router..
To clean and level things up, after the Mallet & Chisel were done.....must have gotten a bit rough along the way....Latch Stile had come loose


So..glue and c clamps to repair that....even as the door was installed...
latch I had thought about using....won't fit

Will see how well the magnetic ones hold.....IF I can get them in the right spots....may need to go shopping..
Need to sand everything down to 220 grit...and see about a stain....Have 2 angle bracket hangers to install..to attach this thing to the single wall stud. at least it IS centered in that wall...with the pipes offset to either side of it....plan is to attach the bottom bracket to the wall....top bracket to the top of the case (on the inside, under the top).....Set the case on the bottom bracket, plumb the case, and attach the upper bracket to the wall....
Wet steamy closed up bathroom....needs a few coats of Poly....2 or 3...
Stay tuned..

Show me a picture, I'll build a project from that
Posts: 4,011
Threads: 0
Joined: Nov 2010
Those 2 clamps came off....just long enough for me to drill 2 holes....then back on they went...

Leave this sit a while....had a couple things to do....finally, glue set up enough, the clamps came off ...

Knobs are installed.
 Next...some sort of latch?

Hmmm, these either won't fit, or just don't look right....however...
I seemed to be attracted to these..
Just mark where the screws will go..
Install the magnet part...use it to locate where the plate will go...
Pilot hole drill to start the hole, and then a driver to install the plate..
Then repeat for the other door. Next up?
These need installed, so I can hang this thing on the bathroom wall...
This had it's own set of problems....stay tuned...

Show me a picture, I'll build a project from that
Posts: 4,011
Threads: 0
Joined: Nov 2010
Those metal brackets....will carry the weight of the cabinet, with screws into a wall stud....Bottom bracket wasn't a problem...
Was even about to drill a pilot hole into the Ash shelf's underside....a LONG driver bit was used, as the towel rod was in the way..
Problem began for the top bracket. I goes inside the doors, up under the top shelf. Problem?
Drill/driver is just too dang long...don't have a 90 drill....or, do I?
originally for assembly of WW2 Bombers....I adapted this to hold a #3 Phillips bit....NOW I can get into a tight spot..

Unable to do any pilot holes, this time around...took a few tries, and a lot of wax on the threads, but...
Those 2 red holes? They will be going through the plywood back of the cabinet...the metal bracket is there to prevent the screw heads from just pulling through the 1/4" plywood....Bracket is screwed to the wall stud.
Today will be a sanding day...stay tuned

Show me a picture, I'll build a project from that
Posts: 4,011
Threads: 0
Joined: Nov 2010
Sanded down, started with 100 grit, ended with 220 grit. Mixed up a batch of stain....one can was way too dark, the other was way too light and red...did a 50/50 blend of the two....then grabbed a brush...
Trying to get to all the areas on the inside , first....then closed the doors...


And stained the outside...trying NOT to get any on my shirt....

Letting this sit a day...

And see how well it looks dry.....may have to fix a spot or two....Not too worried about the top of the case...the only ones that will see that shelf..will be the spiders, The Boss will have a few things sitting up there, as well.....

When this cabinet is ready....I'll brush on a coat of clear gloss poly...and see how that turns out....may need a second coat, we'll see
Stay tuned

Show me a picture, I'll build a project from that
Posts: 4,011
Threads: 0
Joined: Nov 2010
All done...hauled upstairs, and hung on the Bathroom wall...

Screwed to the wall stud in the center of the wall...
Hold this in place with one hand, while trying to drive a screw is NOT a fun way to spend an evening....

I think that will do it, for this little Project..

Show me a picture, I'll build a project from that
Posts: 9,542
Threads: 0
Joined: Jan 2005
Location: Orlando FL
Looks good in place. Also looks a little heavy. Definitely better with a helper.
|


