05-09-2020, 08:37 AM
With the last post, I left off with the major bench construction finished and the bench sitting right side up. Now it's time to finish and put it to work.
So what needs to be done? The uneven ends need to be trimmed, the top planed to make it as flat as I can get it, and finally apply a finish to the surface.
Since the top had some glue squeeze out and uneven areas, I decided it was probably best to take care of that first. Using several planes I evened the surface and corrected some twist.


Both ends of the bench needed to be trimmed next. I started by marking a knife wall on both the top and bottom of the surface at both ends of the bench.


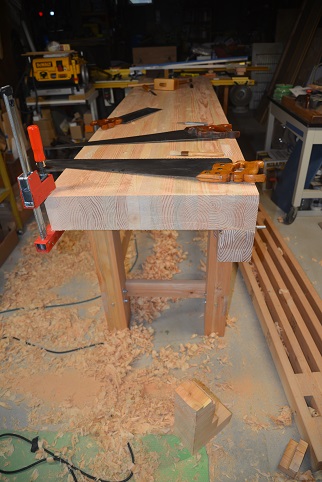
Then with a handsaw started sawing:


Almost done:


And done:


On the right side of the bench, I didn't quite get it straight and ended up with a ridge. (Yeah, I still can't saw straight! Really frustrating!) Since I knew this would bother me if I left it alone, using a handplane I leveled it as much as I could.


Next, following Adam's advice, I sealed the end grain right away in order to slow down moisture absorption.


And as you've probably already noticed, I've added the Veritas twins screw vise, straddling the left leg. And then put a finish on the top.
And here's the finished bench, in the spot where it's going to be used, and ready for the first project.


So what needs to be done? The uneven ends need to be trimmed, the top planed to make it as flat as I can get it, and finally apply a finish to the surface.
Since the top had some glue squeeze out and uneven areas, I decided it was probably best to take care of that first. Using several planes I evened the surface and corrected some twist.

Both ends of the bench needed to be trimmed next. I started by marking a knife wall on both the top and bottom of the surface at both ends of the bench.

Then with a handsaw started sawing:

Almost done:

And done:

On the right side of the bench, I didn't quite get it straight and ended up with a ridge. (Yeah, I still can't saw straight! Really frustrating!) Since I knew this would bother me if I left it alone, using a handplane I leveled it as much as I could.

Next, following Adam's advice, I sealed the end grain right away in order to slow down moisture absorption.

And as you've probably already noticed, I've added the Veritas twins screw vise, straddling the left leg. And then put a finish on the top.
And here's the finished bench, in the spot where it's going to be used, and ready for the first project.


