At first, Iwasn't going to post about it.....nothing fancy going on with it. No huge amounts of fancy wood were abused. No fancy joints, either....rather a bit..boring, eh?
OK, back when I built this computer desk....there was a centered shelf for the monitor to sit on, that WAS the plan. Planner forget to include the base of the monitor..

So, ever since, the dang thing has been sitting on the top of the desk, taking up "floor space" and sitting way too low for reading anything....tried a stop-gap..


To raise the monitor the 3" up where some of it will slide back onto the shelf...ugly, but was doing the trick.....well...

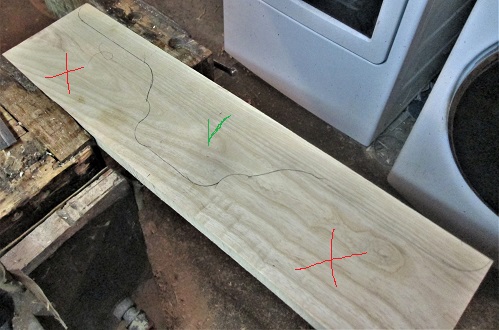
Hauled a 1 x 6 x 4' plank of Ash to the shop....needed to cut the best 24" out of it....tablesaw was buried ( as usual, like about any flat surface) so..


A Disston D-112 was used, instead.....saved the 2 cut-offs, for now....Laid out a few curves, from a 1/2 pattern I made up....


Some used a LARGE washer as a circle pattern....others, like out on the ends, used the Starrett No. 85 compass


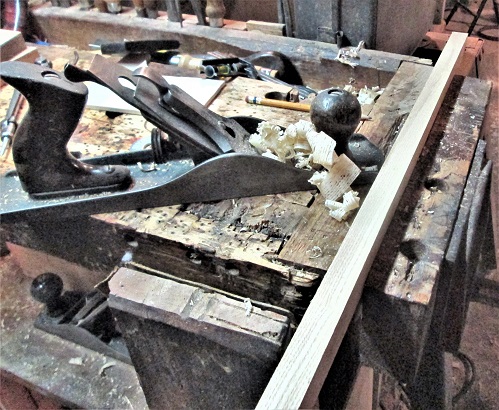
One edge needed jointed ( the other was getting cut out..) so..


Craftsman (Sargent 414) Jack plane seemed to do a nice job on 24" of Ash.....Bandsaw to cut the curved stuff....which still burns Ash, for some reason.
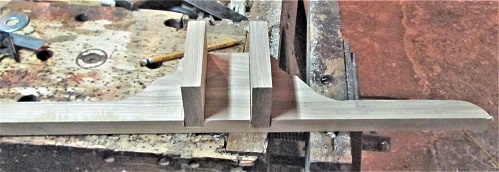
Ok, needed some support under the center of this shelf....and to help raise it to the 3" needed.....Ripped one of the cut-offs into strips about the right size....after allowing for a dado that they will sit in...dado was done at the tablesaw.....was quicker than setting up the Stanley 45....Supports were cut to length...


The other cutoff was ripped slightly narrower, to account for the shelf thickness ( no rebate was used..)


then the "FlashMob" of clamps showed up..


Center was first....so they would sit in the dados properly....then the fillers were added...


And this was as far as I got, the first day..


Let this mess sit overnight...
Stay tuned

OK, back when I built this computer desk....there was a centered shelf for the monitor to sit on, that WAS the plan. Planner forget to include the base of the monitor..

So, ever since, the dang thing has been sitting on the top of the desk, taking up "floor space" and sitting way too low for reading anything....tried a stop-gap..


To raise the monitor the 3" up where some of it will slide back onto the shelf...ugly, but was doing the trick.....well...

Hauled a 1 x 6 x 4' plank of Ash to the shop....needed to cut the best 24" out of it....tablesaw was buried ( as usual, like about any flat surface) so..

A Disston D-112 was used, instead.....saved the 2 cut-offs, for now....Laid out a few curves, from a 1/2 pattern I made up....

Some used a LARGE washer as a circle pattern....others, like out on the ends, used the Starrett No. 85 compass

One edge needed jointed ( the other was getting cut out..) so..

Craftsman (Sargent 414) Jack plane seemed to do a nice job on 24" of Ash.....Bandsaw to cut the curved stuff....which still burns Ash, for some reason.
Ok, needed some support under the center of this shelf....and to help raise it to the 3" needed.....Ripped one of the cut-offs into strips about the right size....after allowing for a dado that they will sit in...dado was done at the tablesaw.....was quicker than setting up the Stanley 45....Supports were cut to length...

The other cutoff was ripped slightly narrower, to account for the shelf thickness ( no rebate was used..)

then the "FlashMob" of clamps showed up..

Center was first....so they would sit in the dados properly....then the fillers were added...

And this was as far as I got, the first day..

Let this mess sit overnight...
Stay tuned

Show me a picture, I'll build a project from that


