Posts: 4,048
Threads: 0
Joined: Nov 2010
Might start a "build thread" about a Shaker Style Bedside table?
Needed three boards for this project ( wood is up to you, IF you want to build along) a 2 x 4 x 8', a 1 x 4 x 8' and a 1x8 x 8' pine board. $20 and change....
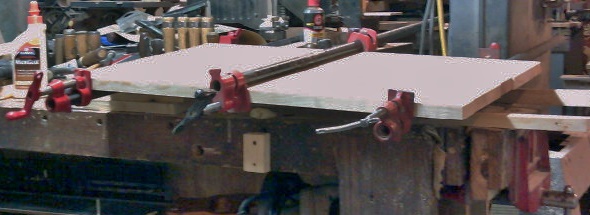
Cut the 1x8 into three 27" long pieces.....turned out a bit too wide, so I resawed one down a bit. Panel when glued up is about 27" by 17"
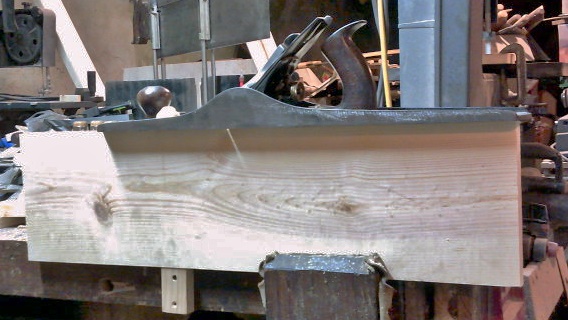
Used a #6c Jointer to joint all the edges straight, then clamped it up for a day..
This afternoon, I removed the clamps, and trimmed the ends square. Then the #6c was at it again..
to flatten the panel a little better, and remove the glue lines. Needed a smooth plane to do detail work..
Millers Falls No.9
Set this aside until I need the top again. Needed to cut the 2x4 down into some leg blanks
About 25" long. Stay tuned for the next "Chapter" to see what was done to the blanks....

Show me a picture, I'll build a project from that
Posts: 4,048
Threads: 0
Joined: Nov 2010
Chapter Two: Leg work

I cut three 2 x 4 x 25" blanks to make a few legs with.
Set up the resaw jig on the bandsaw ( even with the newly sharpened saw, I am OT doing this by hand) to make a few square blanks
Why would I need six pieces? Just in case i get an Ah.....c moment. The center piece was kept for later.. Soon had them all sawn, and then picked the four best ones..
Down at the far end, there is a few knots, however, the rest of the blanks are clear pine. I set these four togethermade sure the knotty ends were lined up flush at the end. A square was used to mark a line across all four blank, right at the bottom edge of the lowest knot. This will be the top of each leg. Now, the fun part...from the line I went down to the bottom of the leg, marked for a 3/4" "foot" then that "saved" scrap was used as a straight edge to connect the two points..
The "TOP" was placed in the leg vise, and a block was added underneath the "FOOT". Then a cambered jack plane hogged the waste off, working up the leg from the foot
Once I got close to the line all along the leg, that #6c was used to smooth the surface out. Then rotate the leg blank 90 degrees, mark another line, plane away the waste...
And call this leg done. One down, three to go. Takes about as long to type all of this, as it is to do the leg.
Next up? Need to do the other three legs, tapered two sides. Then decide whether a drawer will be made, or not. That will decide the type of aprons to be made. Mortise and tenon work for those.
So, stay tuned....might take a few installments...

Show me a picture, I'll build a project from that
Posts: 2,331
Threads: 0
Joined: Nov 2005
Thanks for posting, I love build alongs.
"When I nod my head, hit it." - M. Howard.
"I think you should learn how to use hand tools before you even touch a power tool." - Sam Maloof
Posts: 2,774
Threads: 0
Joined: Oct 2012
Location: W. of Rainier, E. of Orcas
Gosh! The frenetic woodworker!
 Question: What happens when you get a big project, like screen doors, or even a coffee table?
Posts: 4,048
Threads: 0
Joined: Nov 2010
BTDT
 The screendoor at the back of the house? Was made in this shop.....
I merely stretch things out a bit....maybe even build a dresser..
Show me a picture, I'll build a project from that
Posts: 4,048
Threads: 0
Joined: Nov 2010
Ok, went out and bought a couple extra boards today
Needed some decent 1 x 6 for aprons, so at least the drawer will be a decent size
Tapering three more legs, using handplanes, makes a mess on the floor
But finally got them all done, just like the first one
The trick was the fourth leg, first three didn't really matter which two faces were tapered, but it took a few checks to make sure the last tapers were on the right faces...
Used the #358 mitre box to cut some aprons to rough length..
A shorter one, in front of the two longer aprons. The "other" short apron will be a drawer front.
Planes used? Stanley #5c Cambered jack, Stanley #6c , a Millers falls No. 11, and the No.9.....last two for detail work. mainly along the square tops.
Maybe tomorrow, I can start doing some Mortise & Tenon work. and then, maybe build a drawer? Still debating adding a thin bread board edge to the top......maybe 1" wide?
Stay tuned...
Show me a picture, I'll build a project from that
Posts: 4,048
Threads: 0
Joined: Nov 2010
Ok, hid out in the shop, today
 Thought I could get some aprons done.....
The Wards #78 was set up for 3/4 wide tenons on the ends of the aprons.....it would NOT hold any settings in depth or width

The wood bodied shoulder plane could clean it's job.....until it broke throke one of the tenons. Hmm, trashed that long apron, had to cut another.
Finally figured out I could set the depth stops on the Stanley 358 Mitre Box, and then a wide, SHARP chisel to pare away the waste......finally....
Since the Stanley #45 was still set up for bead work, I reset the fence a bit
As I wanted to add a detail to the bottom edges of the aprons
Finally got the three long and one short apron all tenoned up and beaded. The trashed apron, now the blank for the drawers front, also had a bead milled on it
Set most of the aprons aside, except one. I needed it to layout a mortise in one of the legs..
To layout where the 1/4" wide by 3/4" deep hole will go..
The usual suspects were used for the chopping work...a 1/4" wide mortise chisel, a 1" wide paring chisel for the sides, and a fancy, shopmade "Gooseneck" chisel to clean the junk out of the bottom of the mortise, at least so I could do a dry fit
Not too hateful? I then chopped a mortise in another leg to match the tenon on the other end of this apron....whew!

Took a few tries, and checking of parts, to make sure I was in the right spot, hate when I get the mortises crossed up...

Got those two legs done, and then spread some Elmer's around, and a few clamps. Letting the glue cure for now. Will remove the clamps in the morning, and start on the other long apron side assembly.
Next episode? Stay tuned....the cussing is just getting started

Show me a picture, I'll build a project from that
Posts: 10,118
Threads: 0
Joined: Sep 2006
Location: South Alabama
I built a table very much like that about ten years ago. I did exactly what you did with the legs--I resawed 2X4s. I had minimal tools at that point, but the table did stand up. For a while. But the mortises in the legs had been cut too big, and eventually the tops of the legs split out, and the legs and aprons fell apart. I've got the top stowed away for now, and some day I'll make new legs for it.
Your mortises look more proportional than mine were, so I expect that your table will last a good deal longer than mine did.
But a question on the top: are those big knots giving you much trouble as you plane the whole thing own? Tearout can be brutal around the knots. Or is your smoothing plane up to the job? And how do you plan to attach the top to the aprons?
And by the way, the bead is a nice touch. Not "Shaker" in a pure sense, but classy in its own right.
Steve S.
------------------------------------------------------
Tradition cannot be inherited, and if you want it you must obtain it by great labour.
- T. S. Eliot
Tutorials and Build-Alongs at The Literary Workshop
Posts: 2,774
Threads: 0
Joined: Oct 2012
Location: W. of Rainier, E. of Orcas
(03-28-2017, 05:08 PM)bandit571 Wrote: BTDT
 The screendoor at the back of the house? Was made in this shop..... The screendoor at the back of the house? Was made in this shop.....
I merely stretch things out a bit....maybe even build a dresser..
Don't you hate diversions? I am drawn to the chest of drawers. Saw one of David Barron's drawer boxes using full tails; at least never noticed until his. It's nice how the layout with tight tails creates a subtle non-joint accent for the front face. I like yours.
Back to tables.... It is hard to imagine all your effort to build a fragile table using such soft-weak wood. But I can understand why with the outrageous cost of furniture wood, if your lumber yard is in the wrong area. I broke down and bought eastern maple for legs, using local (cheap) figured maple for the balance of a couple side tables. The leg wood cost more than twice the rest.
Thanks for sharing
Posts: 4,048
Threads: 0
Joined: Nov 2010
Knots are tight on this Pine, as I sort through the boards I am buying. Millers Falls No.9 hasn't had any chatter, ever. Couple of the larger planes are the same way....very little, if any tear-out
I seem to be getting better doing Mortise & Tenon work. Had plenty of practice, I guess
Attaching the top through corner blocks. Using a slotted hole for the screws. seems to work for the tables I build..
IF someone is following along, and wants to use whatever wood they have, be my guess.....so far, I have about...$27 in lumber....YMMV
Show me a picture, I'll build a project from that
|


 Question: What happens when you get a big project, like screen doors, or even a coffee table?
 The screendoor at the back of the house? Was made in this shop.....
 Thought I could get some aprons done.....
