Posts: 4,048
Threads: 0
Joined: Nov 2010
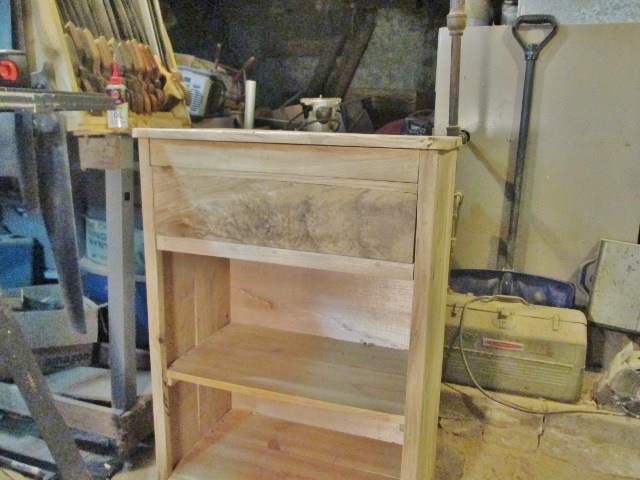
Blank for the drawer's front is out of the clamps.....one edge jointed, then the other was ripped for width, and then jointed.....then the ends were trimmed
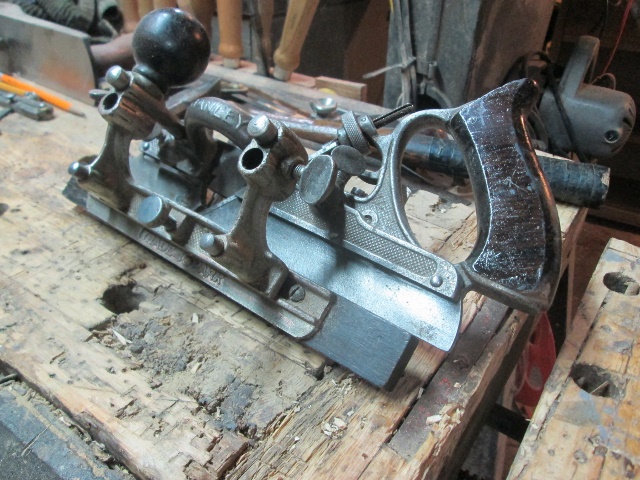
Will tweak for a better fit, when the rest of the drawer is done.....Planes did NOT like the fancy grain....only the #82 would work..
Even the #62 didn't work....chattered worse the the Type 12 Stanley No.3c did.....
Ok, one of these days, I might get the hang of doing these things..
Maybe
 Got both front corners done...tried a dry fit

Don't want to shove it all the way in..without a handle.
Need to plough a groove for the bottom of the drawer, a dado for the back to sit in..and cut the back to size....might get to the glue bottle tomorrow

I did get the Stanley 45 all set up..

Just need the Gumption to use it
 ....Maybe in the morning,eh?
Stay tuned
Show me a picture, I'll build a project from that
Posts: 6,442
Threads: 0
Joined: Feb 2006
another great writeup. Love the narrative style. I don't know how you find the time!
Posts: 2,774
Threads: 0
Joined: Oct 2012
Location: W. of Rainier, E. of Orcas
Gosh! The other day you were talking about "down time". And, now you're half way through another project! Way to go.
Posts: 4,048
Threads: 0
Joined: Nov 2010
Ok, a little catching up...been a busy two days....find the time? I am retired, have all the time I need.
 .anyway...
Grooves were done, then reset the Stanley to do dados..
Needed a little different jig to hold things still...
Then drill and countersink a few holes to attach the back with screws..
And clip the back, bottom corners...
Long time ago, I started clipping the back corners, seems to help when you try to slide the drawer into the opening. saves the finish on the bottom edge of the drawer opening..
More to come...stay tuned
Show me a picture, I'll build a project from that
Posts: 4,048
Threads: 0
Joined: Nov 2010
10-26-2018, 01:11 PM
(This post was last modified: 10-26-2018, 01:14 PM by bandit571.)
Ok...I used the sides, to mark the length the back should be...and then the back and the sides to size the bottom panel...
Now some assembly could be done

Spread some glue around...into the sockets for the dovetails, and into the dados....one pipe clamp + two cauls
The cauls are just below the end of the front of the drawer. pressing into just the sides..screws to attach the back....slide the bottom panel in place.

Check for square...I don't mind a little tow-in at the back, as long as both sides toe-in....this case, it toes in about 1/16"...close enough
 Then add the screws to attach to the back of the drawer. Then add a couple more clamps...
To make sure the top and bottom edges get the same clamp pressure. Then stash this assembly out of the way, for now

One of these years, I might get good at building a drawer?


Next up? Well, there is a puzzle of sorts to solve..
 ...Only have so much Oak left, and still have a topper and two doors to build....and no "Cut List" to use....

Single Brain Cell Sketch Up is working on the "problem"
 I had to get a few rough opening measurements...and find out what lengths to cut some parts...
Stay tuned....

Show me a picture, I'll build a project from that
Posts: 4,048
Threads: 0
Joined: Nov 2010
10-26-2018, 01:25 PM
(This post was last modified: 10-26-2018, 01:26 PM by bandit571.)
Well, according to this "Plan", showing the side of the unit..
Top of the topper needs to be 9" wide...
I think I can cut that from this 1 x 12...and then cut it to match the width of the base's top...
Should be plenty here?
 a Plan with the front views...
has been marked with the rough opening for the doors....parts to come from the 1 x 6s I have left..
Plus two sides of the topper, and it's mid shelf.....I also have a bit of 3/8" thick Oak, for the flat panels in the doors....
Stay tuned...a bit more to come...

Show me a picture, I'll build a project from that
Posts: 4,048
Threads: 0
Joined: Nov 2010
Ok, last night, decided to add "Cut" to the Cut List....got out the Vintage saw..

At almost 50 years young, it is a Vintage saw. Had one of the 1 x 6s marked for two crosscuts...and another 1 x 6 for a third part..the "third was then ripped down into 2" wide strips, have a couple glue ups to do..
One of the glue ups did need a caul on one end..
But the other panel was just fine...set the two glue-ups aside...then the fun can happen..

Crosscut for length, and then ripped for width....cut-off is still sitting on the saw. May find a project for it..someday

Ripped a supply of 2" wide parts....stiles and rails for the doors...
Still have one 1 x 6-1/2" x 5' board..will use it for the topper's mid shelf...as soon as i figure out how much room our Microwave needs....

Those 3/8" thick boards may be a glue up...to get the required width...as soon as i figure out what THAT is...

So, that is where things are, as of today....clamps are off of the drawer,,needed a little off the top right corner...to get a snug fit....will fine tune when the knobs arrive.
Stay tuned....
Show me a picture, I'll build a project from that
Posts: 14,967
Threads: 0
Joined: Sep 2004
Location: Butler, PA
Love these build-alongs! Looking good.
In your 2nd post, the pic of that one 1x6, with the live edge, looks for all the world, like sassafras. The grain is very similar to red oak, but I presume you would notice the smell if it really was sassafras.

Your Craftsman TS really brings back memories for me. I had one exactly like it, except mine was a 9". Wife got it for me for Christmas back around 1979 or 1980. I gave it to my SIL a few years ago and he eventually sold it on Craigslist. It wasn't much of a table saw, but it was what we could afford in those days. I cut a lot of wood with that little thing.
If you are going down a river at 2 mph and your canoe loses a wheel, how much pancake mix would you need to shingle your roof?
Posts: 4,048
Threads: 0
Joined: Nov 2010
Most of the non-store bought boards in this project came from the same Oak tree. Friend of mine dropped the tree, a friend of his bandsaw milled the boards...Store bought since to be just plain old Oak.. Was working way too hard for a Friday, today....started making mistakes.....corrected those, then cleaned up the shop, and called it a day.

Good news?
Drawer does fit, a bit snug, but better than too loose.

I can leave these two sit right there...until I need them clamps....
Stiles and rails were milled....length, width, edges jointed on the stiles.....rails needed their thickness reduced..to 3/4", from 4/4..then face planed. all of these needed a groove milled..
A job for this old plough
 . Got the 1/4" x 1/4" grooves done....didn't tear down the jig, though....got to making the 1/2" long tenons....that needed a haunch.

Would be nice IF there was a tenon
 ..had to go back a mill it's replacement
Decided to clean the place up, called it a day...
I managed to dig up the mortise jig, and set it on the bench. It had a stile long enough for me to mark out and measure for the length of the panel I'll need...rails provided the width...going to need a glue up for those, as well
 . Will double check the measurements tomorrow...way today went, I think I had better. will be gluing up a Mid shelf for the topper, goes right above a microwave oven. We'll see. Look like about a week to go on this project....then DownTime again....
Show me a picture, I'll build a project from that
Posts: 4,048
Threads: 0
Joined: Nov 2010
10-28-2018, 12:34 AM
(This post was last modified: 10-28-2018, 12:44 AM by bandit571.)
Kind of worn out, tonight....spent almost the entire day in the shop, or running errands....will do a full write up in the morning....
Door frames were made..

Panels were made, and installed, frames were glued up into doors
topper has been built. Sliding dovetails for the one shelf...top shelf is counter-bored screws, that I need to plug...drawer now has knobs

One door came out of the clamps just fine..the other door was having "issues"
 waiting on the "fix" to finish up.
Needs a LOT of sanding...may get to the stain part by wednesday? We'll see, stay tuned

Show me a picture, I'll build a project from that
|


 Got both front corners done...tried a dry fit


 ....Maybe in the morning,eh?


 Got both front corners done...tried a dry fit


 ....Maybe in the morning,eh?


 .anyway...

 ..had to go back a mill it's replacement
  . Will double check the measurements tomorrow...way today went, I think I had better. will be gluing up a Mid shelf for the topper, goes right above a microwave oven. We'll see. Look like about a week to go on this project....then DownTime again....