04-02-2020, 03:34 PM
(This post was last modified: 04-02-2020, 03:38 PM by C. in Indy.
Edit Reason: Changed Mel's wax to Don's wax
)
A couple of years ago here I posted a few experiments where wood burnishing had some attractive benefits. In and after that process, I acquired a really tight-bound polissoir, and also some of Don Williams' solid and liquid waxes.
I consider it a fortunate thing that one of the more impressive and easier woods to prepare this way is plain oak. I have a few projects and tools that always live indoors, and they have only beeswax on raw oak, and I love them.
I have other woods which really are pretty but clearly need some improved grain filling. The example below will be Kentucky Coffeetree. I had a nice quartersawn piece and I experimented a lot in the morning, really to come away frustrated. I had done burnishing, rubbing wax in, melting and pouring wax in, and even running it on a hot buffing wheel charged with wax. I didn't think the resulting outcome was worth the efforts.
Later in the day, I pondered it, and I thought maybe the 1st polissoir step was making the grain-opening "furrows" distort. That is, the grain "furrow" was having a partial "roof" extended over it by the mechanical burnishing actions. Wax (molten or friction-flowed) would maybe be viscous enough not to get through the 'hole in the roof' to be efficiently filled into the 'furrow'.
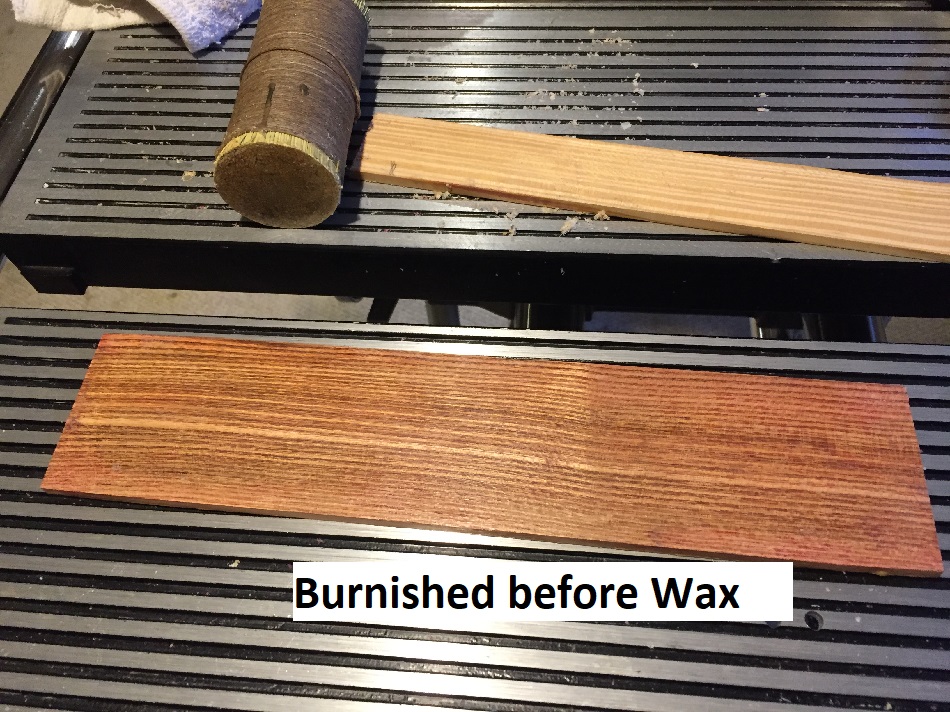
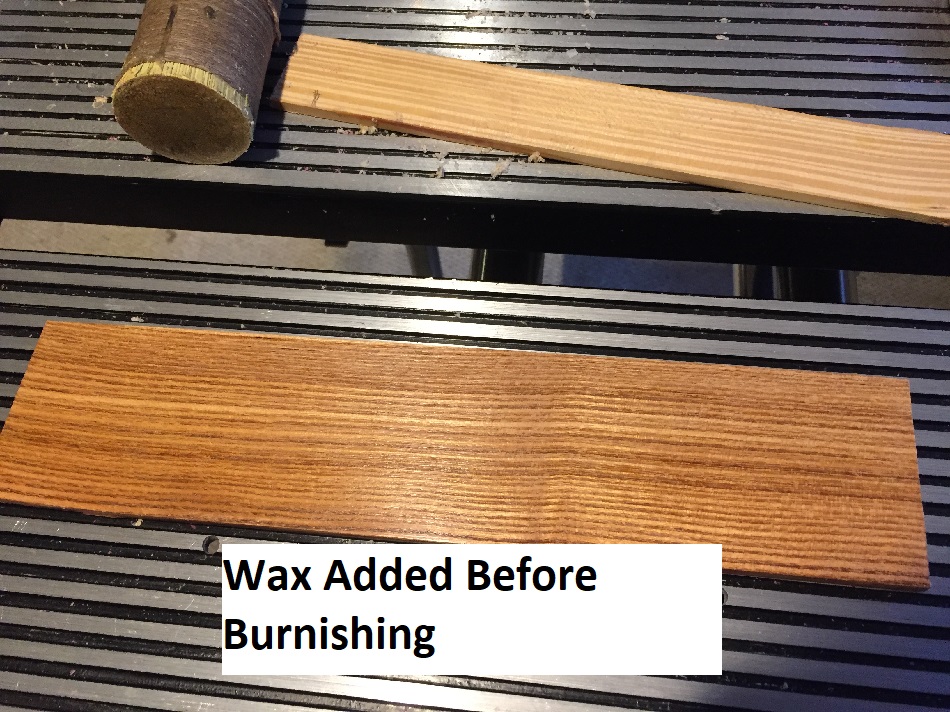
So I did a new experiment / finish schedule. I did a real nice planing of the surface, and that stopped my mechanical work for the time. Next I melted and flowed-in a good amount of wax (I did brown beeswax first, and then overcoated and reflowed some of Don's shellac wax over that, mixing as best I could with a small heating iron). After this, I scraped down the plank with a simple sharp-cut fir board-edge to remove excess wax. Then I finally worked it with the polissoir and finishing cloth.
This seemed to help! I have placed comparative pictures below. This is all just waxes, with no shellac.
First two pic's are from the basement shop, where the overhead lights are typically pretty cruel to scratches. These are two sides of the same board:


Last pic is from natural light upstairs, where I cut the board so a direct comparison would be visible:


I consider it a fortunate thing that one of the more impressive and easier woods to prepare this way is plain oak. I have a few projects and tools that always live indoors, and they have only beeswax on raw oak, and I love them.
I have other woods which really are pretty but clearly need some improved grain filling. The example below will be Kentucky Coffeetree. I had a nice quartersawn piece and I experimented a lot in the morning, really to come away frustrated. I had done burnishing, rubbing wax in, melting and pouring wax in, and even running it on a hot buffing wheel charged with wax. I didn't think the resulting outcome was worth the efforts.
Later in the day, I pondered it, and I thought maybe the 1st polissoir step was making the grain-opening "furrows" distort. That is, the grain "furrow" was having a partial "roof" extended over it by the mechanical burnishing actions. Wax (molten or friction-flowed) would maybe be viscous enough not to get through the 'hole in the roof' to be efficiently filled into the 'furrow'.
So I did a new experiment / finish schedule. I did a real nice planing of the surface, and that stopped my mechanical work for the time. Next I melted and flowed-in a good amount of wax (I did brown beeswax first, and then overcoated and reflowed some of Don's shellac wax over that, mixing as best I could with a small heating iron). After this, I scraped down the plank with a simple sharp-cut fir board-edge to remove excess wax. Then I finally worked it with the polissoir and finishing cloth.
This seemed to help! I have placed comparative pictures below. This is all just waxes, with no shellac.
First two pic's are from the basement shop, where the overhead lights are typically pretty cruel to scratches. These are two sides of the same board:


Last pic is from natural light upstairs, where I cut the board so a direct comparison would be visible:

Chris


