04-18-2020, 03:29 PM
Apparently I like kitchen knives (our family has a...few...). The problem is that all the adults in the family seem to like long knives, particularly after a recent trip to Japan (we now have four chef's knives in the 9-10" range, a bread knife of similar length, and one 12" chef's knife), which doesn't work well with most commercially available knife blocks (good luck finding one that can hold more than one long knife). I have had a commercially made one for years, and had another small block next to it that I made that held some of the longer knives (but not the 12", which my wife purchased like a month after I finished the supplemental knife block.
 )
)
After the recent trip to Japan I decided I needed to fix the situation. I had made a knife block once in the past for my parents, and decided I'd just use a similar design (though this one is longer).
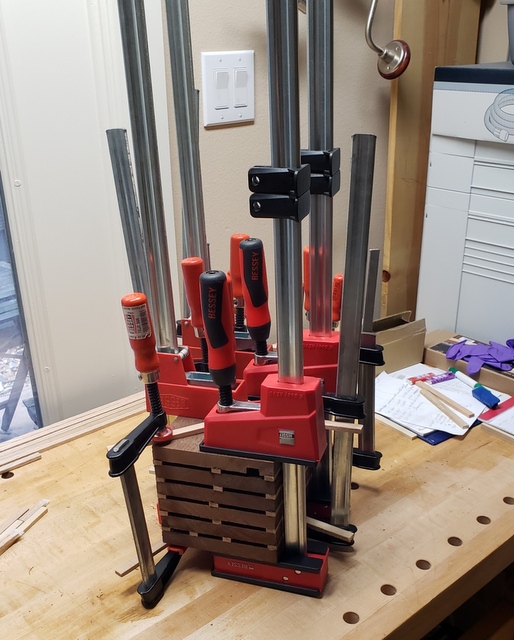
Start with gluing the basic block together (Don't really think this needs much build along. Just start gluing the wood together in the needed pattern).

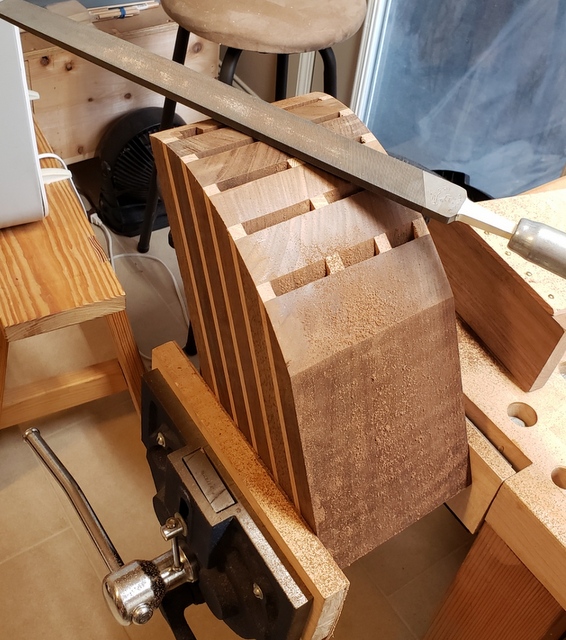
Follow that by cutting a curve on the bandsaw for the bottom, and then filing it smooth (apparently I also have a long file. Side effect of living near Slav for a couple years
 )
)

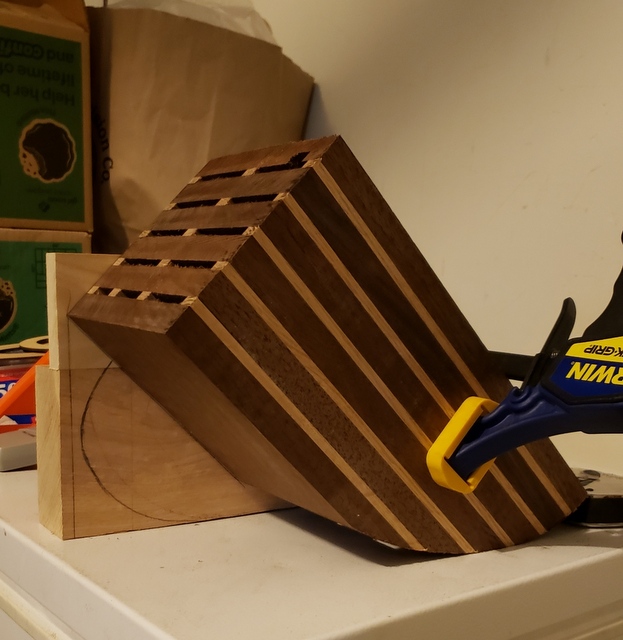
Next figure out the pattern for the leg, and sketch it on the form to be used.

Next I need to get the leg to the desired shape. So on the block I made for my parents I used some of the Cold-Bend Hardwood to do the curve, as I really didn't have a steaming setup, and this struck me as the easiest way. Fast forward to now (10+ years later), and I still have some of the Cold-Bend Hardwood, but the problem is that it is no longer damp. And no longer bends. I decided to see if I could get it to bend by rehydrating it, so I cut a couple pieces out and dropped them in a cooler of water. Definitely seemed more bendy after soaking. Briefly took a piece of wet scrap and put in microwave, which helped the bending. So I decided to steam the piece at this point and see if it would work (too long for microwave). Which it did. (Warning: ugly cobbled together steaming setup photos coming)
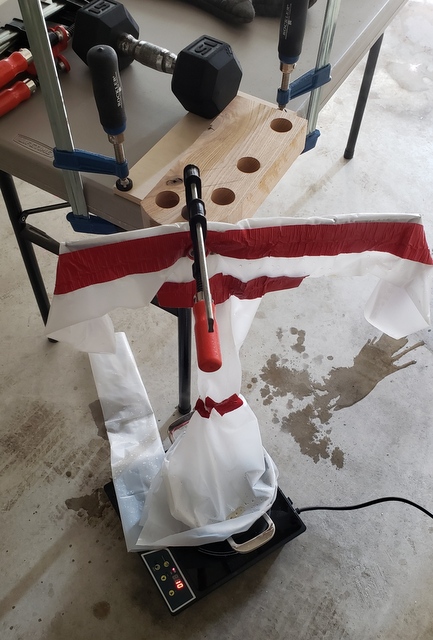

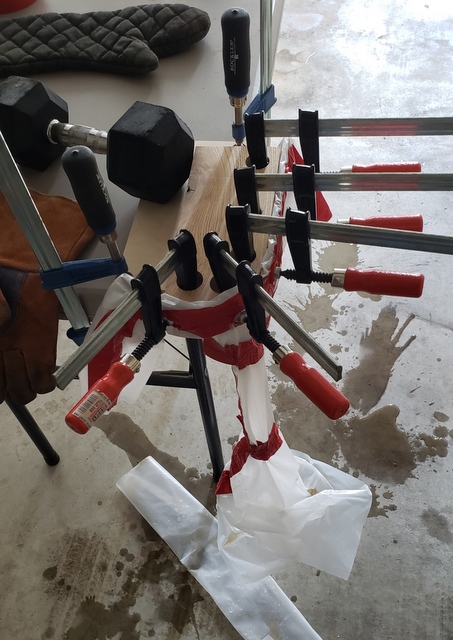

Told you the setup was ugly. I just steamed the wood in place in the plastic, so I didn't have to worry about the thin piece drying/cooling too quickly (saw a video of someone doing this online, which I thought was a interesting technique). After it cooled down I cut off the plastic.
For the record, I soaked two pieces, and after the first was done decided to try and simply bend the Cold-Bend Hardwood on the form and see if it would work. It appears that it did (still drying, but I briefly removed a clamp after about a day and it was mostly keeping it's shape). It was harder to bend to shape (which makes sense), but based on my memory similar to what it was originally like. The only disadvantage to skipping the steaming is I think it would take longer to dry.
So short answer is that rehydrating old Cold-Bend stuff seems to work, and I don't need to toss my remaining stuff

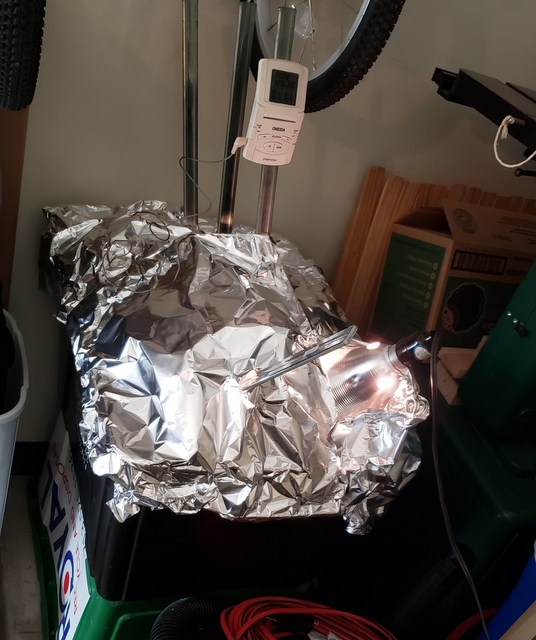
Now I needed it to dry, so I made a hotter area with foil and an incandescent bulb in my garage, and let it sit for a few days.

Continuation in next post
 )
) After the recent trip to Japan I decided I needed to fix the situation. I had made a knife block once in the past for my parents, and decided I'd just use a similar design (though this one is longer).
Start with gluing the basic block together (Don't really think this needs much build along. Just start gluing the wood together in the needed pattern).

Follow that by cutting a curve on the bandsaw for the bottom, and then filing it smooth (apparently I also have a long file. Side effect of living near Slav for a couple years
 )
)
Next figure out the pattern for the leg, and sketch it on the form to be used.

Next I need to get the leg to the desired shape. So on the block I made for my parents I used some of the Cold-Bend Hardwood to do the curve, as I really didn't have a steaming setup, and this struck me as the easiest way. Fast forward to now (10+ years later), and I still have some of the Cold-Bend Hardwood, but the problem is that it is no longer damp. And no longer bends. I decided to see if I could get it to bend by rehydrating it, so I cut a couple pieces out and dropped them in a cooler of water. Definitely seemed more bendy after soaking. Briefly took a piece of wet scrap and put in microwave, which helped the bending. So I decided to steam the piece at this point and see if it would work (too long for microwave). Which it did. (Warning: ugly cobbled together steaming setup photos coming)


Told you the setup was ugly. I just steamed the wood in place in the plastic, so I didn't have to worry about the thin piece drying/cooling too quickly (saw a video of someone doing this online, which I thought was a interesting technique). After it cooled down I cut off the plastic.
For the record, I soaked two pieces, and after the first was done decided to try and simply bend the Cold-Bend Hardwood on the form and see if it would work. It appears that it did (still drying, but I briefly removed a clamp after about a day and it was mostly keeping it's shape). It was harder to bend to shape (which makes sense), but based on my memory similar to what it was originally like. The only disadvantage to skipping the steaming is I think it would take longer to dry.
So short answer is that rehydrating old Cold-Bend stuff seems to work, and I don't need to toss my remaining stuff

Now I needed it to dry, so I made a hotter area with foil and an incandescent bulb in my garage, and let it sit for a few days.

Continuation in next post


 ). Cut that end of the leg to length, then epoxy into place (using some holdfasts to add a bit of weight to make sure it is sitting properly).