Posts: 4,048
Threads: 0
Joined: Nov 2010
02-03-2022, 10:59 AM
(This post was last modified: 02-03-2022, 11:01 AM by bandit571.)
Well, since the Keepsake box is done..there is still the matter of what to do with this...
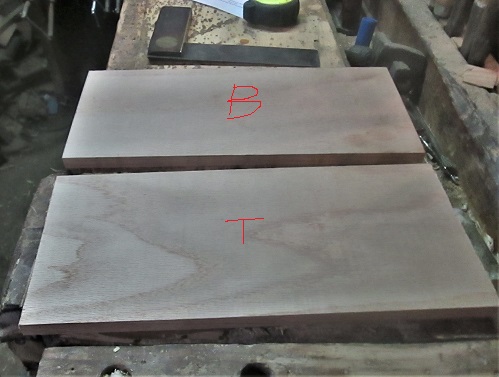
All but one being 1/2" thick Red Oak.
And this 1/4"~3/8" thick chunk of Ash....
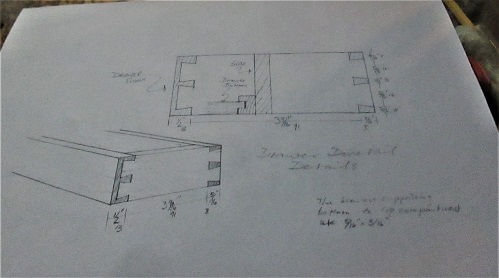
Happened to remember a small project from a few years ago....one of the first "Masterclasses" Projects from Paul Sellers..so, down loaded a set of FREE plans, again
Called a Desktop Organizer..
I'll worry about this drawer, when the time comes..
Have already had to modify the cut list a bit...to allow for the boards I have on hand....Like sizing the lid and bottom panels..
As all I have on hand is the 1/2" thick stuff...As for the 4 sides..they were ripped to 4" width. The front went to 2" width, instead of the 1-1/2" width....gives a wee bit more room to work with.
And figured that was enough to start out this project.....
Stay tuned...
Show me a picture, I'll build a project from that
Posts: 4,048
Threads: 0
Joined: Nov 2010
Got bored last night....and got tired of watching for the Great Snow Storm of 2022 to arrive here.....(finally started at 0330 hrs)...so
First item was to find a 1/4" plywood panel that looked halfway decent, and close to the right size..
As long as it had one GOOD face...as the drawer will see the other. Sellers used a solid wood panel, sitting on glued in "slips" for the bottom of the compartment....I intend to use a thin plywood panel, sitting in a set of grooves and a rebate.
Rebate goes along the bottom edge of the front piece....on the inside...
1/4" x 1/4". Then use this to align where the grooves will go on the other 3 sides...
Set up the Stanley 45 to cut the rebate, first..
Then readjust the fence to do the other 3 sides...used the plywood to check things out,,
And, that should have been enough for this go round....However..
Sellers used HUGE dovetails for his box...don't really care for them...thought I'd try skinnier ones...ok.....Sellers does Tails first, so I try THAT way first...
Stopped BEFORE ever grabbing the saw...brain was not getting the concept here.....switched over to Pin First Layouts....and got to this point...
Right leg was saying it was "QUITTING TIME!"....so, before any saw cuts were made, closed up shop, and trudged back up the stairs
Stay tuned...
Show me a picture, I'll build a project from that
Posts: 4,048
Threads: 0
Joined: Nov 2010
Re-thought the dovetail thing....besides going with Pins first....I also wanted to close off that end of the groove....gathered the usual suspects up..
Made a couple extra lines...
Made 2 extra cuts for the saw to do...however, chopping out the waste was a bit tricky..
And this was the "show side". Chop 1/2 way, flip over and complete the chops..then a bit of clean up..
Coping saw to trim the stub down a bit...and level the chopped areas. traced around these pins, saw on the waste side of the lines, chop out the waste, and then try a dry fit..
Not going all the way down? Rocking in the middle, Hmmmm?
Needs a clean up....came back with that coping saw...
Fits a lot better..and no square hole showing where the groove is.
1 corner done, 3 more to do....1 like the first one..
But the other 2 will be a lot smaller area...
Just need to cover the groove, again...maybe with a 1/2 pin?
When I get all the corners done, then I can trim the plywood panel to final size..
Stay tuned...
Show me a picture, I'll build a project from that
Posts: 4,048
Threads: 0
Joined: Nov 2010
Once I got the Honey-do Jobs done.....and I rested up a bit ( Supper) then tried the shop for a while...after about 90 minutes or so..gave up and closed up shop..
3 tasks were needing to be done..corner #2..
Pins were sawn... the the chisels removed most of the waste....had to switch out coping saws for a better one (Sharper, too)
Trim the stub tenon, clean out along the baseline. Then Trace around the pins with a sharp No.2 Pencil to lay out the tails. Bandsaw to do a better job of sawing at an angle than I do...
And, a few extra cuts to help chop the waste out. Dry fit took a bit...had to use a mallet...
Task #1 for today is done. task #2 was cut the plywood panel to exact length..
Make a mark, Mitre Box No. 358 to make a square cross cut..I'll do the exact width after the last 2 corners are done.
Now, Task #3...was already getting flustered, shop stool kept trying to trip me....never knew that Red Oak was attracted to Concrete Floors...wound up laying out the wrong spot first.....managed to correct myself...
Hmm. Just like round in back, I need a stub to fill the groove...then lay out for the rest of the cuts. This board is just 2" wide, though...might get a bit crowded.
Time to get a couple sash Chisels sharpened up...looks like I might need them.
90 minutes to get to this point...leg was hurting, and getting crampy....decided to just stop for today..there is always tomorrow, eh?
Stay tuned...might get a glue up by Sunday? maybe.....
Show me a picture, I'll build a project from that
Posts: 4,048
Threads: 0
Joined: Nov 2010
Ok...2 hours in the shop, today...made some fancy cuts..
Which led to more fancy cuts..
Then dry fits...
then repeat for the other end
Then try a dry fit, again.after rough cutting the plywood panel to size.
Seems the plywood needs to by planed on that one edge...
Then a glue up occurred...
Will let this mess sit a day...
Then see about milling the bottom to get it ready to glue to the box...
Stay tuned
Show me a picture, I'll build a project from that
Posts: 4,048
Threads: 0
Joined: Nov 2010
Clamps came off this afternoon-ish...slowly....
Half of them....no creaking nor popping...Started the clean up..
A few high spots to lower back down...
Couple spots to fill...even some detail work...
To get an edge level...sat the box onto the base, to lay out where it will be sitting..
Well, it IS centered front to back, AND centered end for end....
According to Sellers, I need to round over the base's edges...with a hand plane..of course..
Ends get done first...along with some sanding..
Then the long grain edges....and a nice corner detail...
Next? Well, Sellers glues the base to the box..
After a check for fit...a bead of glue was applied, then a few clamps...
7, to be exact....Then, seems the panel for the lid is a bit too narrow..we have ways...
About an inch added, tried to match the grain...we'll see. Let both glue-ups sit a day, or so.
Once the lid is done..THEN I can start on a drawer...should be "fun"
Stay tuned..
Show me a picture, I'll build a project from that
Posts: 4,048
Threads: 0
Joined: Nov 2010
02-07-2022, 11:12 PM
(This post was last modified: 02-07-2022, 11:15 PM by bandit571.)
Needed to do some "prep work" before too much longer...clamps came off both glue ups...needed the top of my bench back. Needed to set up a rebate plane...
Sargent made for Craftsman No.3720 (#79),,,fence and depth stop have been attached to the plane, and set...I hope.
Needed the bench vise, to hold the Monarch Metal vise,,,hinges were gappy..
A couple squeezes...
No more gaps....Hammer to keep things straight.
Lid was out of the clamps, needed to be a bit flatter along the glue line..
We have ways..
Laid the box onto the lid...to set the overhang even all the way around..and mark how much to remove..
So it now looks like this. Maybe tomorrow, I can start on the lid....maybe?
Then, I can cut these scraps up into a drawer...
The usual..crosscut, rip, dovetail, groove.....might even have a wooden knob...maybe 2? Just one would end up looking like Dagwood Bumstead's Shirt Button...
This little box is going to sit at the far end of the bench....and hold all the small tools....so they won't get lost down in the tool well...
Stay tuned...
Show me a picture, I'll build a project from that
Posts: 4,048
Threads: 0
Joined: Nov 2010
Waiting on Lunch to settle..then mosey down to the shop. Have to finish up Episode #2, and Start on Episode #3......Hope to have the lid done and hinged to the box....maybe.
Rebates first, though....then the round-overs....THEN set the hinges...Wonder how long that all will take....we'll see..
Film at 2300 hours....
Stay tuned....
Show me a picture, I'll build a project from that
Posts: 4,048
Threads: 0
Joined: Nov 2010
Rebates first..
Have both a Stanley made version and a Sargent made version...used them both..
Then the round-overs..first the ends...
Then round over the sides..
Between the Millers Falls No. 9 and a 1/4 sheet sander....trying to get a crisp corner. Check how the lid fits to the box...
Rebates should line up with the top edges of the box. Lid is not suppose the rock, either. Should fit flat on the box. and, no gaps seen.
Hinges are next. Measure in 1-1/4" from the corner of the lid..
And mark where the 2 hinges will go...then get a few tools out..
And install the hinges to the lid..
Then used these to lay out where they will go on the box....chop the mortises for those, and install the lid onto the box...
And, this is how it is supposed to open up to....no chain needed. Close the lid..
Again...no gaps. No rocking going on, hinges don't bind.
The next task is to build a drawer...so, I rough sawed a few parts...
Front, back and 2 sides were ripped to 2" width...length? TBD....I also found a "decent" 1/4" plywood panel to use as the bottom of the drawer.
That will be the next time in the shop..
Stay tuned...
Show me a picture, I'll build a project from that
Posts: 4,048
Threads: 0
Joined: Nov 2010
Episode #4 was all about dovetails for the drawer. Will have to see how it works out for my drawer....as I use a different way to hose drawer bottoms....
Stay tuned....almost certain to involve some sort of cussing....you will have to provide your own ear plugs...
Show me a picture, I'll build a project from that
|


