Add a shelf to an End Table
#20
When you can't run a handsaw to cut tails with...we have ways..
   
Then clamp the top to the bench top...and chop out the waste....with a couple chisels...then fit the pins to the tails..
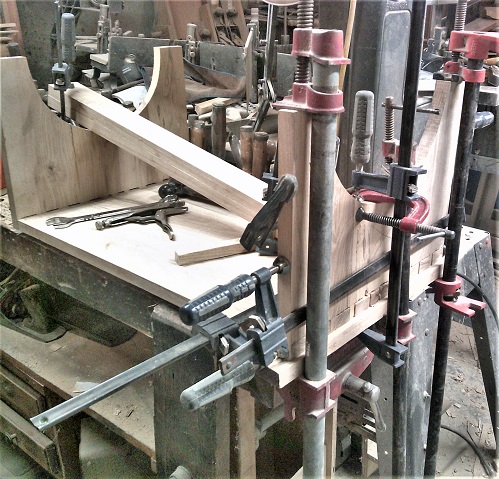
   
Hammer and clamps to drive things home...despite the leg panel trying to split twice...added a caul or 2 to help out..
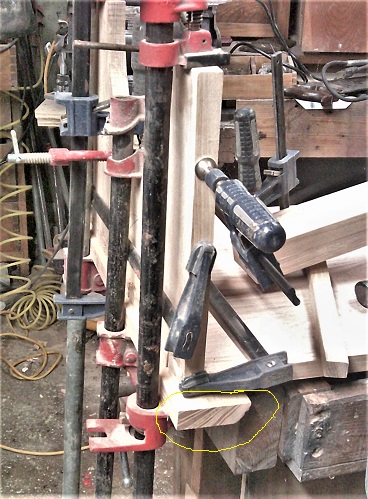
   
The extra clamps and cauls to pull both splits back together, with a blob of glue brushed into each   Caul and a red c clamp to pull the splits flat..
   
Ever get to the point where hand turning wasn't getting it done?  We have ways...
   
Large box end wrench works quite nicely...the Visegrips?
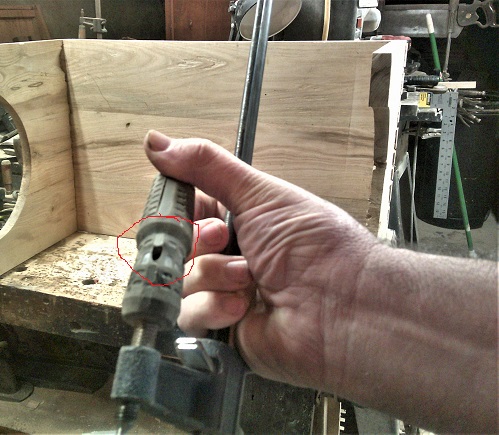
   
When a handle snaps...visegrip the threads right under the handle, and keep cranking...


Let this sit overnight..and removed all the clamps this morning...
   
Laid on it's side,,have more through dovetails to mill...
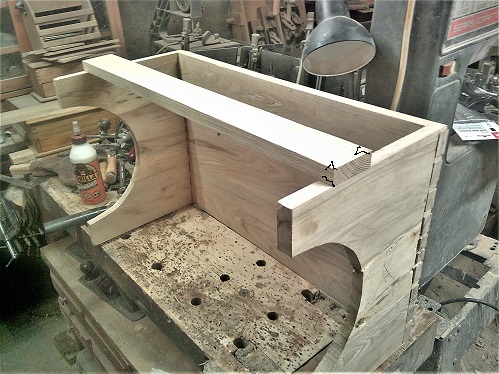
   
One stretcher per side...
Issue with one 12mm chisel...
   
SNAP!....we have others...
   
Stay tuned..
Show me a picture, I'll build a project from that
Reply
#21
A bit of work, this morning....turn the unit around to work at the other end...
   
Clamped down tight, so it won't wiggle around on me...small combo square to carry a few lines..
   

On both faces..
   
Along with how far down to saw....
   
I need to keep a finger against the saw blade..otherwise it will try to wobble all over the place....not a fan of broom-handled saws...

Made 3 cuts..3rd one in the middle...as a relief/Control cut...for when this chisel start to chop away the waste..
   
I chisel and pare until I'm right at the bottom lines..check both faces....then finish up with that 4-in-hand file....check with the square...dry fit showed a couple spots that needed pared a bit more...
   
Left side of this socket needed a bit pared off.....time for the glue and glue brush...
   
Dovetail #1 fully seated into the glue and the socket...
   
And the 2nd dovetail...drive in with a hammer and a wood scrap...
   
First stretcher is now installed...need to let glue dry...sand a bit, router to run a round-over bit...then flip over to do the other stretcher..

Stay tuned


Attached Files Image(s)
   
Show me a picture, I'll build a project from that
Reply
#22
Coming along nicely, Bandit!
Waiting to grow up beyond being just a member
www.metaltech-pm.com
Reply
#23
Router work, today...
   
Had to fix yet another split...before this could get to work...
   
Run all the edges..
   
And along the ends..
   
Then ran some 120 grit with my ROS....to clean things up..
   
So...now I am waiting on glue to dry..again..

Stay tuned...
Show me a picture, I'll build a project from that
Reply
#24
Second stretcher has been installed..
   
allowed the glue to dry...then worked with these two items..
   
Roundover bit, and 80 grit..
   
Corners were a bit tricky...
   
Then the Arches were worked over...
   
Some high spots needed leveling..
   
Before the router came through...sanded to 120 grit, for now...
   
Before the coat of Witch's Brew was brushed on..teaser, for now...
   
PIP later..stay tuned...
Show me a picture, I'll build a project from that
Reply
#25
Has been varnished, rubbed down and moved to it's new home...
   
was trying to colour match to the table, so that they look like a "set"....even though the table is a bit older that the shelf...came close..

Thanks for looking in...
Show me a picture, I'll build a project from that
Reply
#26
Nice job Bandit.  I didn't notice until now that you sanded to only 120, is that normal for you?
"I tried being reasonable..........I didn't like it." Clint Eastwood
Reply
#27
Looks great. The new camera seems to be doing well too.

I was taking a look at Paul Sellers version and was wondering about the leg on the one side that has the curve down. Did he say what that was for? Seems like it would allow for rocking on the floor. I prefer the way you made it.
Reply
#28
almost all the surfaces had been hand planed smooth...120 was to just knock down any rough spots along the routered edges...

Sometimes, I will go with 220....I save the 320 for after the finish...IF needed..between coats...

Sellers version was more to slide under the side side of a Sofa/Easy Chair....or...across one's lap.

This was made to slide under an existing table, to add a shelf under it.    I also tried to match the colour and grain to the table..
Show me a picture, I'll build a project from that
Reply


Forum Jump:


Users browsing this thread: 1 Guest(s)

Product Recommendations

Here are some supplies and tools we find essential in our everyday work around the shop. We may receive a commission from sales referred by our links; however, we have carefully selected these products for their usefulness and quality.