What got me back into woodworking
#11
For the last 8-9 years wildlife photography has consumed most of my free time but I've always loved working with wood but never really took it seriously enough to "invest" in tools for a woodworking shop.  I made due with what I had at the time and it got me by but being a perfectionist I'm always wanting more and trying to get better at anything I do in life.

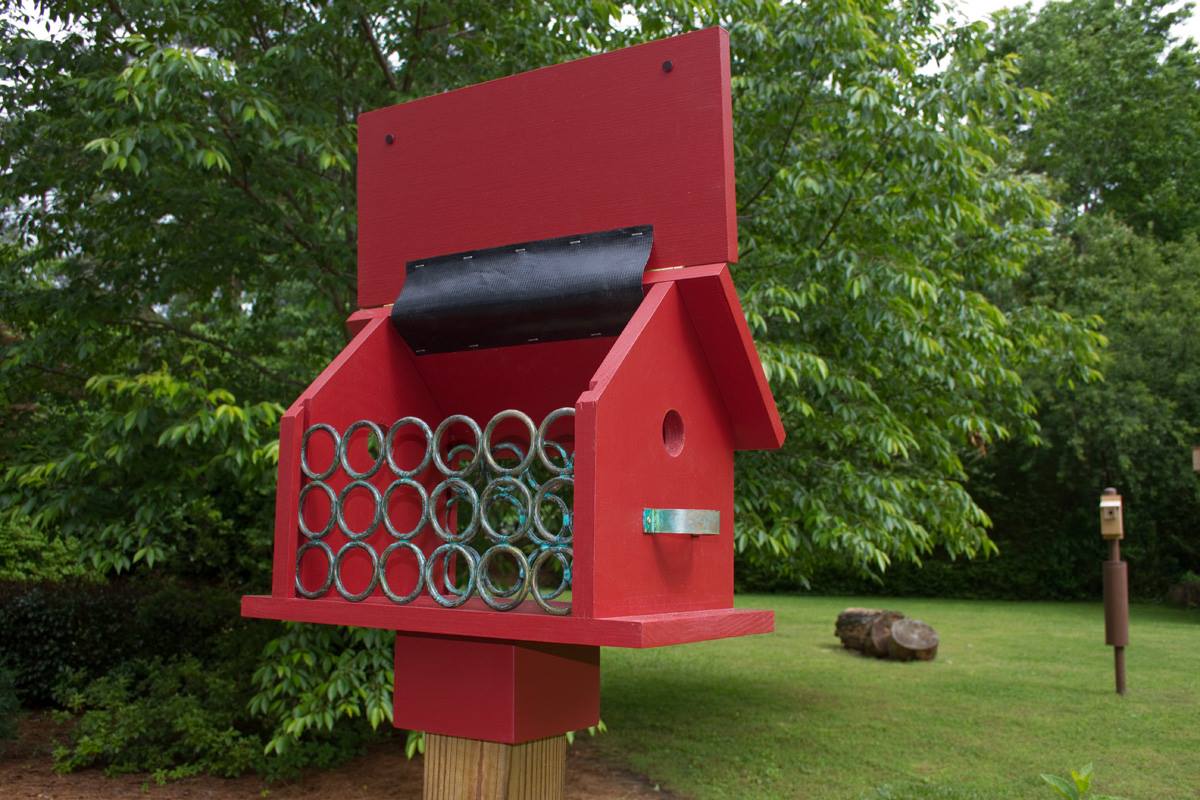
Attracting Eastern Bluebirds to my yard is the main reason for re-sparking my interest in woodworking and developing a feeder to dispense mealworms for Bluebirds without feeding every bird in the neighborhood.  After a lot of observation and research I came up with a feeder and over the years the design has changed by the idea has stayed the same....a feeder that serves a purpose and is also attractive.
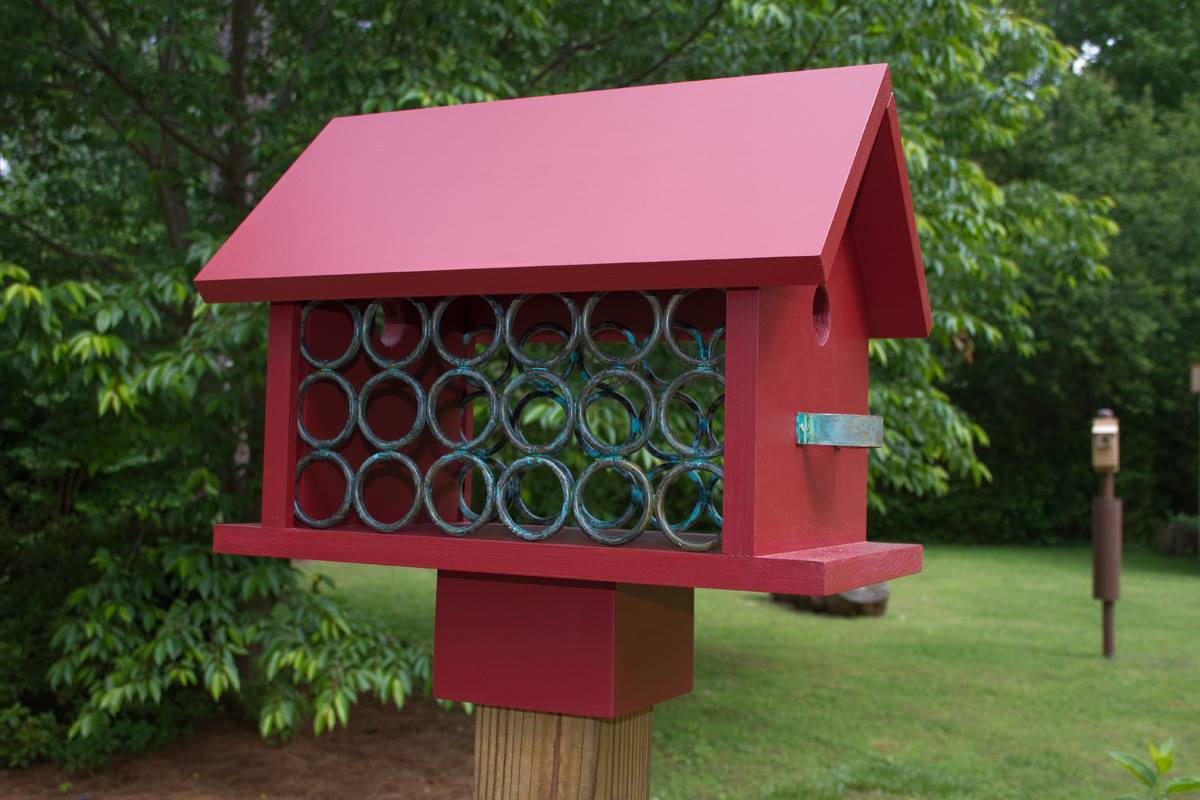


Basically the idea with this feeder is to only allow birds that can fit through a 1 1/2" opening to access the mealworms and it works with a little patience and training (yes, birds can be trained).  The main issue I have with this feeder design is the roof and base warp over time with changes in humidity despite using exterior latex paint. 

I'm looking for advice on how to alleviate this problem I'm having.  I've tried several ways of supporting the wood but nothing seems to work and over time to the wood starts curling.  I have a feeling the answer is simple but I've overlooked it for last several years. 

Future feeders will not be painted because the feeders I've sold that looked natural were the most popular.  I've also been approached by my local Wild Birds Unlimited store to offer these for sale there but until I'm 100% confident the design is flawless and will last for years I'm not crossing that bridge yet. 

Thank you in advance.

Duane
Reply
#12
You could make the roof out of tin. A lot of people might like that in a "See Rock City" kind of way. You didn't mention what flavor of wood you're making these out of. If it were me I would look at cedar or redwood. Pressure treated pine and I think white oak (maybe) are good outdoor woods. Someone else will have a better idea than me about the wood selection. The only other thing to do is go with a real good oil based primer topcoated with a gloss oil based paint.

Nice looking birdhouse.

carl
Reply
#13
I think the solution is two fold: one glue up your top boards alternating the grain and then  add cleats under the top using  sliding dovetails that fit tightly but are not glued.  A single screw or pin  in the center will keep it centered and will allow movement 

It would help resist the cupping issue without overly adding to the top weight or design which I happen to like BTW 

Joe
Let us not seek the Republican Answer , or the Democratic answer. Let us not seek to fix the blame for the past. Let us accept our own responsibility for the future  John F. Kennedy 


Reply
#14
I like Joe'S approach, but another option might be to use MDO, a plywood that is made for exterior signs. If the edges are sealed and then it's painted it should last for many years, just like road signs do.

John
Reply
#15
MDO would be my solution as well. Very stable, and takes paint well....which might be a problem if you decide to not paint them. It probably wouldn't be all that attractive without paint. Put an edging on them to conceal the plys.
I started with absolutely nothing. Now, thanks to years of hard work, careful planning, and perseverance, I find I still have most of it left.
Reply
#16
The side exposed to getting wet vs the side that stays dry can be one cause of warping since one side swells and the other not so much.

Add shingles.

Planing the wood to 3/8" then laminate it cross grained will give you 3/4" and less apt to warp.

A plastic top would be a choice.

Composite material might help.

Cement board.
Reply
#17
Thank you all for the suggestions. My current test feeder has composite deck boards for the roof but the problem with that is the weight the boards add to the feeder. Most of the people who buy these feeders are "of age" or frail in nature (basically older women) so my main concern is them being able to lift the top safely to clean and fill the feeder without it falling down on them if they don't lift it past the roofs pivot point (I could alleviate this problem with a locking hinge of some sort I guess).

I do like the sliding dovetail suggestion because I like and the people who have bought them like the looks of natural or stained wood....plus I dislike painting (lol). I guess with me having the rest of the week off of work to heal from my surgery I can tinker with the top design.
Reply
#18
(02-13-2017, 05:20 AM)Duane N Wrote: The main issue I have with this feeder design is the roof and base warp over time with changes in humidity despite using exterior latex paint. 

I'm looking for advice on how to alleviate this problem I'm having.  I've tried several ways of supporting the wood but nothing seems to work and over time to the wood starts curling.  I have a feeling the answer is simple but I've overlooked it for last several years. 


How do the base and roof panels warp? twist, cup or bow?


[Image: knots1.jpg]


My guess is they cup the length of the pieces. That is from grain pattern, probably wanting to follow the grain of the wood. Note the first pic, though it is much thicker than you are using shows a typical BORg end grain where the grain is curling and looking at the end grain you see a smile, or a frown depending on which way the board is flipped. Those boards want to follow that pattern, and curl/cup

[Image: plum-cupped.png]

In a perfect world every piece of BORG pine would be QS grain, or rift.


[Image: hickory,%20shagbark%20quartersawn%201%20...%20plh.jpg]


If you can't find those pieces, what Joe suggested is to rip, and then flip, or to rip a few boards, and add different characteristics back into one board. Either way a QS board, or a board glued closer to QS will be much more stable. Some discussion here.


Joe's other advice to add a mechanical stiffener across the board, be it a metal bar screwed on, or a piece of wood pinned, DT, or glued and screwed to the bottoms will keep them for moving.

Your picture shows them painted inside and out, so the wood should be in equilibrium versus one side bare, and pulling water in. I think it's just the wood, and or a mechanical stiffener, and you will be in better shape. Now with age a problem that will occur is seed left in the feeder if it gets wet and after the paint degrades will wet the wood, and it will be as if you never painted. It would be a good idea to put written instructions in them to clean the box out completely each season, and allow it to air dry a day or 2 before refill and back out in the weather.
Worst thing they can do is cook ya and eat ya

GW
Reply
#19
The bows are following the wood grain and I use to use Pine from Lowes. I also tried some Popular with similar results. I'm guessing a tighter grain pattern or one that is more straight will also solve this problem.

Yes, the older feeders are painted inside and out even on the end grain where the sides are fastened to the bottom and at the top. I know end grain soaks up the moisture easily but I primed and painted everything before assembly.

It's ironic...the first feeder I built 4 years ago that's sitting in my shed doesn't have this problem. I guess I got lucky with the wood used for that one.
Reply
#20
Check the end grain of the one that didn't change, and see if it doesn't look like the third pic.


[Image: hickory,%20shagbark%20quartersawn%201%20...%20plh.jpg]


That is Quarter Sawn stock, and is the most stable cut.
Worst thing they can do is cook ya and eat ya

GW
Reply


Forum Jump:


Users browsing this thread: 10 Guest(s)

Product Recommendations

Here are some supplies and tools we find essential in our everyday work around the shop. We may receive a commission from sales referred by our links; however, we have carefully selected these products for their usefulness and quality.