Posts: 4,006
Threads: 0
Joined: Nov 2010
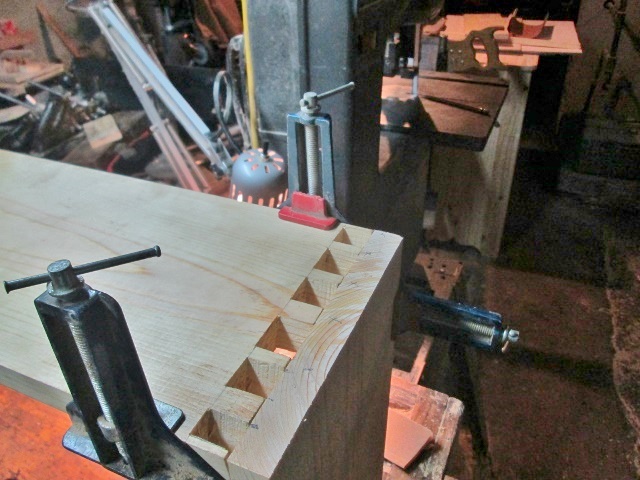
Well, how do I transfer lines to mark the tails....one of two ways...either stand the pin board up..
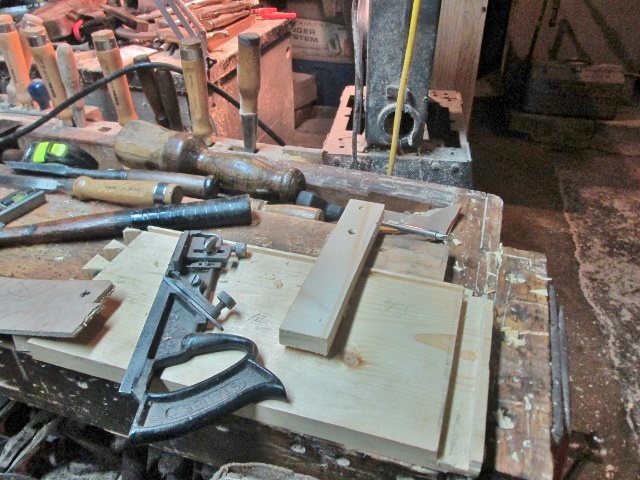
Or, clamp things together...
Either way, I use a pencil to trace around each pin. Pencil doesn't even need to be sharp. I cut on the waste side of the lines, trying to LEAVE the line. Then chop out the waste, and do a dry fit..
Once the dovetails are done, I can go back and plough the drawer bottom grooves in the sides....need a dado for the back to sit in, too....

Mitre saw to cut the dado's walls to depth. I was going to chisel things out, decided to try another type of plane (saves changing the #45 back and forth)
This is a Stanley #39 3/8" dado plane. ( Thank you, Arlin!) Dado is 3/4" wide...I just ploughed both sides to make the width.
Ok, one last episode to go....stay tuned
Show me a picture, I'll build a project from that
Posts: 4,006
Threads: 0
Joined: Nov 2010
Ok, last chores for today....needed counter-sunk holes drilled..
To attach the back to the sides. I don't trust just using glue. Had to re-size the 1/4" plywood panel....was a little TOO big. Since the bandsaw finally broke down, I used the sabresaw, instead. Spread a bunch of glue around, even used a brush
 to moosh it around in the dovetails. Clamps and screws...
Check for square..before I added screws to the drawer bottom. Needed a diagonal clamp, to pull things close to square as I could...
Will let this drawer sit until morning....then fit it to it's new home, and install a pair of knobs. Then try to get the other two drawers built...tomorrow.

Stay tuned..

Show me a picture, I'll build a project from that
Posts: 4,006
Threads: 0
Joined: Nov 2010
Drawer is out of the clamps, cleaned up...and almost fitted..

And the other two planks have been cut down into something I might be able to use for the other drawers

These are what got cut out....
Will try later today, if things cool down in the shop, to do Drawer #2...stay tuned
Show me a picture, I'll build a project from that
Posts: 4,006
Threads: 0
Joined: Nov 2010
Worked a while last night, finally closed the shop about 10pm....Had to square the ends on a blank for the front of Drawer #2......Used the Langdon 75 Mitre box for that
Front also needed planed for width...since the bandsaw is broken..
 used a Jack plane..

Once it fit into the opening, I could run the Stanley 45 to add a groove..
Then lay out and saw a bunch of "pins"...

Then use a few chisels to chop out the waste....and then repeat for the other end...
Then used one set of pins to lay out for the tails. Backsaw to cut on the waste side of the lines, leaving the lines. More chisel work to chop the waste out, then a dry fit

Just a couple taps with the mallet to get it started. Left it sit. Was getting too late in the evening, back was getting sore. Closed up shop.

Maybe after Lunch, I can do a little more work?
 We'll see.
Stay tuned

Show me a picture, I'll build a project from that
Posts: 4,006
Threads: 0
Joined: Nov 2010
Well, went to the shop......and now have another drawer in the clamps...
Had it done before Lunch, even

Of course, had a knot right where the dado was going to be.....was a bit rough on the Stanley 39....got it done anyway..

Diagonal clamp to pull things square, again....then added the screws between the bottom panel and the back
First drawer seemed to like the middle drawer opening better...

So I am fitting this second drawer to the top opening, instead.

Letting the glue cure a while...maybe after Supper, I can start on the third drawer?

Stay tuned..

Show me a picture, I'll build a project from that
Posts: 4,006
Threads: 0
Joined: Nov 2010
Second drawer is out of the clamps.....dovetails have been cleaned up..

laid out for the knobs..
And fitted into the case. Had to fix some gaps...

Added a thin strip of Pine to the side of the opening, NOT the side of the drawer..

I also got the front for the last drawer fitted ( no gaps..
 ) but,, I only have enough "Good" Pine to make the two drawer sides, but nothing for the back.

Guess I can buy a short pine "project board" at lowes....enough to make a back for the drawer.
Almost done.....staying tuned?

Show me a picture, I'll build a project from that
Posts: 4,006
Threads: 0
Joined: Nov 2010
Did what I could today on the last drawer.....all the dovetails are done...

Need to go and buy one board, to make the back of this drawer. Then I can do the dado to house the back, and a glue up..
For right now, a test fit will have to do..

Need to use the Stanley 45 to make the grooves to house the bottom panel....already have it done to the drawer's front

For some reason....I wound up with yet another "extra" pin....they also keep getting smaller..

Or..is it the tails are getting smaller?

Almost done...stay tuned..

Show me a picture, I'll build a project from that
Posts: 4,006
Threads: 0
Joined: Nov 2010
Board has been bought, Drawer has been finished up and installed.

Router bit has been run around on the top of the case...

Down by the case's feet..
Then up the outside corners, until the router's base hit the underside of the top. Have since sanded this all to 180 grit

Also included across the bottom of the front.

letting my Daughter decide what flavour to finish this in.....stain/varnish..or..paint
 will be for her 9 yr old son.

So this PIP will be it. The "woodworking" part is done....
Thanks for following along

Show me a picture, I'll build a project from that
Posts: 2,772
Threads: 0
Joined: Oct 2012
Location: W. of Rainier, E. of Orcas
That's a nice gift for your grandson! Thanks for sharing the build with us.

Posts: 349
Threads: 0
Joined: Sep 2006
It was a great build-along. Thanks!
|


 to moosh it around in the dovetails. Clamps and screws...

 used a Jack plane..

