Posts: 4,006
Threads: 0
Joined: Nov 2010
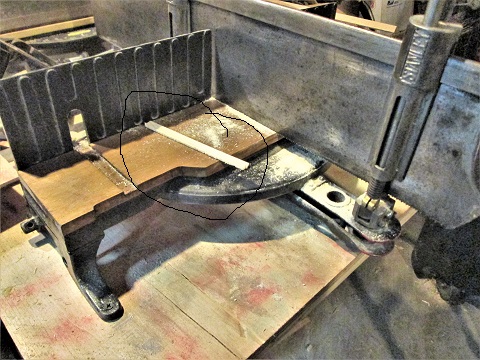
Ok...box #2. Cut the Poplar 1/2" x 5-1/2" boards as close to in the middle as I could...

And, with my usual luck, one part needed trimmed a bit...

Just a tad....then a bit of jointing, to get them all the same width..
Then the end grain...
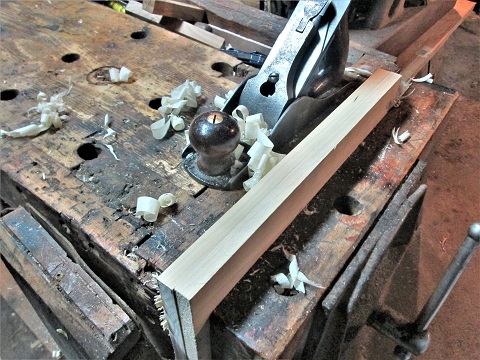
Laid out the parts, looking for the best faces....couple had a bar code sticker still on them...#3 plane took those off, too...

From 2 different boards.
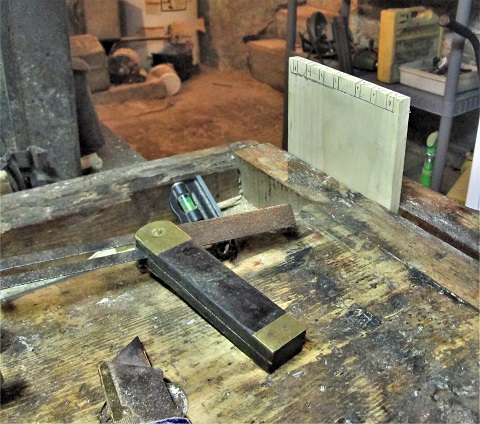
 Set aside all but one long side...and dug out the lay out tools..

Set one to the angle I use for dovetails...other 2 were set to the board's thickness. And, something to do a knife wall...
And started laying out pins...as I do pins first

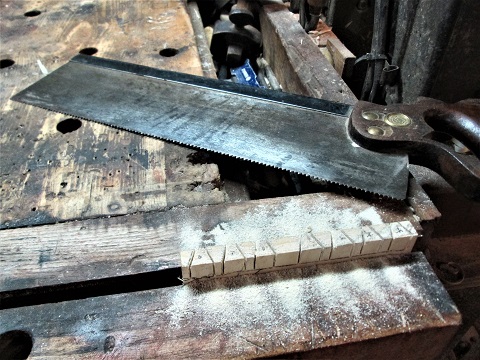
Had to make sure I marked which was "waste" and which wasn't...then lowered the part in the vise to about 1/4" above the top of the vise, and make a few cuts

Then set up a chopping station..

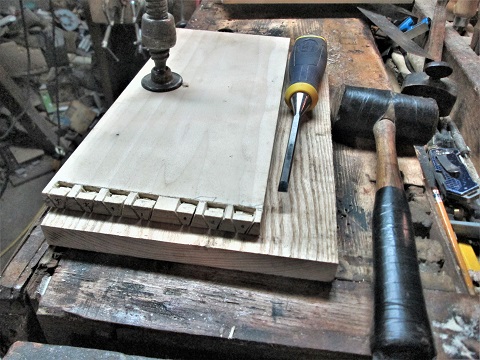
Did a bit of chopping, too
 ...1/2 way down, and leave a tab out at the end....
Stay tuned, part 2 coming up....

Show me a picture, I'll build a project from that
Posts: 4,006
Threads: 0
Joined: Nov 2010
Ok..flip the board over, and complete the chopping..

Then use these pins to lay out and mark the tails ( that wide pin will fall about where I'll be splitting the lid off) then a bandsaw to make a bunch of cuts...

Then cut the waste out. Why the bandsaw? Because I can SEE the cuts being made, trying to stay on the waste side of the lines...the more of each line I leave, the tighter the joint will be....then do a dry fit, and see how I did...

Not too hateful..
 Been awhile, out of practice?
Turn the board around, carry all the markings to the other end...then layout the pins on the other end, saw and chop, mark the tails, saw and chop..and then another dry fit...

Had 2 corners done...

Then my hands started cramping up...along with the back of the knees...working too hard, I guess

Maybe I can get a bit more done tomorrow, eh?

Stay tuned...

Show me a picture, I'll build a project from that
Posts: 7,008
Threads: 0
Joined: Aug 2004
Location: Perth, Australia
Steve, there are an awful lot of gaps there ... how do you plan to make them disappear? That would make a good article.
Regards from Perth
Derek
Posts: 4,006
Threads: 0
Joined: Nov 2010
(09-28-2019, 06:27 PM)Derek Cohen Wrote: Steve, there are an awful lot of gaps there ... how do you plan to make them disappear? That would make a good article.
Regards from Perth
Derek
Might just use an eraser....as 90% of those "gaps" are pencil lines....the more line I leave, the tighter the joint...
Show me a picture, I'll build a project from that
Posts: 4,006
Threads: 0
Joined: Nov 2010
The other 2 corners are done. had to dig out a new pencil, too

other ones were getting a bit too short.
 Decided to use the existing pins as a pattern..
Transfer cut lines as needed....then the usual, saw, chop...mark out the tails, saw, chop....and a dry fit. When all corners were done..
Went in search of any "gaps"

Found one gap....glue up and clamps will take care of that....

Need to reset the Stanley #45....have a few grooves to mill....and some plywood panels to cut to size....then a glue up.
Stay tuned

Show me a picture, I'll build a project from that
Posts: 4,006
Threads: 0
Joined: Nov 2010
Been under the weather the last couple of days....might try today to get something done. Thinking of adding trays to these 2 Poplar boxes....may have to resaw some 1/2" down to 1/4" stock....or, just plane them down....
Maybe something like this?
This was made for a different box...

That I even had to make molding for...

Still in the shop, used to hold screws and hardware...

Sooo..may keep the top of the trays even with the tops of the box's lip/seal? Corner joints? Fancy plywood for the tray's bottoms? Need a lip to set the trays on, maybe on the ends of the boxes?
Stay tuned
Show me a picture, I'll build a project from that
Posts: 4,006
Threads: 0
Joined: Nov 2010
10-01-2019, 05:27 PM
(This post was last modified: 10-01-2019, 05:33 PM by bandit571.)
Ok, busy afternoon...had to tear down the Stanley 45..

To get rid of the long rods and the cam rest, for now. Needed it reset for other grooves ( took about..5 minutes)
Set up a simple jig, just 4 screws, and a block of scrap...
2 screws to hold the "backstop" in place, and 2 to hold the part in place....I can remove one or both of the end screws, to change out a part..
Once a groove is started a bit, I rub a plain old candle across the groove....makes thing move along better...then I had to reset the 45 again...
Ok, one dovetail is a lot wider than the rest...so..
That is where the groove for the lid will be...
Ok..all 12 grooves done. Cut the plywood for the top and bottom panels, and do a test fit..

One of which needed jointed a bit, so...
Everything fits...time for glue and a forest of clamps..

And let this sit overnight, just like me. Uncle Charles(horse) decided to cramp up my feet and hands, right when I was getting the clamps on..figures

Stay tuned...will try to split the lid off, tomorrow...I hope

Show me a picture, I'll build a project from that
Posts: 4,006
Threads: 0
Joined: Nov 2010
Out of the clamps, it was...ugly..

We have ways...cleaned up, time to set up the Stanley 45 one more time...first, needed to know WHERE the groove needed to be..

Once one end was laid out, to where I could set the 45 up to...
fence got moved about 1/4" out. Took the 1 minute or so, to clean out the fine adjust fence...was getting dirt in-between the moving parts...then set the fence..tried a few passes, stopped, used the backsaw to make "relief cuts" where the cutter would be coming out..no blow-outs that way...a dab of wax in the groove...
Then, rotate the box onto the bench. repeat the groove cutting..

then rotate again. Then the last 2 sides were done with the groove...time to get out a sharp knife ( and NOT cut..ME
 )
Lid is to the right, in the photo, needed to run the knife along the right side of the grooves....to split the lid away...then fine tune the lip, until the lid fits over it...
Almost..need a hair more off one of the lip sections...Stanley #78 cleaned that up. Was also using a Stanley #60-1/2 to slightly bevel the lip..Time to get out a tool tray..
The one screwdriver was a PITA to use, smaller one was good enough to get things started, but wanted to cam out if torque was needed...larger one was ok with torque, my hands were not...finally, after bumbling along with visegrips on the handle...went to the grinder, removed the spinny head on that handle, to where I could chuck the remains into a drill, and then drive the TINY, waxed screws home...still started with the smaller one. Instead of hammer and nail, and visegrip to do a pilot hole, nail was "beheaded" and also chucked into the drill...kind of a time-share thing...clutch was set at "6"....
Laid out the hinges, and the brass corners, box into the vise to hold thing securely...

Off to a roaring start....check how the lid works?

This was after the rest of the hardware was added...seems to work, though....

Stay tuned, a bit more to show..

Show me a picture, I'll build a project from that
Posts: 4,006
Threads: 0
Joined: Nov 2010
And...after the hinges were on, rotate the box 90 degrees in the vise...

handle is on the box part, instead of the lid. Brass corners used 2 screws, so each rotation means I have 2 more screws to do. Rotate again..
4 screws for the latch, 4 screws for the corners...rotate one more time, and do the other handle, and the last 4 screws for the corners, whew.
 ..take the box out of the clamps..for a PIP ( just bought th brushes for the stain a little while ago) Also, as I worked around each side, I planed and sanded as needed...PIP?

Well, you've already seen the lid opened, so we close things up..a look at the plywood panel on top?

As this box will get other boxes stacked on it...trying to protect the corners a bit...top and bottom..
waiting to see how that "Gunstock" stain will do on the Poplar, again. Need some final sanding, and such, then the stain goes on...

Stay tuned

Show me a picture, I'll build a project from that
Posts: 4,006
Threads: 0
Joined: Nov 2010
Box has a coat of Gunstock stain...

But,,,there seems to be something inside, too...

Ok....last I seen of that...it was a plank..

That needed cut and thinned down...

Nothing all that fancy, though..

Just a tray. May come back...when this has a coat of varnish...
until then...
Thanks for looking in..

Show me a picture, I'll build a project from that
|





 Set aside all but one long side...and dug out the lay out tools..







 ...1/2 way down, and leave a tab out at the end....


 Set aside all but one long side...and dug out the lay out tools..


 ...1/2 way down, and leave a tab out at the end....


 )
)