Posts: 844
Threads: 0
Joined: Aug 2014
Yes, Arlin, it might be tempting to hack up some of the projects, on the frustrating days

. Also, a street utility man came the other day and had me tell him where exactly that white PVC sewage fitting was... hopefully nothing serious!
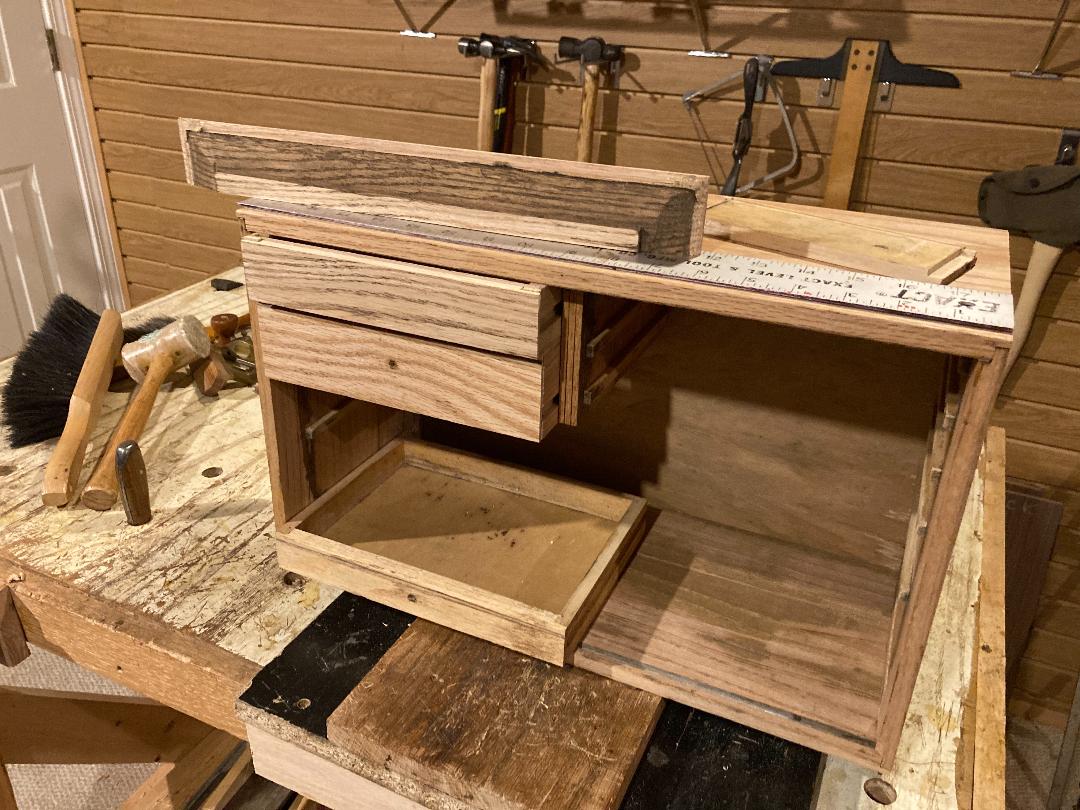
Besides shortening all drawers, I needed to make up a missing drawer. I decided the best match would come from some "found wood" from the rest of the assembly (see remains sitting atop the case). So, now I'm mocking up the new drawer along with the first of the shortened drawers for the job:
Chris
Posts: 844
Threads: 0
Joined: Aug 2014
It was time to start rectifying the sloppy veneer edges on the back. Using the (Veritas) cutting gage was a great way to strike off a clean inboard edge, wide enough to lay in some marquetry stripping. Also in the background you can see 3 more shortened drawer sections.
Chris
Posts: 844
Threads: 0
Joined: Aug 2014
Really besides the oak fronts, the drawers are now full rebuilds.
I won't swear I used the miter-box on all of the pieces, but at least some

. (The walnut slats on the left will be for a separate future project.)
Now back to the "Busy Bench".
The trimmed-up veneered back of the chest is visible. Some drawer glue-ups are in progress. As per my usual, I keep a few drawer parts "proud of the final finish", so I can later whittle to size with a block plane. At the far right, the shooting-plane is my Craftsman No. 14. While I'd seen the occasional rare picture of an engine-turned Craftsman plane, mine was run-of-the-mill when I got it. During pandemic boredom I applied engine-turning to the sides.
Happy Woodworking,
Chris
Chris
Posts: 844
Threads: 0
Joined: Aug 2014
Pieces are cut to size for 6 of the 8 drawers by now, we're making progress!
I didn't initially plan to re-use the metal corners, but these are now actually hard to come by as new ones. So I'm straightening out some pieces that got very bent-up when I pried them off (they were riveted):
Chris
Chris
Posts: 844
Threads: 0
Joined: Aug 2014
After some insomnia gave me extra time outside of work hours... All 8 drawers are glued up. The bottom drawer needs case-work on its support runners (soon). The brand-new upper left drawer has been scribed with a sort of a bead to help match the others:
Chris
Posts: 844
Threads: 0
Joined: Aug 2014
Next up, the shortening of the drawers had left the long drawers with off-target knob holes. I wanted to plug those.
I have a drilling jig I made about 10 years ago for jobs like this. It supports the drill bit and helps give a bit less tear-out when making holes:
Now the 'extra' holes are plugged and will be shaved later:
Happy Woodworking,
Chris
Chris
Posts: 844
Threads: 0
Joined: Aug 2014
It's almost done, and I've had to leave on "a tangent" job. I'll get back another time on what that shop-built tool is for!
Chris
Posts: 844
Threads: 0
Joined: Aug 2014
Here we go....
Before & after on this last tool chest:
Also, the Veritas cutting gage, really it's worth a paean ! I think I'd done so before.
This week, the new mystery attachment for it is from the last posting... getting ready for some curved cuts in the next big project:
Have a great week, and a great Easter!
Chris
 . Also, a street utility man came the other day and had me tell him where exactly that white PVC sewage fitting was... hopefully nothing serious!

 . Also, a street utility man came the other day and had me tell him where exactly that white PVC sewage fitting was... hopefully nothing serious!


