Posts: 4,027
Threads: 0
Joined: Nov 2010
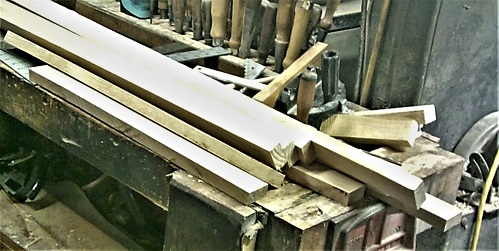
Ok..to connect those two sides into a chest of drawers...I need to make web frames....need to rip a stack of Ash down into..
Of 3/4" x 1-3/8" strips....I need 8 for the stiles..
And 8 rails
The rails need tenons milled on the ends..
And the stiles need a groove to match that tenon...
Though I only NEED it on the ends of the stiles...was easier to just run the groove all the way through.....was a time, that the groove would house a dust panel..WAS.
Check for fit..
That should do the trick....next, a little assembly work..
Glue on the tenons, clamp to pull them tight...pin with a 5/8" #18 finish nail and set aside...have 4 frames to do...
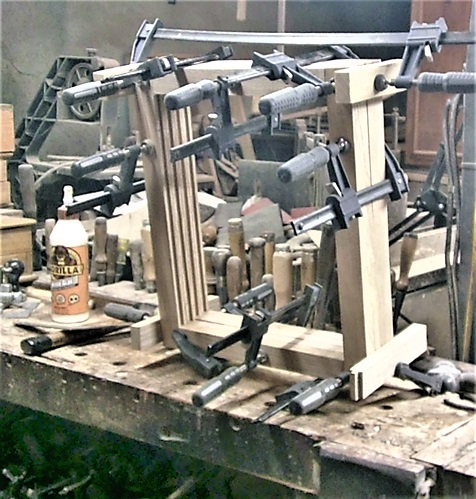
While the glue was still setting up, clamped all 4 frames together..trying to get them all to match each other.....always seems to be "That One"
Let these sit a day....
Show me a picture, I'll build a project from that
Posts: 6,442
Threads: 0
Joined: Feb 2006
lookin good!
it's amazing how fast you work
Posts: 4,027
Threads: 0
Joined: Nov 2010
To install those frames...needed a rebate for a back panel milled first....so that (in theory) the frames will go back against the back of the case enough, for a 3/4" thick face frame's rails to be flush with the front of the stiles....we'll see...
Bottom web frame does not need any kickers...but the rest do...
This is the rebate..milled with a Ward's #78...checking the depth setting ( and getting a splinter in me thumb..OW)..
Web frames are attached to the sides of the case with 2 counter-bored screws...and a bead of glue...the frames that need kickers, are predrilled for these screws, before the kickers are installed..
Glue and screws...then stand a frame up..
Square to make sure things line up...
Bead of glue, and 2 screws..continue on towards the top of the case....remember, the kickers are on the underside of the web frames....
All frames attached to one side of the case....lay both sides on top of the tablesaw...straightedge to carry the lines across to the other side...bead of glue on each frame, flip over onto the second side,,and add the screws...watching the lines...had one frame that didn't wanna...we have ways..
Then, finally, stand this up on it's own 4 feet...
There will be a kicker installed for the top drawer....no web frame...will see how that gets done...in the next episode
Stay tuned..
Show me a picture, I'll build a project from that
Posts: 4,027
Threads: 0
Joined: Nov 2010
"Face Frame" is just 5 rails, dovetailed into the side's stiles, and glued to the webframes....usually...unless there isn't a webframe to glue to...
Top rail..gets dovetailed in place..
The case's back was already glued and screwed to a rail...
So the top drawer kicker was installed here...up in front...a simple butt joint just won't do, so..
Glue and a counter-bored screw...will plug later...match the grain, plane flush, plug disappears..
Rest of the rails?
I cut the tails first, this time around..use them to lay out the sockets..
Sockets are just chopped out with chisels..
Until a socket appears..
Took a couple work sessions...all that chopping is hard on these old shoulders...but..
Bottom 2 rails were glued in place.....found out the in the process of assembly the sides sides to the webframes...couple frames had shifted a bit toward the front...
Next day...new RED sanding belt ( NEVER, EVER buy those blue sanding belts from Harbor Freight) and a Millers Falls No.11 Junior Jack were all set to level out the front rails...first, I needed a vintage saw...
As there was a profile drawn onto the bottom rail....did not feel like redrawing that. Once that was cut out. can beltsand and handplane all the front rails until they match up with the front of the stiles...then set the case over onto the floor....
Still need to make a top, add the corner blocks to attach the top to the case....and then maybe start on the 4 drawers...
Stay tuned..
Show me a picture, I'll build a project from that
Posts: 4,027
Threads: 0
Joined: Nov 2010
Corner Blocks? First, I need the mitersaw set up..
And some scraps the right size...including the 2 I cut from the bottom rail...miter both ends, drill and counter sink for a few screws
Installed with glue and screws....they still need a slot, though..
Just drill a hole, then rock the drill "fore & aft" until a slot appears along the lay out lines. This will be for a screw to attach the top of the case. Slot allows the top to "move" as the seasons change..
As for that top...brought a plank to the shop,,,cross cut it a bit..
yep, these all came from the same board...task was to pick out the best 3...
and save the 4th for the bread board ends..
From the looks of the edges...I will need to run the jointer...plane..
Checking for gaps as I joint all the mating edges...
Once they all match up, no gaps....time for a glue bottle, a brush to spread the glue, a few clamps and some cauls...
Cauls I made while ripping the 2 bread boards to width..
Which also needed an edge jointed...was a bit rough. These will wait a day, while the glue cures...then they will get added to the planed and sanded top...
Stay tuned...
Show me a picture, I'll build a project from that
Posts: 21,259
Threads: 2
Joined: Mar 2009
Location: IA
(10-27-2022, 01:46 PM)bandit571 Wrote: "Face Frame" is just 5 rails, dovetailed into the side's stiles, and glued to the webframes....usually...unless there isn't a webframe to glue to...
Top rail..gets dovetailed in place..
The case's back was already glued and screwed to a rail...
So the top drawer kicker was installed here...up in front...a simple butt joint just won't do, so..
Glue and a counter-bored screw...will plug later...match the grain, plane flush, plug disappears..
Rest of the rails?
I cut the tails first, this time around..use them to lay out the sockets..
Sockets are just chopped out with chisels..
Until a socket appears..
Took a couple work sessions...all that chopping is hard on these old shoulders...but..
Bottom 2 rails were glued in place.....found out the in the process of assembly the sides sides to the webframes...couple frames had shifted a bit toward the front...
Next day...new RED sanding belt ( NEVER, EVER buy those blue sanding belts from Harbor Freight) and a Millers Falls No.11 Junior Jack were all set to level out the front rails...first, I needed a vintage saw...
As there was a profile drawn onto the bottom rail....did not feel like redrawing that. Once that was cut out. can beltsand and handplane all the front rails until they match up with the front of the stiles...then set the case over onto the floor....
Still need to make a top, add the corner blocks to attach the top to the case....and then maybe start on the 4 drawers...
Stay tuned..
Get a bigger hammer.

As of this time I am not teaching vets to turn. Also please do not send any items to me without prior notification. Thank You Everyone.
It is always the right time, to do the right thing.
Posts: 9,568
Threads: 0
Joined: Jan 2005
Location: Orlando FL
Wow, you're really moving on this thing. Its looking great.
Those old metal bodied tools always give me the heebee geebees. my dad had a metal bodied drill I used to use that had just enough of a short to bite you frequently but not enough to fully light you up. I hated that thing but it was the only drill we had. I never wanted to touch another metal bodied tool after that thing.
Posts: 4,027
Threads: 0
Joined: Nov 2010
Was just killing time last night..decided to work on the drawer fronts a bit...while I am waiting on the glue to cure in the top..
Need them to be "4 Square"....need one jointed edge, first..
I even marked them after the edge was jointed...easier to keep track of them, that way..
I can then set this edge against the mitre gauge, square one end....mark the other end for length, and then cut that for square, too....the set up the rip fence..to mill the other edge parallel to the jointed edge..
4 fronts, 4 squared...next? Tilt the blade about 14 degrees..set up the Zero Clearance Overlay and the rip fence..to bevel all 4 edges...just like a I did with the raised panels in the sides of the case...then bring the blade back to 90 degrees, reset the fence..
I need both ends ran through and only one long edge....decided on the fly which edge to run through. Then reset the rip fence, without the ZCO as the fronts will be going through on the flat...instead of..
Standing up. Had to lower the blade to just remove the waste and...
That should do the trick...called a 3/4 Overlay....bottom of the drawer does not get the rebate...it WILL get a groove to house the plywood bottom panel, though.
Waiting on the sides, a back, and the bottom panel...already bought the knobs for these...
Stay tuned...that panel for the top of the chest of drawers came out of the clamps today...
Show me a picture, I'll build a project from that
Posts: 4,027
Threads: 0
Joined: Nov 2010
Router in use...
Run down the front edges of the sides' stiles..
Across the bottom rail..
And detail the feet..
Top has been flattened, corners rounded..and the top attached to the case..
2 screws up front, and..
2 back in the back...then stand the case up on it's own 4 feet...
And run the router around the top...other than a final sanding to 220 grit,,case might be done...
So..NOW I can start building 4 drawers...stay tuned..
Show me a picture, I'll build a project from that
Posts: 4,027
Threads: 0
Joined: Nov 2010
Router table dug out of the back corner..
Dovetail bit installed..
Needed to clean off the old markings on the fence..and start new ones..
Set to the thickness of the drawer sides.....too a few set-ups with the fence, until..
4 drawer fronts had 5 sockets on each end.
Drawer sides had already been cut and ripped to size...
Just select the best end to cut the tails on...and trace out the cut lines...
I was using a bandsaw to make the cuts...because I can better SEE where I am cutting, trying to leave the lines, by cutting in the waste side..dry fit?
try again..dry fit..
Only working on dovetails, for now...once both sides of a drawer were dovetailed...needed a place to stash the three parts...
While I work on the next in line..
Maybe later today....I can get the other 2 drawers dovetailed. Then work on the grooves to house the drawer bottom panels..and the dados to house the drawer backs
Stay tuned..
Show me a picture, I'll build a project from that
|


