01-21-2020, 12:37 PM
I finally completed my spray booth that I'm going to be using quite a bit here in the next several weeks. Right now I have 26 drawer boxes in the shop ready to spray and then upper cabinets for our kitchen are up after that.
First off, i only spray water-borne materials. No solvent based materials are sprayed. I only do those outside.
So the basics....


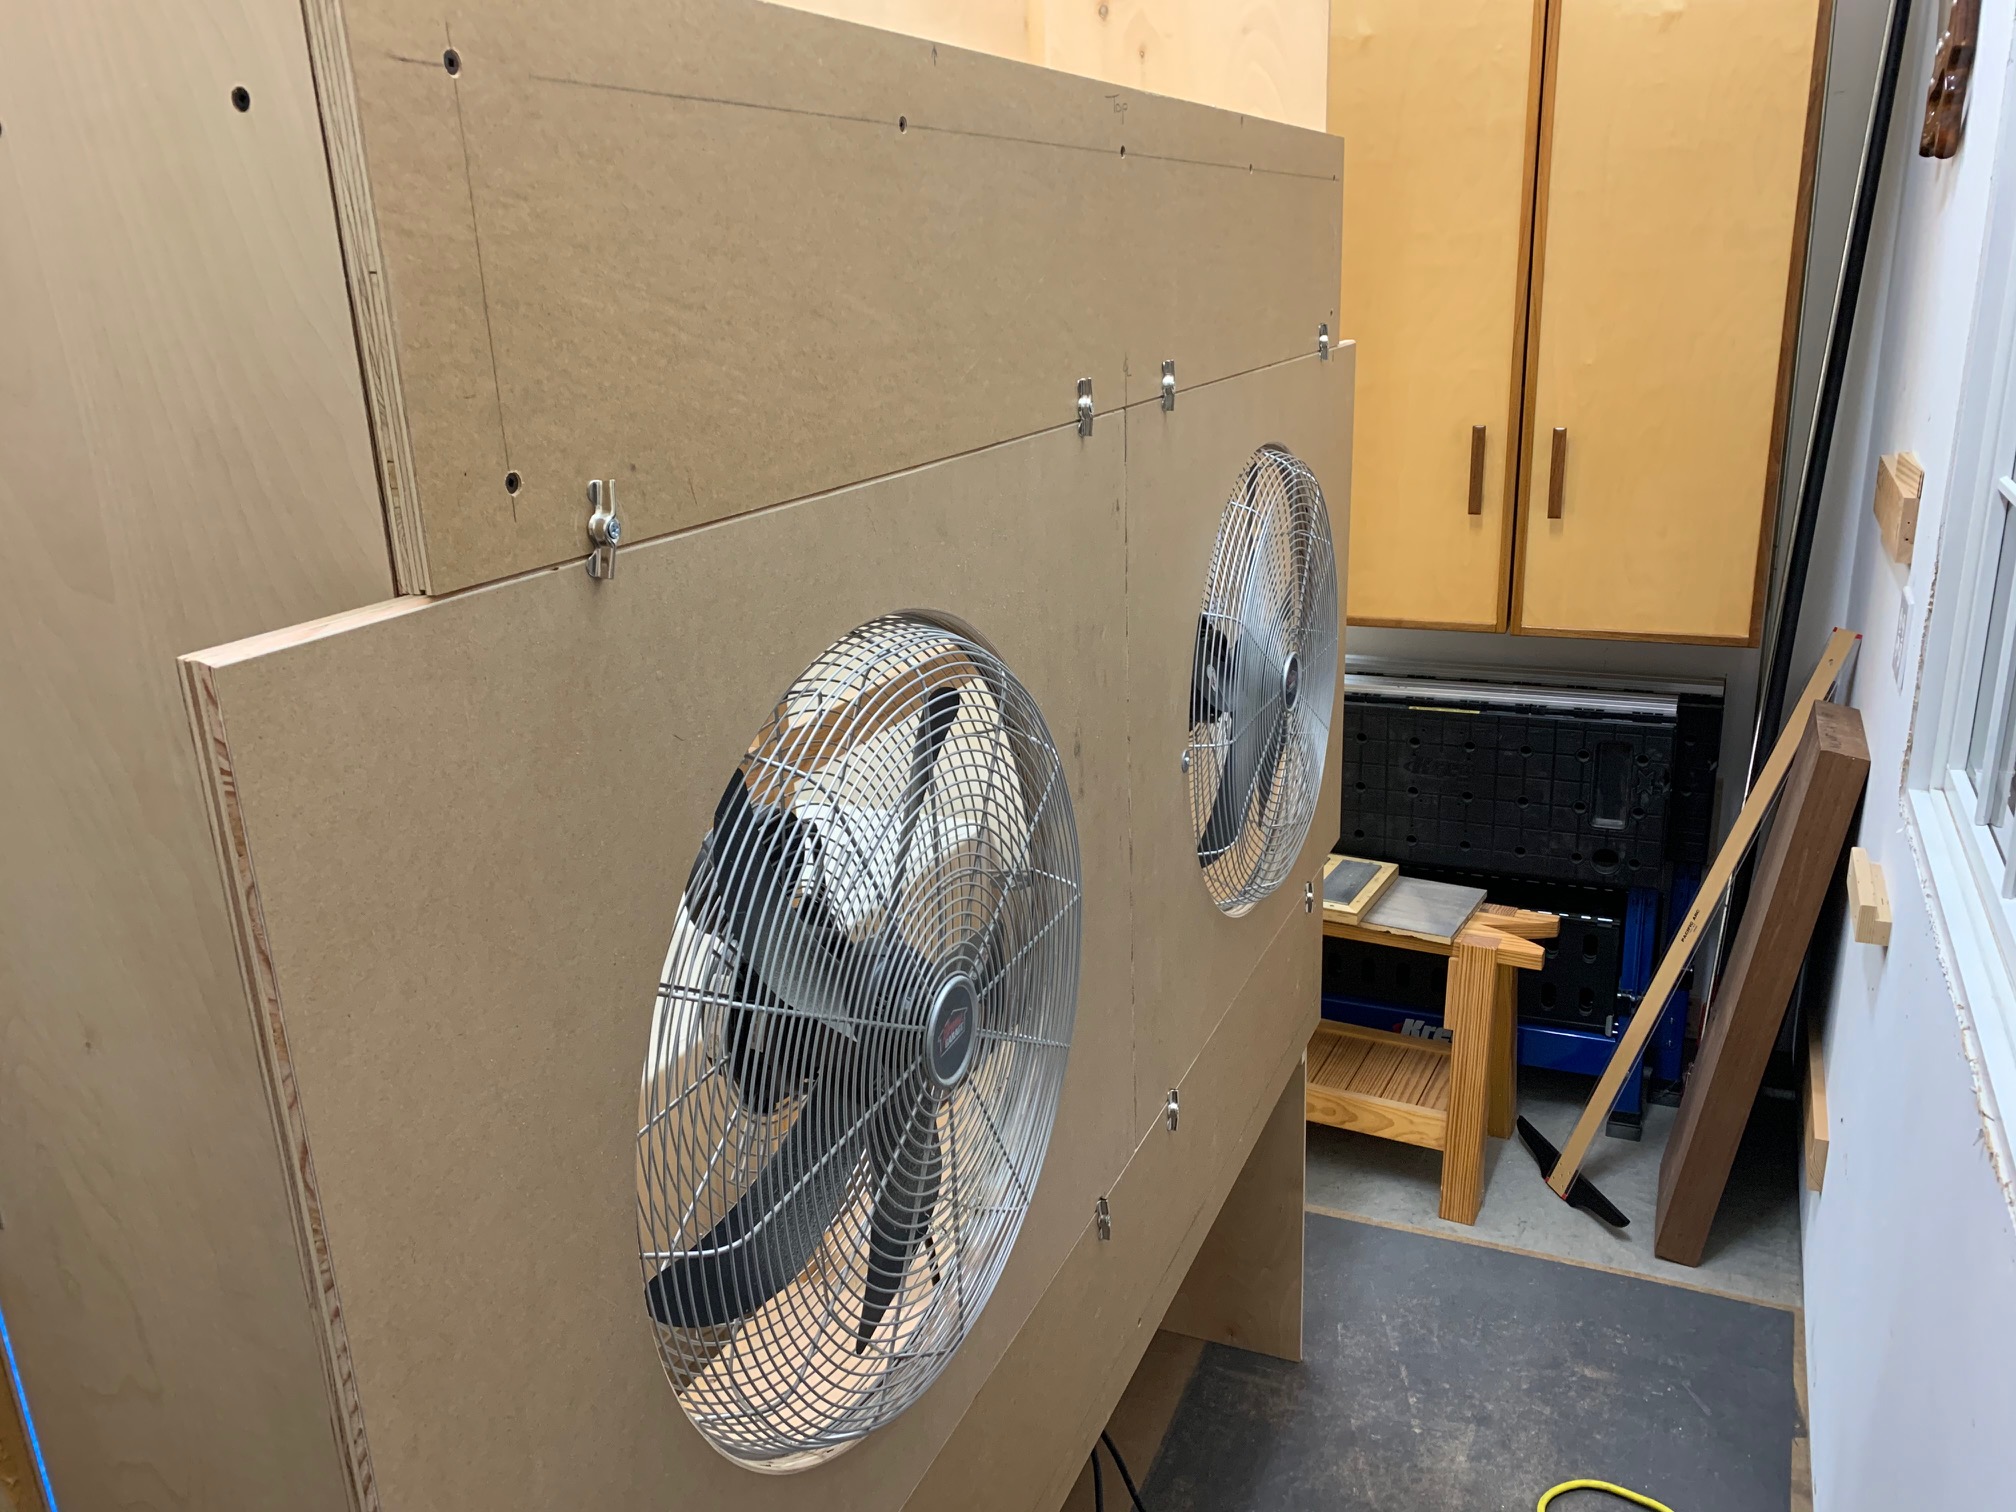
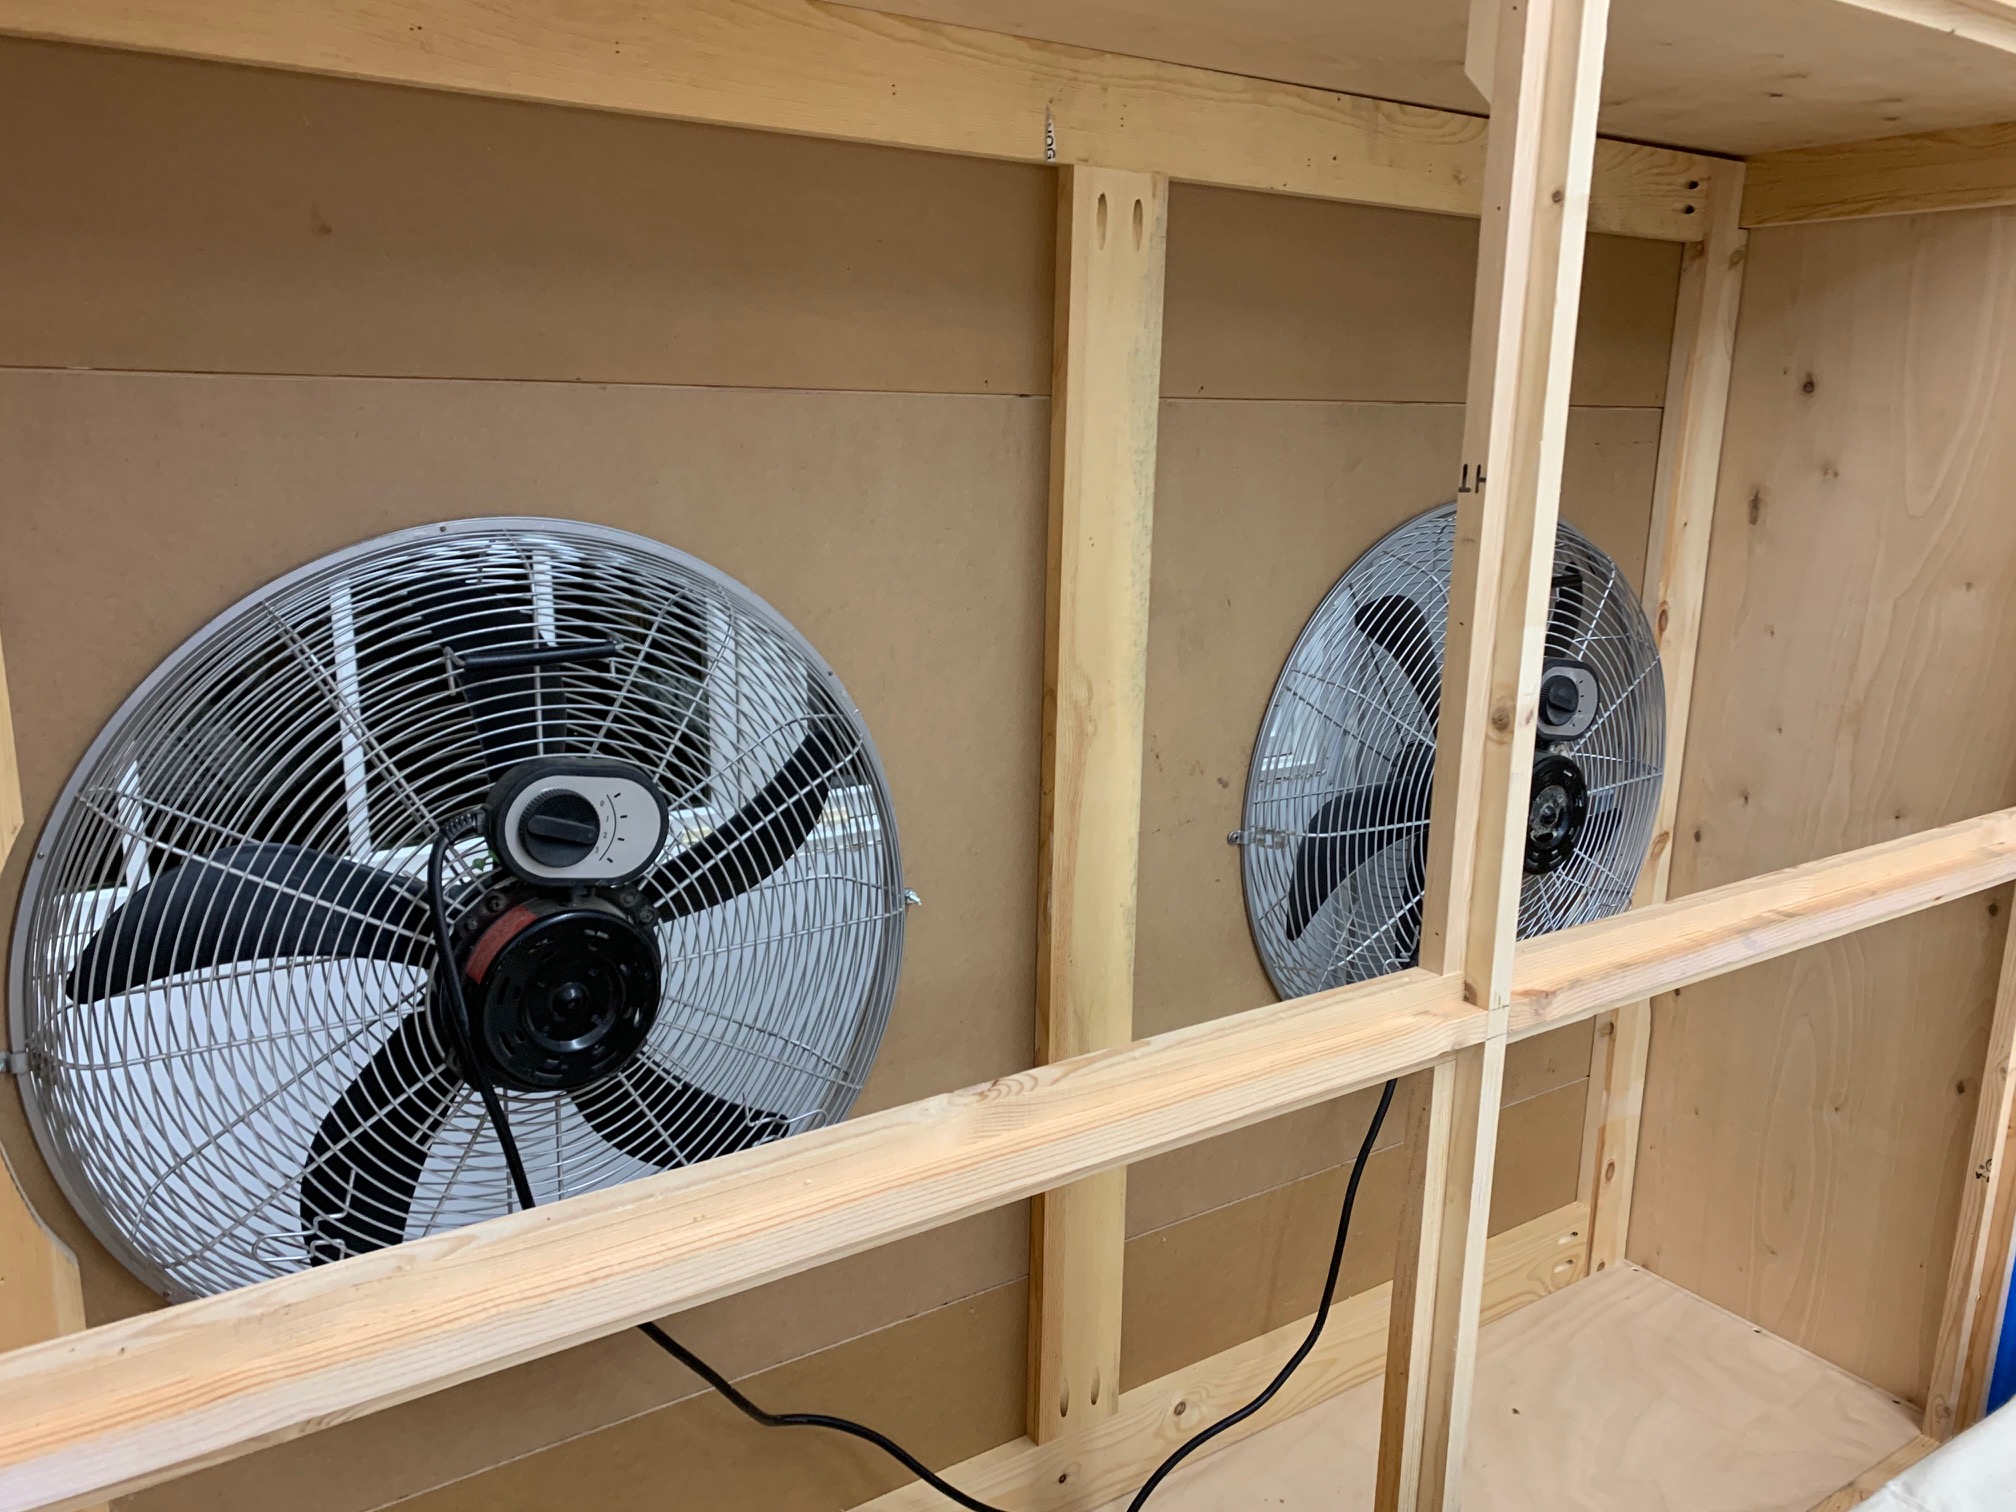
Back panel is 5' wide x 8' tall. There are four 24" x 30" furnace filters that go in the frame work in front of the fans. I left them out so you can see the fans.
Two wings walls are 1/4" plywood with 1x4's around the perimeter on the back side. They are simply joined to the back panel with loose pin hinges. I can pull the hinges pins and the wings walls come off in seconds.
The top panel is simply a 1x4 frame with plastic stapled to the top to allow light through. The frame is secured to the wing walls only with a 1/4" clevis pin in each wall. Simply pull the two pins and the top comes off.


The box assembly for the fans includes the filter frame, top and bottom shelves with french cleats for ease of assembly and two 1/2" side panels that are fastened to the filter frame. You may notice the bronze hinges on the filter frame. That allows the upper and lower portion of the back panel to fold in to take the panel down to a 4' x 5' size for storage.
The fans are bolted to 3/4" MDO plywood pieces. I can use the fans in two ways. Secured to the filter frame or they also can in the double hung window you see to the right. I normally put the fans in the windows and exhaust directly outside. If it's brutally cold outside, I use the fans on the back of the filter box as they are pictured. When placed in the windows, I simply shove the booth against the wall/window.


I can assemble this booth in less than 10 minutes.
It has proved very helpful in capturing over spray in the shop and I don't have that thick haze in the air after spraying.
I also use a lazy susan bearing between two pieces of plywood which makes a great swivel stand for spraying parts.
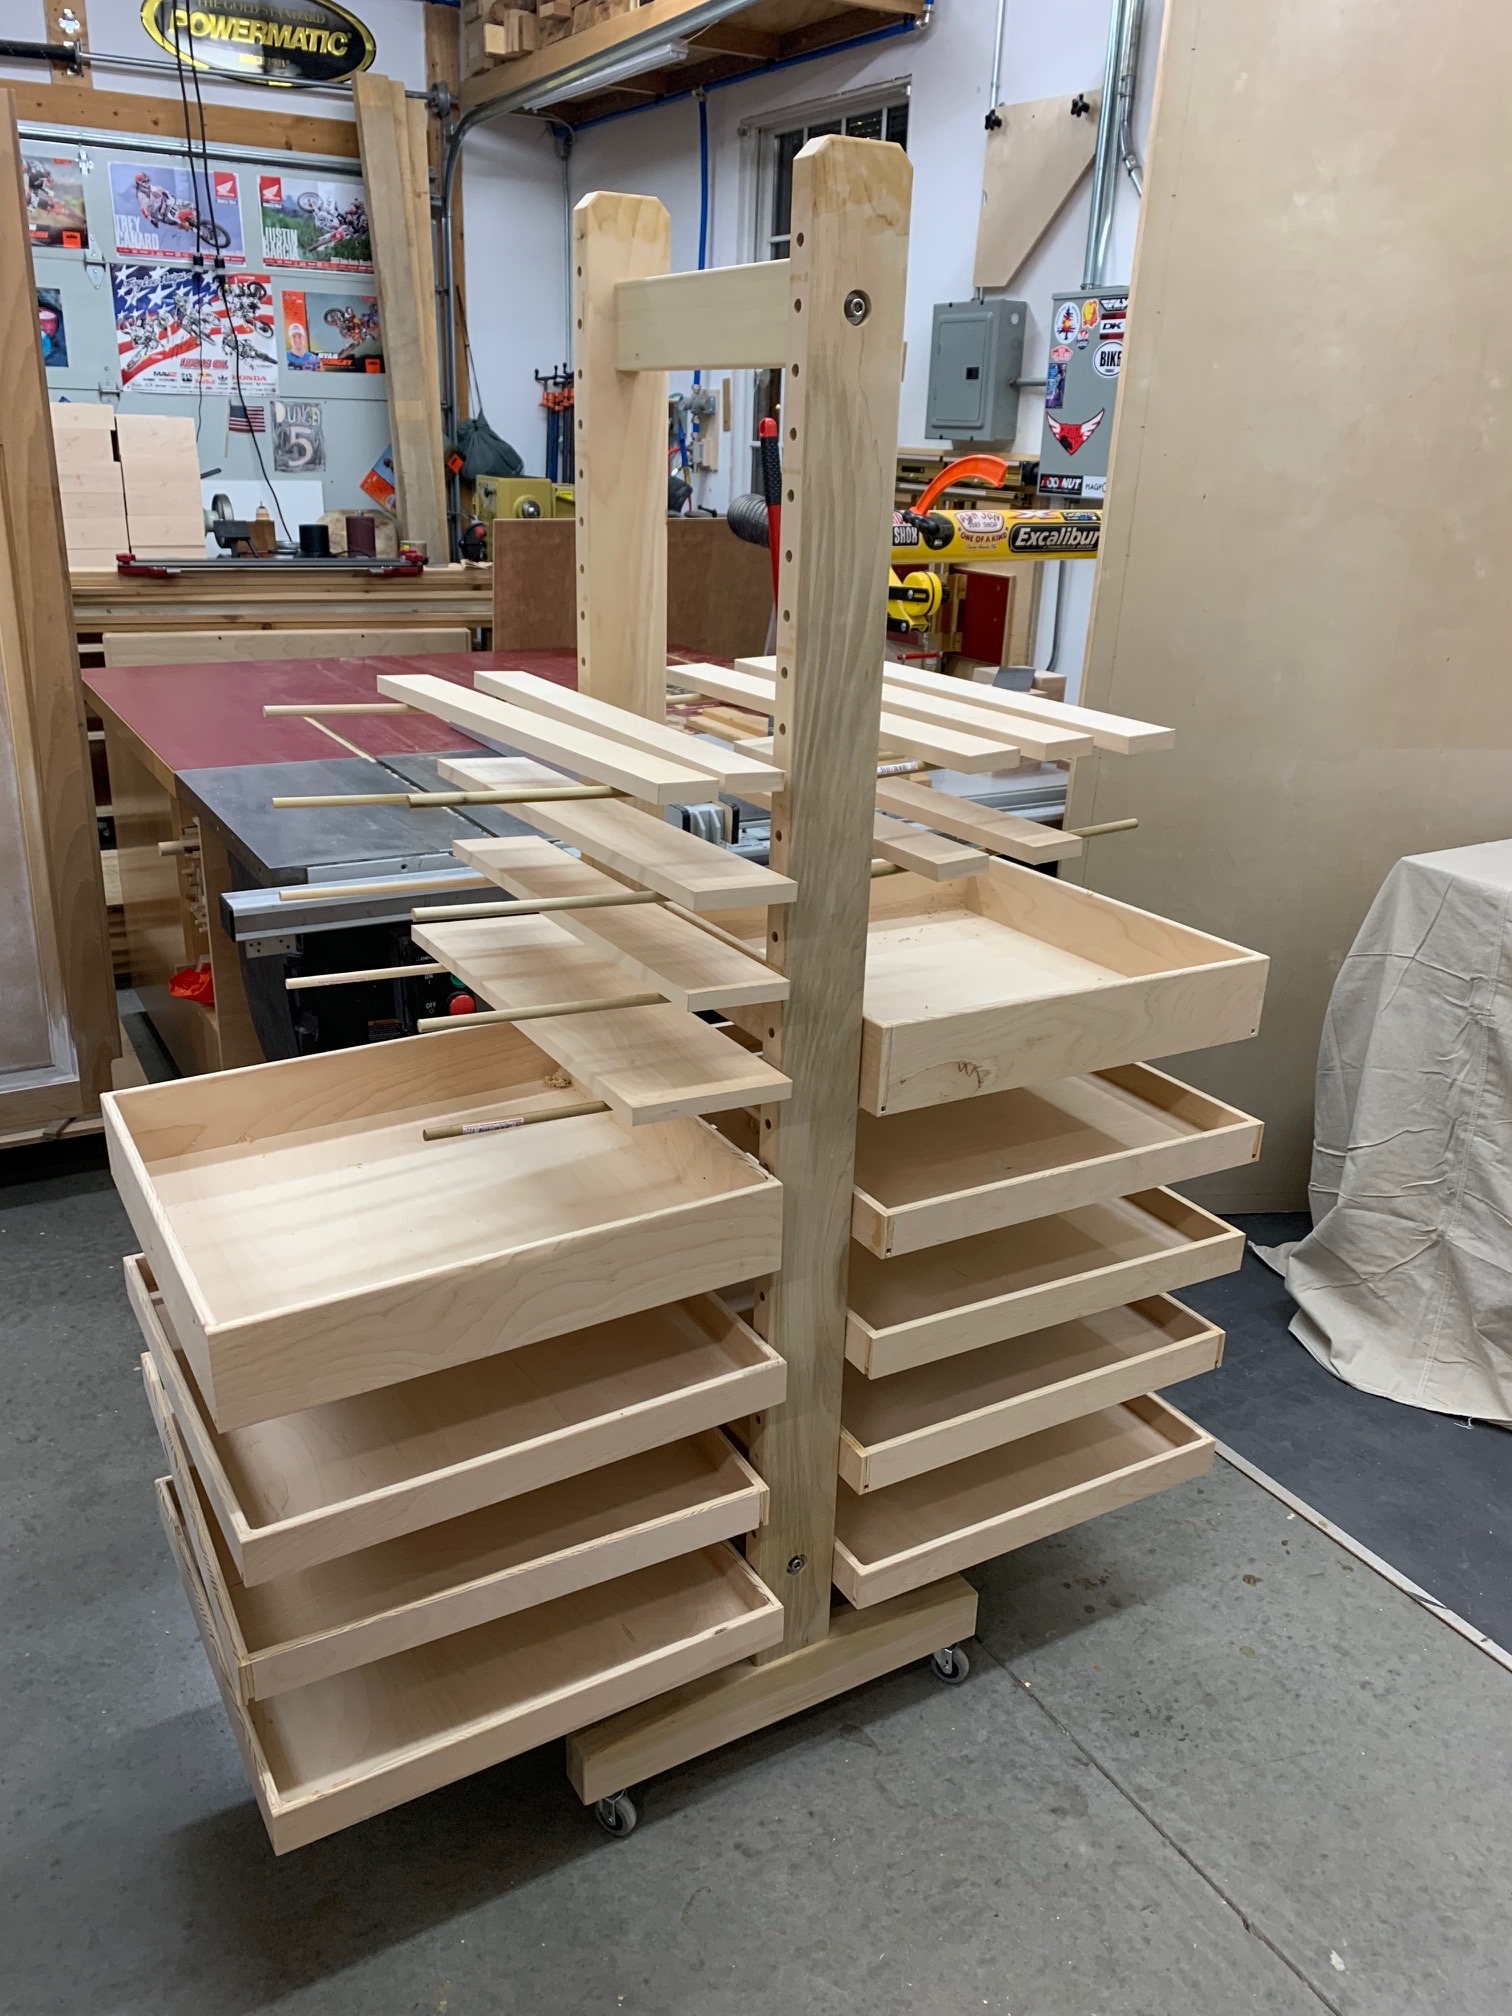
As a bonus, here is my drying rack. I simply change out the two stretchers for different lengths to make the rack wider or narrower.


First off, i only spray water-borne materials. No solvent based materials are sprayed. I only do those outside.
So the basics....


Back panel is 5' wide x 8' tall. There are four 24" x 30" furnace filters that go in the frame work in front of the fans. I left them out so you can see the fans.
Two wings walls are 1/4" plywood with 1x4's around the perimeter on the back side. They are simply joined to the back panel with loose pin hinges. I can pull the hinges pins and the wings walls come off in seconds.
The top panel is simply a 1x4 frame with plastic stapled to the top to allow light through. The frame is secured to the wing walls only with a 1/4" clevis pin in each wall. Simply pull the two pins and the top comes off.

The box assembly for the fans includes the filter frame, top and bottom shelves with french cleats for ease of assembly and two 1/2" side panels that are fastened to the filter frame. You may notice the bronze hinges on the filter frame. That allows the upper and lower portion of the back panel to fold in to take the panel down to a 4' x 5' size for storage.
The fans are bolted to 3/4" MDO plywood pieces. I can use the fans in two ways. Secured to the filter frame or they also can in the double hung window you see to the right. I normally put the fans in the windows and exhaust directly outside. If it's brutally cold outside, I use the fans on the back of the filter box as they are pictured. When placed in the windows, I simply shove the booth against the wall/window.


I can assemble this booth in less than 10 minutes.
It has proved very helpful in capturing over spray in the shop and I don't have that thick haze in the air after spraying.
I also use a lazy susan bearing between two pieces of plywood which makes a great swivel stand for spraying parts.
As a bonus, here is my drying rack. I simply change out the two stretchers for different lengths to make the rack wider or narrower.

"This is our chance, this our lives, this is our planet we're standing on. Use your choice, use your voice, you can save our tomorrows now." - eV


