Cherry Dresser for the Grandson
#11
I don't mean to post old work (this was done 2 years ago)  but, the new shop is taking longer than I thought and I need something to keep me occupied.  Here's the general idea.


This is just a corner joinery detail in case someone finds it interesting.


My usual parts selection method; lay the material out everywhere, grab a cup of coffee and ponder.


I mark out parts looking for figure that will work for me.
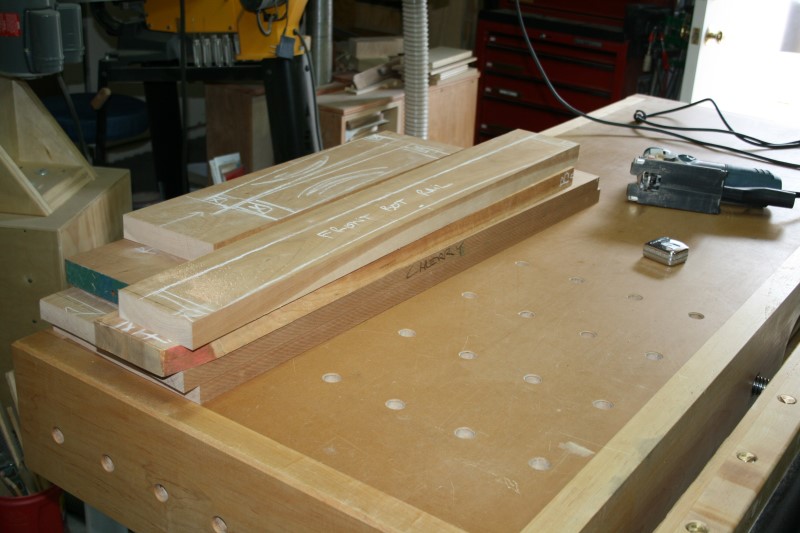
   

This sometimes means changing my mind.  The red lines won on the corner post percolation.


No, an 8" jointer is not big enough
Smile .  The Saturday morning I dedicated to making this planer sled has paid dividends for years.


Parts selected for the top.


I use the Mortise Pal for . . . well . . . mortising. In this case I wanted a different size than the standard templates. I made a 'tweener' set.


Other parts being brought to final dimensions.

   
When I was young I sought the wisdom of the ages.  Now it seems I've found the wiz-dumb of the age-ed.


Reply
#12
I use a shop made bow to put arcs on the front and side lower rails.


I smooth these out with a spoke shave.


I prepare blanks for the side panels.


I raise the panels.


And an end panel shows up.


I use a dado stack to cut the tongue on the top that will accept the breadboard end.


I use a sled for this.  A sacrificial fence could also be used without the sled.  I do both.


I clean this up and fit it with a shoulder plane.


The breadboard in a dry fit.


I chisel out the spot for the decorative spline that covers the tongue/breadboard joint.

   
When I was young I sought the wisdom of the ages.  Now it seems I've found the wiz-dumb of the age-ed.


Reply
#13
A shop made depth gauge sets me up for drawer lock joints at the router table.
   
Featherboards are your friend with this joint.

   
The large panels are just profiled blanks to cut drawer box parts from.


A hole at the front and slots that get larger from front to back allow the top to expand to the rear keeping the front elevations consistent throughout the year.  This can be done with a router and an edge guide as I am doing here or just drill the holes and connect them with a chisel or a rat tail rasp.


For grins I use contrasting walnut dowels from underneath to secure the breadboards.  No one will probably ever see them.


You can pare or plane these flush.  There wasn't much sticking out so I just pared them off with a butt chisel.


I mark out some drawer fronts.


The carcass is pretty much worked out.


Drawer boxes too.

   
When I was young I sought the wisdom of the ages.  Now it seems I've found the wiz-dumb of the age-ed.


Reply
#14
I raise the drawer fronts.


I fine tune the elevations of drawer front to divider to corner posts.


I like to make my pulls all from a continuous blank.  Seeing if the client ever notices without being told is part of my twisted sense of humor.


I use threaded inserts for attaching the pulls.  These are installed befor shaping as it just makes it easier
Smile


This is the continuous figure look I am after.


The back is all maple.  Ship lap to let things breathe.


Here's the general look.


This is the decorative spline.  It is glued to the breadboard and the top.  I get away with this thanks to the fixed hole at the front of the bread board and the slots that force movement toward the rear.


When I was young I sought the wisdom of the ages.  Now it seems I've found the wiz-dumb of the age-ed.


Reply
#15
The finish is my usual oil / varnish blend.


If all works out the toddler can take it to college with him. 

P.s. If a mod can fix the bad rotation on a couple of those pics, that would be cool.
When I was young I sought the wisdom of the ages.  Now it seems I've found the wiz-dumb of the age-ed.


Reply
#16
Very nice work,  I especially like the contrast with the inlays.
Reply
#17
Beautiful wood and excellent work.  I like how you pinned the breadboard ends at the front; perfect for that application.  For such a refined piece I think I would have used solid wood for the drawer boxes though..  Not a criticism, just my preference.  

John
Reply
#18
Thanks guys. I need to get the shop up and running as there is a little brother coming along behind that will need something similar.

@jteneyck  Thanks and I agree about the drawer boxes.  Solid box and bottom is my norm.  I do use ply for some things but, usually kitchen, bath and shop.  This one has to survive a toddler, serve the mother and hopefully live on past childhood.  I'm not saying solids wouldn't do that but, plywood and full extension metal slides seemed to rule the day
Big Grin
When I was young I sought the wisdom of the ages.  Now it seems I've found the wiz-dumb of the age-ed.


Reply
#19
Super work and an excellent build-along. Thanks for posting.

g
I've only had one...in dog beers.

"You can see the stars and still not see the light"
The Eagles: Already Gone
Reply
#20
(03-20-2020, 08:25 PM)GeeDub Wrote: Thanks guys.  I need to get the shop up and running as there is a little brother coming along behind that will need something similar.

@jteneyck  Thanks and I agree about the drawer boxes.  Solid box and bottom is my norm.  I do use ply for some things but, usually kitchen, bath and shop.  This one has to survive a toddler, serve the mother and hopefully live on past childhood.  I'm not saying solids wouldn't do that but, plywood and full extension metal slides seemed to rule the day
Big Grin

I understand completely.  


I wasn't suggesting traditional drawers, just solid wood.  Undermount metal drawer slides are far superior functionally.  

John
Reply


Forum Jump:


Users browsing this thread: 1 Guest(s)

Product Recommendations

Here are some supplies and tools we find essential in our everyday work around the shop. We may receive a commission from sales referred by our links; however, we have carefully selected these products for their usefulness and quality.