04-17-2020, 05:05 PM
We're finally getting to the interesting part. If you recall the design of the bench was so that I would not have to cut 5 by 1.5 inch by 5 inches deep mortices and then the corresponding tenons. (Spoiler alert, it worked!) The other key part was the preparation of the 2x6's, the boards for the legs and the three boards that were used for the mortices. They were run through the planer without any changes to the planer settings to make sure they were all the same thickness.
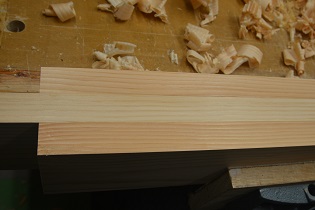
I layed out the boards for the first two legs, and this being the hand tool forum, cross cut them with a handsaw:


Prior to gluing the leg, I checked that the middle board that will be the tenon, actually fit into its mortice. In all four cases, the tenon was just a little too snug and I had to take a couple swipes with a handplane to get them to fit. In retrospect that's not surprising, the clamping pressure and maybe a little shrinkage, made the mortices a bit tight.
Here's the first glue-up:


I didn't get too much squeeze out, but still there was enough that it needed to be cleaned up. After a few hours of drying, I took the clamps off and used a card scraper to get the semi-dry glue off. The small unevenness of the legs was smoothed out with a number 4 handplane. I made sure not to go anywhere near the tenon, and the planning was just for cosmetic reasons.


[attachment=26198]


Once the leg was fully dry, typically overnight, it was inserted into it's corresponding mortice. As you can see, the fit was quite good. I was happy with that. One leg had a little bigger gap on the inside shoulder, but a few minutes with a chisel, and it was good to go.


The next two show all four legs in their mortices, with the second one showing that the two opposing legs are parallel to each other. I was quite pleased with that as well.


I layed out the boards for the first two legs, and this being the hand tool forum, cross cut them with a handsaw:


Prior to gluing the leg, I checked that the middle board that will be the tenon, actually fit into its mortice. In all four cases, the tenon was just a little too snug and I had to take a couple swipes with a handplane to get them to fit. In retrospect that's not surprising, the clamping pressure and maybe a little shrinkage, made the mortices a bit tight.
Here's the first glue-up:

I didn't get too much squeeze out, but still there was enough that it needed to be cleaned up. After a few hours of drying, I took the clamps off and used a card scraper to get the semi-dry glue off. The small unevenness of the legs was smoothed out with a number 4 handplane. I made sure not to go anywhere near the tenon, and the planning was just for cosmetic reasons.

[attachment=26198]

Once the leg was fully dry, typically overnight, it was inserted into it's corresponding mortice. As you can see, the fit was quite good. I was happy with that. One leg had a little bigger gap on the inside shoulder, but a few minutes with a chisel, and it was good to go.

The next two show all four legs in their mortices, with the second one showing that the two opposing legs are parallel to each other. I was quite pleased with that as well.


