Posts: 4,184
Threads: 0
Joined: Nov 2010
Well..the old one just isn't doing the job, anymore..

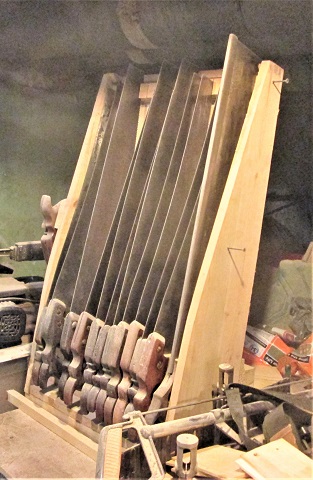
Saws right now are having issues with just staying put....even walking by, one or two will try to flop out...made to hold 16 saws....full length ones. That mitre saw is just passing through, at the moment....May build one for just backsaw types.....from 12" up to 30".....or, just hang them on an overhead peg.
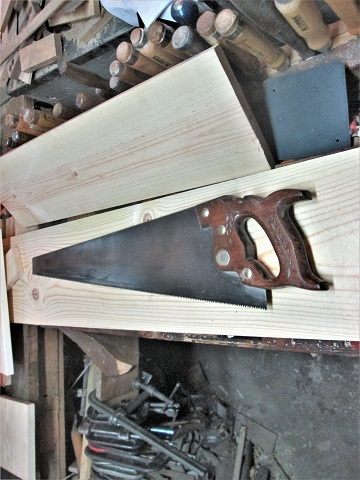
Picked up a couple 1 x 10 x 6' Pine planks...to get things started.....one of which wound up ON my bench, BTW...

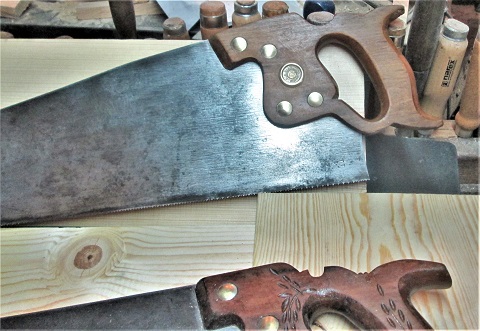
Along with an Atkins handsaw. Silver Steel, Perfection handle, 8 ppi, 26" long.....Figured to use it to see how a plane will fit, inside a box made of 1 x 10s...with a back and a door.....

Has the AAA logo on the medallion, BTW..
6' length, can be trimmed down to a pair of 3 footers...

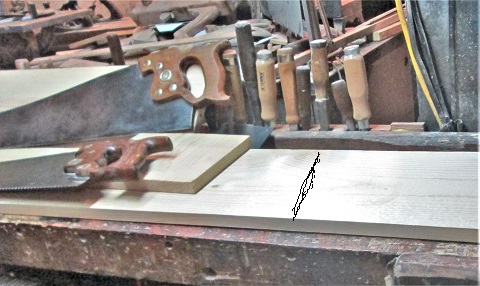
The other saw? Disston D-8, 11ppi, 26"....about 1949 era? Used both saws to see whether they would work handles up, or handles down...

Leaning more towards hanging them by the handles...letting the backs of the plates rest against the back wall of the til. Maybe a kerfed rest at the bottom for the saws' toes to rest at....
Maybe a single door....Frame & Panel? Why? Well, there ARE 3 panel saws running around in the shop...figure I could hang them on the inside of the door's plywood panel. Maybe 2 handles up, with one saw between them, handle down. As for the outside of the door...maybe a way to show what is inside this big box..?

Maybe a couple hooks to hold this saw on the door?
Stay tuned.....might start cutting some boards, this week?

Show me a picture, I'll build a project from that
Posts: 4,184
Threads: 0
Joined: Nov 2010
Made a bit of saw dust, today....getting a few things cut roughly to lengths....now have a pair for the top and the bottom of the case..

Will let these sit all clamped up...trying to get them to STAY Flat...1 x 10 x 20", next..

Cut the other 1 x 10 into a pair of 33" long sides, for the case....had thought about doing the through dovetails, so I got out the toys...

Decided to wait a day...had another blank, needed to rip it for the saw hangers..
Mainly to get rid of the middle of the board...
Seems it then curved on me....had pith right down the middle...then ganged to remaining pair of boards...
Tablesaw blade was raised all the way up. Spacing the slots to hold the saws...which will hang by their handles....the other board will hold the saws' blades..

Dry fit. Holders will sit in a stopped dado in each side of the case. Non-slotted edge goes against the back of the case. Trying to leave a little gap between the handles...
Need to lave a little room above the handles, too. Trying to decide whether the saw blade keeper will be....
Maybe tomorrow, I can start doing pins for the dovetails? those need to be on the ends of the sides, I think..
 ..need to mill a rebate, to house the back of the case, too.
Stay tuned..

Show me a picture, I'll build a project from that
Posts: 4,184
Threads: 0
Joined: Nov 2010
Shoptime is canceled for today.
 Had a TIA come through my head....made things go into lock down, while the world around me spun around, a few times...have had these things before, and am well acquainted with them....They last maybe 5 minutes....then the rest of the day is more or less shot.

So, IF nobody minds, I'll just take the day off...

Show me a picture, I'll build a project from that
Posts: 9,705
Threads: 0
Joined: Jan 2005
Location: Orlando FL
I don't know what a TIA is but I hope you get over it soon.
Posts: 4,184
Threads: 0
Joined: Nov 2010
Sometimes called Mini-strokes...

Show me a picture, I'll build a project from that
Posts: 5,388
Threads: 0
Joined: Jan 2014
Location: Santa Maria, Ca
TIA are potentially very bad. Scary.
Heal up there Bandit! We need you around, your builds are inspiring!!
Mark Singleton
Bene vivendo est optimum vindictae
The Laws of Physics do not care about your Politics - Me
Posts: 4,184
Threads: 0
Joined: Nov 2010
Long night....I think I was able to sleep it off. Added a "extra" BP pill last night. This morning was rather screwed up...by the time things were back to normal...it was almost 2pm!
 So, I went and hid out in the shop for a while about then....Got out a case of planes..

Empty spot is for the Wards#78...which I had to re-assemble, and set up..
As I was going to run a few rebates to house the plywood back panel...which I had to go out and buy a new 2' x 4' panel for..
 Decided, since the sides of the case were already on the bench...I'd start there...Slight problem..

No way is that thing going to the front of the case...so, the rebate will have to go through that knot...

Good thing the iron was sharp. The other side panel was a breeze to do, after this on....then one one the ends was given a rebate as well....Will be making that the bottom of the case. Then shifted gears a bit...laid out dovetail pins on the end of one of the sides..pins first, of course..

Then some chisel work..

problem here was...that corner with the rebate showing....had to lay out for that, while I was laying out the tails, using the pins...then a bandsaw to make a few cuts..

hope that will cover the rebates. Chisels to remove the waste, then a dry fit...

Panel for the bottom does have a cup to it....should flatten out when the glue up happens

By now, my "get up & go" had gone up and went....sweep up the mess..
Chips from the #78, and chunks from the dovetails...this was the second batch I had to sweep up. Decided to call it a day...2-1/2 hours seemed to be about the limit, for now...will try again tomorrow

Stay tuned..

Show me a picture, I'll build a project from that
Posts: 4,184
Threads: 0
Joined: Nov 2010
Update:
 2 more corners have been dovetailed...
Corner #2 was a tad too tight, had to pare a few spots, and fix that split...

Corner #4 has issues with the Case's Top panel having a slight curve across the width...glue up will flatten that curve

At least the rebates line up...and the ends will be covered...Biggest thing yesterday, was getting a bit too tight, almost needed a sledge hammer to test fit these together.
Needed two sides set into either the top, or the bottom panel....just so I could measure to space needed for the two saw holders. Since they will be fitted into dados the same depth as the back's rebates....then crosscut the holders to length. I also needed the Top in place, to layout where the top holder will go. It will sit at an angle.
What do you know, another knot
 Anyway, when a saw is placed in the holder, it will slide downwards towards the back of the case. To remove the saw, handle need to slide up the holder, and still clear the "roof" of the case. Place a saw with the longest handle into the holder, and checked for clearance for the handle to exit the holder. The bottom holder is the easier one to do..

And...not knot to get in the way. Just a few inches from the ends of the saw...not all of mine are 26" long....some are 28", couple are 24"....hit somewhere in-between, and should be good to go....Chisel out the end, backsaw the walls, chisel the bulk out, clean up with the router plane...

Might be a fun day, today..
 ..weather outside? Sucks...
 ..good day to hide out in the shop for a while?

Stay tuned..

Show me a picture, I'll build a project from that
Posts: 4,184
Threads: 0
Joined: Nov 2010
Late night excursion back to the shop....Took apart the dry fit, for now. Fixed all the gap-toothed dovetails, until no gaps were showing....Then

Each side spent some time, clamped across the bench..wound up needing a third clamp to remove any bouncing around...Laid out where the dados needed to be..
Knife the wall lines. 18mm chisel to dig a square hole out at the end...square hole is for the toe of a saw..

Backsaw to saw the lines down for depth....
 Then...
Same mallet and chisel to "pop" most of the waste out....then set up a plane to the depth needed..

Stanley No. 71-1/2 with a 1/2" wide cutter, to clean and level the bottom of the dado...

Yep, even this one...made the rest look easy...all three of them...
And the last one. I even used the Millers Falls No. 11 to add a bevel to the back of the upper holder, once I marked it out.
Swept up all the mess on the floor..again
 and wandered back upstairs, for the night....

Today being a Monday...and it would be a very late start for anything in the shop....will just take today off....may even Bug Bomb the shop....

Stay tuned..

Show me a picture, I'll build a project from that
Posts: 4,184
Threads: 0
Joined: Nov 2010
Had a Late Night, last night....got done about..0400 hrs, this morning....

Cut the plywood for the back...from a 2' x 4' piece into a 1/4" x 19-5/8" x 32-1/4" .....not sure which was louder, the saws, or, my cussing

Had to do a full dry fit, to get those measurements .....so...out came the glue and clamps...had to turn the tablesaw 90 degrees, and slap an extra plywood sheet on top of it....then the real fun began....there was an issue about the saw holders....as in which way was "Top".
 ...but..

Then added a couple more clamps, after the photo was taken....will let this thing sit a while...maybe after 1500hrs today, I can start removing that forest of clamps..

Can never have too many clamps, right?

Show me a picture, I'll build a project from that
|


 So, I went and hid out in the shop for a while about then....Got out a case of planes..
