Just a box for a block plane
#11
Trying some ideas out....nothing else going on.   Just something to pass the time, is all.   Have a stack of thin Pine scraps....seemed better than just tossing them out onto the Firepit.

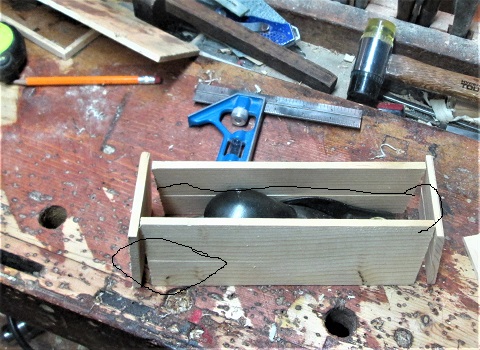
Stanley No. 18 needs a new home.   Set up some blanks, to see how they would look...
Rolleyes
   
Should be enough.   Sides need planed....gave the "new kid in town" a workout..
Winkgrin
   
Takes a while, when you get see-through shavings.  
Rolleyes Got out the usual suspects...
Winkgrin 
   
I guess some will call these "toys", right?
Winkgrin
   
Well..they worked well enough, that 2 corners were done, dry fit to make sure the plane will fit...
   
Set up the Stanley 45, with the skinniest cutter they made...took an entire 5 minutes of "drudgery" to get it set up...
Rolleyes
Set up to plough a groove for a lid to sit in...holdfasts?
Confused 
   
Just to plough a groove...
   
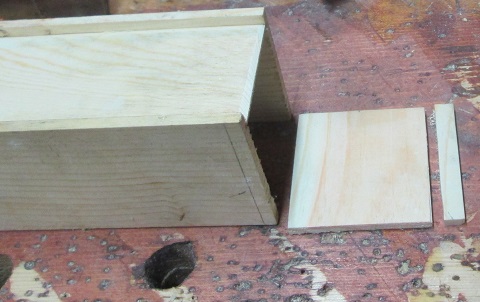
Lid will slide in and out in this groove....even made a stopped groove at the end on the box..
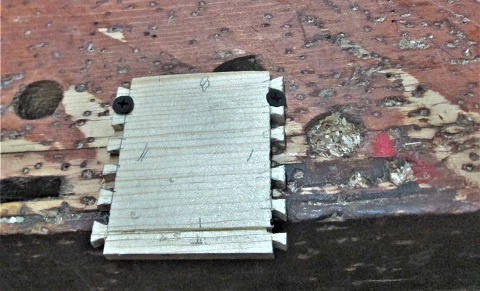
   
Dry fit, after beveling the edges of the lid blank...
Cool  
   
So I could cut the end for size....and for a "handle" to slide the lid with....
Cool
   
Will do a rebate, and then glue the handle to the lid.  The rest will get dovetails to close the end off.   Then a bottom gets glued on. 

Well, I have bored you folks long enough....stay tuned, maybe tomorrow I can get a little more done....
Rolleyes
Show me a picture, I'll build a project from that
Reply
#12
This being a Monday....and Decoration Day......shop is closed for today...

"Lest we forget...
No ...remember them.
Cool ."
Show me a picture, I'll build a project from that
Reply
#13
Hmmm, just wondering a bit..
Uhoh ..last few boxes, a plywood bottom was simply glued to the bottom of each box.....pine was used for the covers/lids.....

Maybe a rebate to house the pine bottom?    Or, try a groove all the way around, similar to the way the lid is?   Stanley #45 is still set up to cut the grooves...hmmmm
Confused

A rebate would mean either a trip ( or 2) across the tablesaw..
No ..or..set up the Ward's #78..
Rolleyes ..either way, would have to bevel the edges?    Maybe not with the rebate...but doing the groove....
Confused  
Stay tuned...
Winkgrin
Show me a picture, I'll build a project from that
Reply
#14
(05-25-2020, 03:37 PM)bandit571 Wrote: Hmmm, just wondering a bit..
Uhoh ..last few boxes, a plywood bottom was simply glued to the bottom of each box.....pine was used for the covers/lids.....

Maybe a rebate to house the pine bottom?    Or, try a groove all the way around, similar to the way the lid is?   Stanley #45 is still set up to cut the grooves...hmmmm
Confused

A rebate would mean either a trip ( or 2) across the tablesaw..
No ..or..set up the Ward's #78..
Rolleyes ..either way, would have to bevel the edges?    Maybe not with the rebate...but doing the groove....
Confused  
Stay tuned...
Winkgrin

I've built more than a few similar sized boxes, oak plywood and simply glued plywood to the bottom. Eased the edges and finished with golden oak poly-look great and get better with age.

I thought the same as you, about grooving the bottom, but with a small box, you lose 1/2" of inside depth, and the inset bottom really didn't look that much better (I did a couple).
Waiting to grow up beyond being just a member
www.metaltech-pm.com
Reply
#15
I have had better days in the shop....

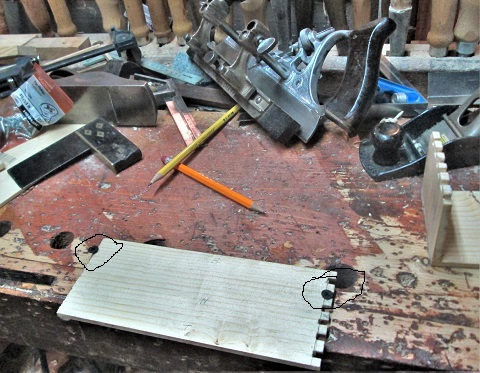
First dovetail joints were looking good...
Winkgrin
   
But then....things went south...
No  
   
Pins were supposed to got the other way...
Angry  Bad enough somebody marked the last corner wrong,,then he actually cut it....wasn't until he tried to do the end of the box...
Upset 
Which meant a re-do of the one side, and a new end panel....from scratch, including the groove.
Upset   Well at least the stanley 45was still set up..got that almost done....

Confused
Confused
Confused
Confused
Confused 
Power goes out...no lights IN the shop...lasted about...15-20 minutes...then back to work...Adjusted the 45 a hair....and made a handle for the lid...
Cool 
   
Yes, it was done with the Stanley 45. Test fit, after trimming the lid for length, and beveling the end a bit...
   
Yes the handle is on...but, which end....I also made sure the bottom panel was the right size..
   
Will glue that on, tomorrow.    Clamps and cauls...
   
Added a couple extra...just to tick someone off.
Winkgrin   Lid also got ONE clamp..
Cool 
   
Well, I managed to make a mess on the bench..
   
But, at least I did sweep the floor, before calling it a day.   Let the glue up sit until tomorrow, and then clean it up....
Stay tuned...
Show me a picture, I'll build a project from that
Reply
#16
Box cleaned up.    Lid adjusted for fit...was a bit too tight, glue blob in one of the grooves, too. 
Bottom is roughly trimmed for size.    And, glued in place....might have used too many clamps again?
Rolleyes  
   

So, how did I use the Stanley 45 to make that handle's groove?
Confused
   
Make the groove in a larger piece, then cut out the part needed.
Cool   Save the rest for the next one..IF there is one...
No 

May check on the glue up after a bit....has had all day to dry....may add a bit of wax to the lid, so it will slide better.  
Winkgrin

No cussing was needed, today.  
Winkgrin   No sawdust & glue filler is needed, either.
Winkgrin   may look around for a Stanley No. 18 label, tomorrow....after the Witch's Brew dries.
Cool

Doubt IF any more little boxes will get made,  let alone posted on here......
No
Show me a picture, I'll build a project from that
Reply
#17
Out of the "clamp" and a bit of clean up..
   
Side #1..
   
Just old Pine...end view..
Winkgrin
   
Handle is on the other end...
Cool
   
Waxed the bevels, and close the lid..
   
Waiting on the Witch's Brew to dry....may need a second coat....
Show me a picture, I'll build a project from that
Reply
#18
Done... 
   
Awaiting a label...
   
See ya.....
   
Show me a picture, I'll build a project from that
Reply
#19
How many more to go?
Steve

Mo.


I miss the days of using my dinghy with a girlfriend too. Zack Butler-4/18/24


The Revos apparently are designed to clamp railroad ties and pull together horrifically prepared joints
WaterlooMark 02/9/2020


Reply
#20
None.....I've had enough....
Show me a picture, I'll build a project from that
Reply


Forum Jump:


Users browsing this thread: 1 Guest(s)

Product Recommendations

Here are some supplies and tools we find essential in our everyday work around the shop. We may receive a commission from sales referred by our links; however, we have carefully selected these products for their usefulness and quality.