Posts: 4,134
Threads: 0
Joined: Nov 2010
03-05-2021, 12:19 AM
(This post was last modified: 03-05-2021, 12:21 AM by bandit571.)
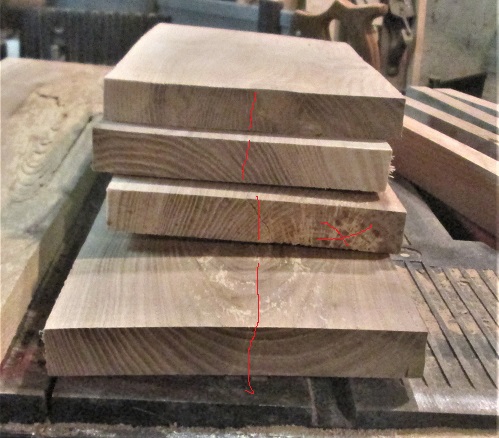
Got off to a rocky start, though. Had a stack of Leftovers....decided to resaw them down....with the better looking stuff at 1/2" thick, and whatever the other side came out as...
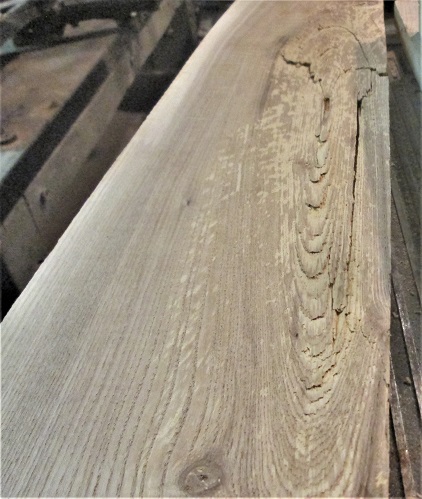
Not everything was......nice...

Some was downright nasty..

Figured I could get about 2-1/2" of good stuff....and toss the bad out..
Had some good pieces, though..
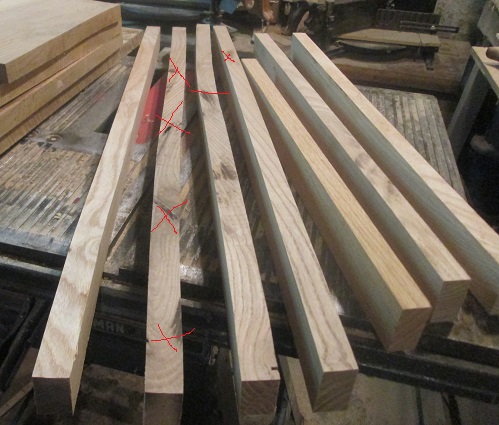
Rip fence on the saw was right at 2-1/2" width....the problem began with these other strips..
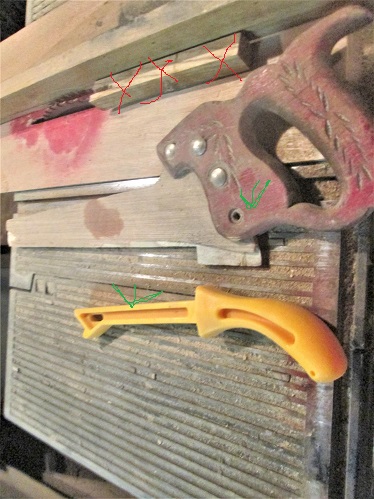
Mostly 7/8" thick.....figured I could try to rip them to the 1/2" thickness....was getting a might too close to my fingers...grabbed a stick of scrap to push things through..
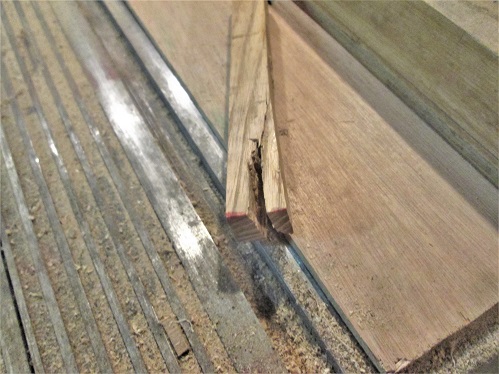
This was the end pushing the strips through....until the tablesaw blade nicked it....red is paint from the Zero Clearance Overlay.....other end of the push stick ...
Did this....thing is, if'n I hadn't been in such a hurry, I could have used a proper pushstick..
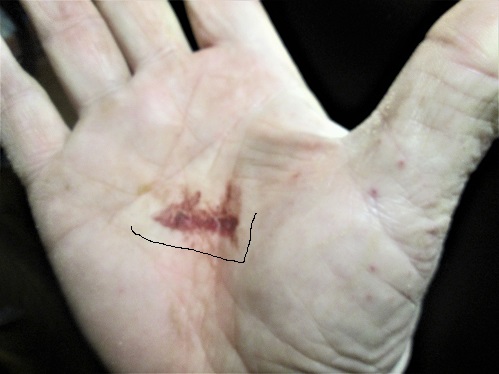
Managed to complete the task....then went upstairs for a bandaid...
These are what the task produced. Then I closed up shop for the day....
Paul Sellers made a Desktop Organizer a while back....thinking I can make a version of it....using this pile of scraps. May split the drawer into 2....and some 1/4" plywood as needed. First, I need to glue up a few panels.....and NOT have another kickback happen.....

Stay tuned

Show me a picture, I'll build a project from that
Posts: 4,134
Threads: 0
Joined: Nov 2010
Ok....hand was doing a bit better, kept the bandaid on, though....
This stack is mostly 1/4 thick....good for cauls and dividers...the 1/2 strips were sorted out, trying to get the best of the lot..
Ganged them all up, trimmed the ends so they all will almost match....needed to joint the edges, to make a decent glue joint..
Used this, as the Millers Falls No. 14 needed "refreshed" before I could use it.
save it for the next day....got to the point I could spread some glue...
Add some cauls and clamps....and set this aside for a day, or two...
Next day. hand is getting better....Millers falls Jack is sharpened up and tuned....back panel is a 2 piece glue up
Need to flatten a couple spots, joint the edges until they fit...then glue the panel up...

No gaps? Glue clamps and cauls..
Then more jointing and face planing...
These will be the sides/ends....Idea to to make them into panels....
Whenever enough clamps become available....can glue these two up.....first panel is to be the "Lid" second is the "Back". There will be a single piece across the front, and a pair of drawer fronts. Haven't decided on the bottom, just yet....
Might be a decent Project for the month? Will see what corner joints will look best.....with 1/2" thick Ash..

Stay tuned..

Show me a picture, I'll build a project from that
Posts: 9,655
Threads: 0
Joined: Jan 2005
Location: Orlando FL
You've been quiet for longer than usual. I was starting to wonder what happened to you. Glad to see you're back at it.
Hope you hand heals up soon.
Posts: 4,134
Threads: 0
Joined: Nov 2010
Honey-do chores have my back hurting, so, while I am just sitting around waiting on it to settle down....might as well get this blog caught up

Lid panel came out of the clamps...
Needing a bit of work....60 grit belt sander and a couple planes later...
Should be good enough for the underside of the lid? Topside?

Set this aside, for now...panel for the back...
Removed the clamps..slowly...don't want it to fly apart, right

Jack plane to flatten, then a smooth plane to ....smooth..

And zero chatter, and no tearout...might have the plane tuned about right...

So, where did all those clamps go?
So, now I have to wait on the glue to dry...again

Stay tuned

Show me a picture, I'll build a project from that
Posts: 4,134
Threads: 0
Joined: Nov 2010
Side panels are out of the clamps..

handsome, ain't they?
 Checked to see how well they match each other...
And, of course they don't....we have ways..
Now they do. Millers Falls No. 11 Junior jack. Clamp the 2 sides together in the vise, and joint until they match..
Next, see how they will match the back panel...

And of course not....solution is to mark a line along the back's edge, clamp the back in the vise, and joint to the line...checking with a straightedge..
There WAS a high spot in the middle....WAS. Used that square again...
Lid was getting one end squared up, and the other end cut to a length of 12"...was able to trim a couple "split ends" as well....once that was done, I could mark the back for square on one end, and for length...this time for a 3/8" overhang on the ends of the lid...

Then I worked on the two ends a bit more....They both needed face planed...
Flat and smooth....as for square?
Hmm, trim the better end square, then mark for final length, and remove this mess...
Next up...a front and a drawer front..
By going with 12" instead of the 16" I was going with...I now can do a single drawer. "T" is for the Top of the Front...DF is for Drawer Front....
So, next time? Need to clean these two up, cut the ends square, joint the edges....and decide on joints for the corners.....
Stay tuned..

Show me a picture, I'll build a project from that
Posts: 4,134
Threads: 0
Joined: Nov 2010
Ok, the two for the front of this box....

Yep...besides having a slight taper to them.....the faces need a wee bit of work...Once the tapers were jointed off, the the faces could be flattened and smoothed out.
This is the top, there will be a storage area behind it, so both faces needed planed. A rebate will go along the "bottom" edge, to house a 1/4" plywood "floor"...
As for the drawer front?

Took a while....might be a decent looking drawer front?
This morning....laid all the sides of the box out..
Even found a couple knobs for the front of the drawer....was trying to see how well the grain will line up...
The Right side...not too bad? the Left?
Not bad at all...then laid out a few tools...
Going to use through dovetails, for the corner joinery....including the drawer....Details?

Both the marking gauge and the bevel gauge have an SW logo. Saw is a Disston No. 68...square was sold by Winchester. Mallet came from Wall E World.
Have a Masterforce Folding Utility Knife to use for Knife lines/walls. Always need a few SHARP pencils....and a few sharp chisels...
I do Pins first....use the pins to lay out the tails. Just easier for me, that way. Then see about a few grooves. haven't decided on a bread board edge for the lid..yet..we'll see. More worried about underneath the drawer.....at the front...
Stay tuned....may have this done by April?

Show me a picture, I'll build a project from that
Posts: 4,134
Threads: 0
Joined: Nov 2010
Well, first thing I need to do....is to mark out which side goes where, in relation to the other parts...don't want dovetails going the wrong way, nor where I don't need some many...like where the drawer will be going....so..."Side #1""(have to start somewhere, right?)
Of course, there is an "IN" shows which is the inside face. There are 2 "B" marks...one for bottom, one for Back....the "F" is for Front...going to be working on the back corner first...needed a baseline made (to be abuse?
 )...set to the thickness of the back of the case..
Then stand it up in the vise...figure out which way the pins are to go, set the bevel gauge to the angle wanted..
Use the combo square, set to the thickness of the back, to carry cut lines down each face....as a guide for the saw....Don't like using the saw with the board this high in the air. Vibration makes it a bit rough to saw a line...so..
I slide the part down in the vise, until the baseline is1/8" or less above the wooden jaws....and..
I sit down on the job.....about elbow height to work the saw.....Saw Guide? My left thumb, with the thumbnail getting rubbed clean from the saw's plate. Can also stand my index finger up against the saw, until the saw in about 1/2 way into the kerf.....about 8 full strokes per cut..no rush..
Next, set up a chopping block...
Good face up...don't want any blowouts to show ( inside is usually ok
 ) I chop down about halfway, leaving a "front Porch" for support..then flip the board over..
Pins are done. Laythe "Back" on it's show face....make sure it is correct...then stand the pin board vertical on the end the tails will be....Hold the two parts steady, trace around each pin...and mark the baseline....go back and remark the baseline with a square....take the back over to the bandsaw.....I can see a lot better where I am cutting....and cut on the waste side of the lines....the more of the line I leave, the tighter the fit...then back to the chopping block..
Again, chop half way down...those extra cuts make it easier to remove the chips/waste...flip this over to complete the tails..
Almost time for a dry fit?

First corner is done...usually a good sign, when I need a mallet to assemble these...
One corner is done....merely repeat for the other full back corner...then things get....complicated

Stay tuned..

Show me a picture, I'll build a project from that
Posts: 4,134
Threads: 0
Joined: Nov 2010
03-10-2021, 11:09 AM
(This post was last modified: 03-11-2021, 08:15 AM by bandit571.)
Rinse and repeat...
Now, across the front of this box....there is a drawer front...above that there is a strip that encloses the storage compartment under the lid....It needs a rebate milled..
Didn't feel like messing with thespur on the Wards 78. Set up the Stanley 45 ( no spur installed) to mill the rebate. Rebate is where a floor panel will get glued to.
Then, use this strip to reset the 45...

As the other 3 sides need a groove to also house that floor board...Jigged up..
Groove is a set distance down from the top edge of each side...feeling groovy..

I had set up the Stanley 71-1/2 with the Veritas 1/4" cutter....thinking I could level the grooves, if needed. Cutter is turned so the plane can travel in the jig...one problem
The Veritas cutter (1/4") does NOT fit the 1/4" groove cut by a Stanley #12 (1/4") cutter
 And, I doubt is is from any wear on the Stanley cutter...Oh well..

I used a 1/4" plywood scrap, to check the line up...
Close enough...Which leaves...
These 2 corners...They need dovetailed in place....so..
The full width sides get the pins....but only down to the groove....then tails were made to match...and a test fit done
At least on corner #3.....back was having issues....so...
I can do this last corner..later today....Need to reset the Stanley 45 one more time....need a groove for the bottom of the box. Drawer has to have something to slide on, right?

Stay tuned....

Show me a picture, I'll build a project from that
Posts: 4,134
Threads: 0
Joined: Nov 2010
In doing all these resets of the Stanley 45....1) the #12 cutter, that is supposed to be 1/4" wide...isn't. it is at 0.249". I was having trouble cleaning the bottom of the grooves with the NEW Veritas 1/4" cutter in my Stanley 71-1/2 router plane, didn't fit....got to checking it is at 0.252"....Got a box of cutters for the older 45...a No. 2 box. In it was an almost unused 1/4" cutter...
It measured in at 0.251"....so, IF I stone the sides of the Veritas cutter a bit, and hone away that chip out in the edge...
Run a groove with the new 45 cutter, then..
Try the 71-1/2 and it's honed cutter ...and..it now fits the groove


2) there were two thumbscrews, located on the sliding stock on the 45....They were getting to be a PITA trying to tighten or loosen, having to use a pair of needle nosed visegrips.
 ...so...
They were "retired" (FIRED!) and replaced with a pair of slotted bolts, so, instead of the visegrips, I can use...
One of these. The pair out on the fence?
Threads needed cleaned..badly...rear one was also chewed up on it's pointy end....wire wheel/brush to clean the junk off, light sanding to remove a burr or 3...drop of 3in1 oil, and back into the fence....They work a bit better...will be shopping for a pair of new ones...later. Needed to rejig to plough some grooves....the 3 full height sides need a bottom groove, to house a plywood bottom..
something like this. Now, I also needed to dovetail one more corner..
last pins for the case, and..
last tails....then a full dry fit...
When I need a mallet to assemble these corners.....I may just be getting the hang of these...
Maybe

Stay tuned...

Show me a picture, I'll build a project from that
Posts: 4,134
Threads: 0
Joined: Nov 2010
Needed 2 plywood panels cut to size. one for the bottom of the case..
Gives the drawer something to slide on....and a panel to be the floor of the compartment..

need to start on building that drawer next....

And, trimming the lid a bit...may add a Finger-lift to the front of the lid. Next time in the shop? Drawer Building 101...in the meantime
What can anyone tell me about this little fellow?

Walnut handle is just over 4" long. Lots of brass, but the locking bolt is steel, in brass washers. Blade is blued steel, with a clipped corner Stanley box logo...with a heart shape around the SW logo.....little fellow was used throughout this project....
A lot handy than the normal sized ones I also have...
Stay tuned

Show me a picture, I'll build a project from that
|











 And, I doubt is is from any wear on the Stanley cutter...Oh well..