Posts: 3,725
Threads: 0
Joined: Nov 2010
Had a couple Tasks to do, today...wound up taking 3 hours to do....
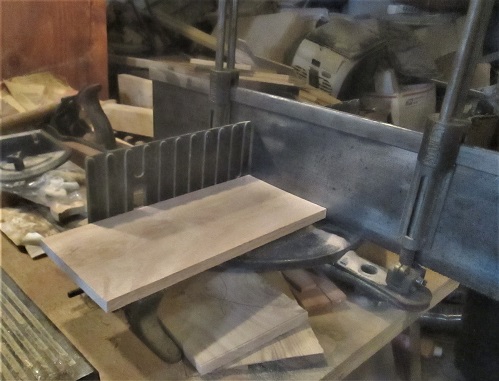
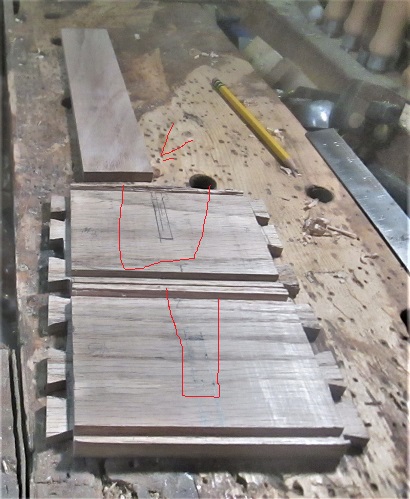
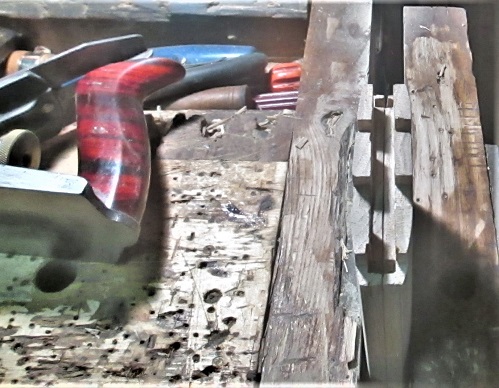
First, in order to layout 2 stopped dados on the insides of the ends, I needed a divider that will sit in them...Mitre box to cut a chunk of Red Oak..
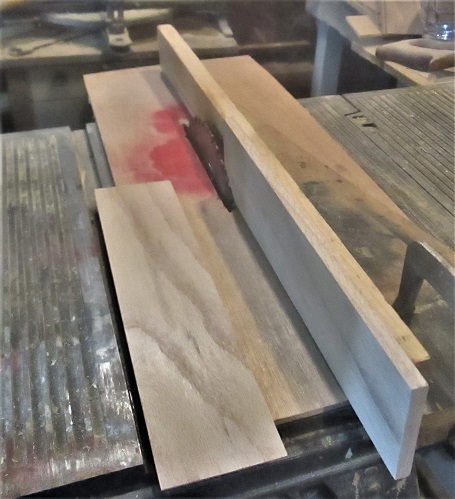
Fine..except this was too wide, and a hair (1/8") too thick.....marked where to rip for the width, easy enough, once I figured out the width needed. As for that "extra" 1/8"
2 passes took care of that problem....so, now some layout work...
As the divider does not extend up into the lid.....time for some chisels, and a plane...
Supposed to by 3/8" wide by about ~ 1/8" deep, just enough to hold onto the divider...one done..
Test to make sure the divider will fit..
Paul Sellers states in can be a hair loose, as he wanted it to be removable...ok...This task is done....need a jig for the next Task
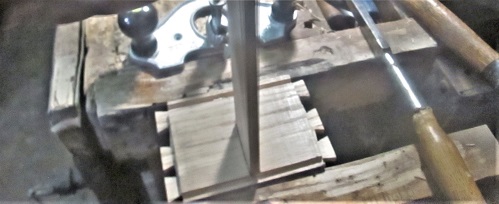
From the grooved side, I come up 3/16" and mark a stop line. Then that smooth plane takes over. Goal is to plane a radius (just under 12") by planing from the stop line up to the middle....using my hand to find any "flat spots"....looking for a nice even curve..then flip the board around, and do the of half of the curve.
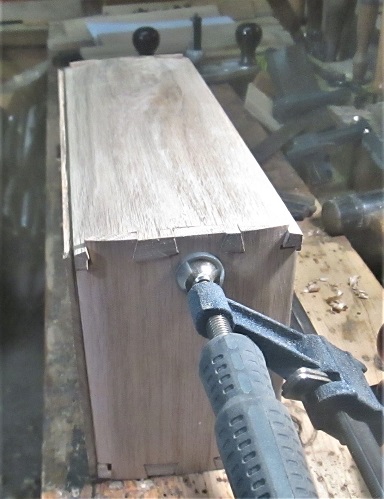
Now both ends are done....do the same for the 2 sides...then a dry fit..
Had to adjust the lid panel for a better fit..one groove wasn't quite deep enough..
As for the tails/pins sticking out...well part 2 will cover the last task of today
Stay tuned..
Show me a picture, I'll build a project from that
Posts: 3,725
Threads: 0
Joined: Nov 2010
Ok,last task for today....was getting a bit sore and tired...was a busy day, making a LOT of shavings..
Yep, one of those days...they also seemed to "Krunch" as I wandered past....
Cutting back the wild ones..
Involves a dovetail saw...Paul uses a sharp chisel to pare what is left....but, he is using Walnut, NOT Red Oak..Decided a beltsander would help out, IF used correctly....and saves stabbing me fingers with a chisel ( already have a splinter in me left thumb..)so...
Once all 4 corners looked decent...that was it for today...I have to leave the bottom panel out...as I will need to disassemble this mess before the glue up can happen...
But, all the tasks from Episode #2 are now done....will research Episode #3 and see what I need to do next,,,
Stay tuned..


Show me a picture, I'll build a project from that
Posts: 3,725
Threads: 0
Joined: Nov 2010
Taking a day off from the shop...too many errands, today..too much walking for this bum right leg....Add in a ride in the CAT Scan....been a LONG day...try again tomorrow, eh?
Stay tuned...
Show me a picture, I'll build a project from that
Posts: 3,725
Threads: 0
Joined: Nov 2010
CAT Scan: seems that while I was sound asleep sometime before Christmas...I woke up with my nose against the wooden bedroom floor...the "impact" was enough to wake both me and the Boss up....have had a headache ever since. Docs finally decided I needed to be scanned, yesterday...

Cardio checked out fine, yesterday....schedule to wear a 30day monitor to just check out things....

Watched Sellers's episode #3 last night...first task was to dry fit all the parts....then add a round over to the edges...a No.101 plane helped that out. Then out came the cauls, a cheap brush, a bottle of glue....and a forest of clamps. Paul used just 4 bar clamps....all I have is either pipe, or F style clamps......that want to slide around.

Anyway..box IS glued up, last night.....may head to the shop after Lunch....and clean up the mess...

The remaining 2 tasks are to saw the lid free of the box...and level the cut edges...
Stay tuned..
Show me a picture, I'll build a project from that
Posts: 3,725
Threads: 0
Joined: Nov 2010
Yeah, yeah..photos or it didn't happen, right..
The box is in there..somewhere...let sit overnight..this morning the clamps came off..
A little rough around the edges....planes and sanders to clean up...
Lot of the Millers Falls No.9...and some sanding....and even a couple smaller planes..
A No. 101 and a No. 9-1/2....next..was connecting some dots..
2 lines, about a saw kerf apart. Run all the way around the box. Plan shows where the cut line is centered...on the wide dovetail...then a backsaw to saw in each corner.
Once all 4 corners have been sawn...then bring the saw down to connect the corners..ends first.
Both ends done...then repeat for the 2 long sides...clamp the box as high in the vise as you can..
One side, then the other, careful you don't get "pinched"...and you'll have this, as a result
Then a plane to level the cut out..
And use both parts to check for any small high spots, like the corner on the left...
Once that is cleaned up, and the lid sit flat and level ( no rocking allowed) I'm done for today....even worked up a sweat! between the planes and the backsaw, nice Cardio going on. Will see what gets done in Episode #4...and see how THAT goes....haven't decided on hinges, at the moment...
That stopped dado, was opened up, to allow the divider to slide down into place, no glue.
Stay tuned..
Show me a picture, I'll build a project from that
Posts: 3,725
Threads: 0
Joined: Nov 2010
Tried to get part of Episode #4 done, today....one part was already done..
As the only way the divider will slide into the box, is to open up the dados...
Checked the spares box...not the right type of hinges...so, off to Lowes to get a package
While I was there, picked up a quart can to bring home...
As I thought I'd try this out on the Red Oak. Part of the prep for adding those hinges, was to make sure the lid fit the box, without any gaps...had one more high spot on the lid to plane down...was almost done...when the lid flipped over, and onto the floor below...with predictable results....got the pieces back off the floor, re-glued and clamped up...Grrrrr, with the bench vise as a 3rd hand...fixed the out-of-square, too.....then just set it aside, until the glue is dried...
As for those 2 chisels laying there...just their bad luck today....as I refreshed their bevels until scary sharp...
Then, since it will be Bras screws into Red Oak...decided a pilot hole would be in order....and a cordless one, at that..
Need to find that old candle, to wax up the threads, too.
Might go and check on the status of the glue in a bit...been about 9 hours...
Stay tuned...
Show me a picture, I'll build a project from that
Posts: 3,725
Threads: 0
Joined: Nov 2010
So, gave the glue about 8 hrs to dry, removed the clamps and finished up fitting the lid and the box together....
About as close as I can get it....then set this into the bench vise....
Sanded to 120 grit, to remove any other rough spots...when the back of the box was done, time to lay out for the hinges..
Sellers just uses a hinge, to set how far in from the corner the hinges will be...makes a single mark across both the box and the lid. The I set the box aside, and start on the lid...using the hinge to lay out where to chop a shallow mortise..
Then a drill for the pilot holes, and an old candle to was the threads..soon had both hinges installed in the lid..
Cordless drill? Cordless Screwdriver...
Then, before I can mortise the box....have a different tool to use..
As it is easier to carve a finger lift now, before the lid is attached
Also a 4-in-hand, and a bit of sandpapper to smooth this out, then add the lid..
Then see how the lid will close..
And call it a night....while I decide on what feet to make for this little box...
Onto Episode #5, stay tuned....
Show me a picture, I'll build a project from that
Posts: 3,725
Threads: 0
Joined: Nov 2010
Figured out what I was going to use for the 4 feet under this box....as I didn't care for Sellers' versions...so
Shaker "mini" pegs, round away the flared out part, then cut at that red line. Find a bit the right size (#3) and a cordless drill for that bit. Wanted to drill 4 mounting holes, and NOT got all the way through the bottom of the box. Brace and bit gave me a little better control, as the snail will stop pulling when it just pops through..
Then a dab of glue into the holes..
Box has already been fine sanded....might be time for a sealer coat...IF I can find that Church Key...
Was over hiding with the varnish cans....about THE best way to open a can of finish. An Awl was used around the rim of the can...that trough that always fills up, well, 4 holes will act as drains...to keep it empty...and, since that divider was already out of the box...
it was used first, to see how Amber shellac and Red Oak play together....then the entire insides of the box got their seal coat.....and finally all of the outside of the box...started with the underside, then the 4 sides...then the top of the lid..
End view....hinges are causing a gap, around in back...
But, the front does look good..
Letting the glue and shellac sit a day or 2....need to find a short length of chain to "stay" the lid when it is opened... Maybe some green felt to line the insides? (I don't have any leather to use, like Sellers did) sand the shellac, add another coat...rub that out, and add a final coat....
Episode #5 was the last of the series...which is where I am now....
Hope I haven't bored anyone....stay tuned. (Shop is Closed on Mondays..)
Show me a picture, I'll build a project from that
Posts: 2,339
Threads: 0
Joined: Jan 2008
Location: Irving, Tx
I have a question..."the four holes" in the rim...how do you seal the can when you replace the lid?
I always enjoy your builds. Thank you for taking us along.
"I tried being reasonable..........I didn't like it." Clint Eastwood
Posts: 3,725
Threads: 0
Joined: Nov 2010
have found the rim of the lid does a decent enough job of sealing things up. Mallet to set the lid down tight, is usually enough.
Show me a picture, I'll build a project from that
|
