Just a pile of scraps...
#20
Went shopping for hardware, Monday.    You would not think 40 miles is that hard to travel.....until you try to get from the East side of Lima, OH. over to the North West side.....where Hobby Lobby is located.   Even drove past Harbor Freight's store!    Bellefontaine, OH to Lima is only 35 miles.....Takes forever, when you can't pass slow poke traffic.    Found out Hobby Lobby is a very dangerous place to go....when you are on a budget.....( $10 in me pocket..)

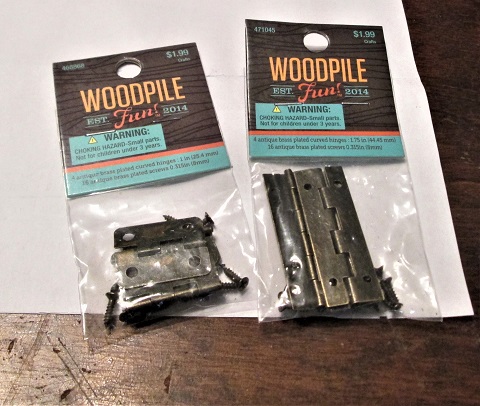
Needed some hinges...wasn't sure about which size would work, so...
Confused
   
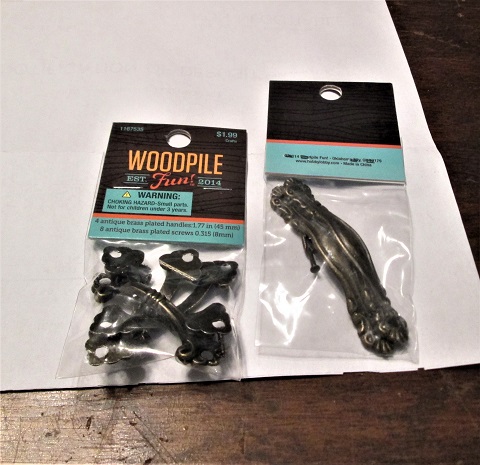
two smallest pairs they had....just in case....then these caught my eye...
Rolleyes 
   
Again, wasn't sure which size would work.....should have stopped here, was still within the budget, but
Uhoh 
   
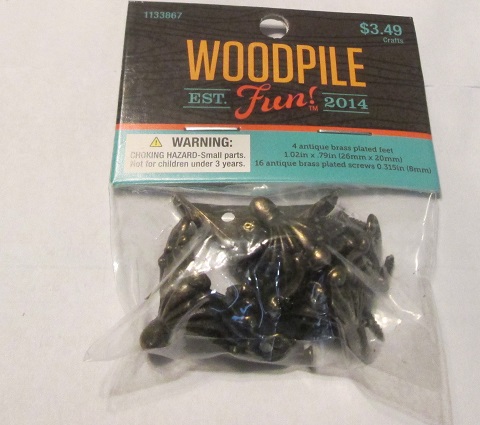
And then some feet, too...
Rolleyes  
   
There went the budget....and since that happened...
Winkgrin  
   
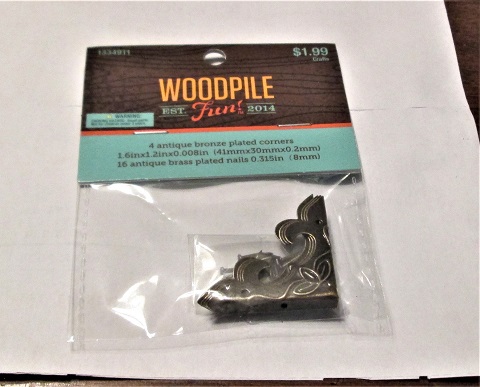
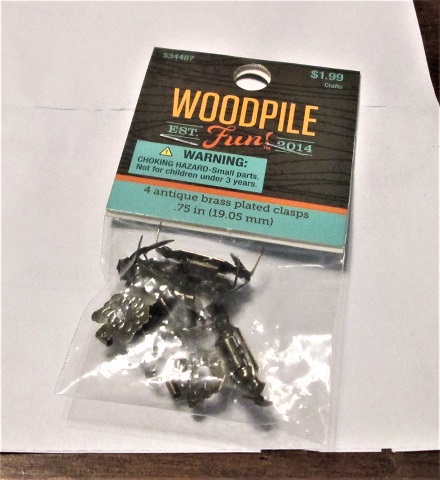
Maybe something to keep a lid closed?.......hmmm, just went there for hinges...
Rolleyes
   
Seems I keep a budget about as well as Congress does....instead of $10...spent $16.49, counting sales tax...
No

Maybe later, I can get some of these installed?    Have a stack of 1/4" Ash...
   
That maybe can be used for dividers inside the box?
Confused

Stay tuned..
Winkgrin
Show me a picture, I'll build a project from that
Reply
#21
Went with the shorter hinges...longer ones didn't look right..
   
Used a strange looking screwdriver, but at least it fit these TINY screws.   Nail chucked up into the drill, for pilot holes....candle wax on the threads....only snapped one
No off..Hardware..feet installed, smaller of the handle sizes installed,,
   
Everything sanded down...lid "adjusted" to the box....Gunstock stain applied, inside..
   
And outside, then wiped down....
   
Haven't decided on any dividers on the inside...yet...issue being spacings.   Letting the stain dry a day...then add a few coats of Amber Shellac....
Confused

Stay tuned...
Winkgrin
Show me a picture, I'll build a project from that
Reply
#22
Had some "downtime" yesterday....so...planes at the ready...
Winkgrin
   
Used the 60-1/2 to plane some 1/4" Ash flat....then ganged three pieces up in the vise, and jointed the edges to match. 

Bandsaw to make a few notches...Mitre Box to cut for lengths needed....
Cool
   
Working on a tight fit, as little gap as I can get...
Cool  
   
Friction fit, so they won't rattle
Rolleyes 
   
Then close the lid, to see if it will shut all the way...
Rolleyes
   
And then set this aside, for now.   No glue was used.
Winkgrin 
While the planes were handy...
Rolleyes  Planed 2 pieces to do a glue up....
   
And got some blanks jointed for some sides of a box..
   
Once I figure out the lengths needed, the Mitre Box can trim things for length. 
Cool

May do dovetails for this one.....stay tuned...
Winkgrin
Show me a picture, I'll build a project from that
Reply
#23
Didn't I read somewhere, you are supposed to be taking it easy?  I am amazed how you just keep turning out one project after another.


Thank you for including the rest of us.
"I tried being reasonable..........I didn't like it." Clint Eastwood
Reply
#24
Well, today was just 2 hours in the shop, counting time using a broom.  Had to saw a few parts to size..
   
And squared things up, even the blank for the lid needed a trim...
   
Then the Stanley #3 was needed...as none of the parts were flat...lid needed some work..
   
As the left side was thicker than the right...short end pieces were easy to do, once I figured out grain directions...
Rolleyes  
   
The longer sides were too long that direction...so..
Rolleyes  
   
Was able to clamp them just a hair above the jaws of the vise...Got all the parts flat and square, and dug out the toys..
Winkgrin
   
Needed to mark a "baseline" before I did the pins ( I do the pins first,BTW)
   
Then lay out some pins...
   
And use the backsaw to make a few cuts....then chop out the waste..
   
Clamped it back in the vise...to clean things up.   Used the pins to lay out the tails....chop the waste out..and dry fit..
   
Not too bad?   Then went and did a second corner....back was having issues, decided to sweep the floor, and close up shop....I can always work tomorrow
Stay tuned
Winkgrin
Show me a picture, I'll build a project from that
Reply
#25
A little over 2 hours of shoptime, today...had two more corners to dovetail, and then a groove made for the plywood bottom..

A little more about the dovetails....once the pins are made, I use them to lay out the tails...just easier for me.
Cool  
   
Just stand the pin board where it is supposed to go, making sure it is facing the right direction...Trace around each pin.  Knife a base line, bandsaw to make a few cuts..
   
I use the bandsaw because I can SEE the cuts being made, and can stay on the waste side of the lines...the more of the lines I leave, the tighter the fit will be.

have an old Harbor Freight 1/4" chisel....tip has been ground a bit different...
Rolleyes
   
Long ago, was told by some "guru" to grind the end this way, to better work in tight corners....
Rolleyes
   
Ok...clean things up, for a dry fit..
   
So, all corners have been made....time for the grooves. Just like on the last box...a backstop and a pair of screws to hold the sides still, long enough to plough a groove

Longer sides weren't too hard to do...had to lighten the cut a bit, was going too deep.   The shorter ends?
Confused 
   
were a bit of "fun".  dry fit to see how the grooves line up..
Winkgrin
   
Then fit the plywood panel.....length was trimmed over on the Stanley #358 Mitre Box...width?  We have ways..
Rolleyes
   
Was a tad too wide, and one end was wider than the other...mark a line, plane down to the line...dry fit, until it did fit..
Cool
   
Then glue and a forest of clamps...
Rolleyes  
   
Now a matter of letting the glue cure a day, then clean things up, add some hardware and the lid....maybe a coat of stain...
Winkgrin 

Stay tuned
Cool
Show me a picture, I'll build a project from that
Reply
#26
Box is out of the clamps, this morning....and didn't fly apart..
Rolleyes 

Sanders and a Stanley #3, Type 11 to do a bit of clean up  
   
All four sides.   Then plane and sand the lid to match the box...
   
Then decide which was the front, and which was the back...
Confused
   
The decide on some hinges
Rolleyes 
   
And the rest of the hardware...
Rolleyes
   
That headless nail is to be chucked into a drill, to make pilot hole for those TINY screws....

Maybe later this evening, I can install a few items?

Stay tuned.
Winkgrin
Show me a picture, I'll build a project from that
Reply
#27
Hardware has been installed.  Coat of stain applied....PIP?
Confused  
   
Along with 3 or 4 coats of Amber Shellac....
Winkgrin
   
6" combo square, to show the size of the box...
Cool 
   
Before the shellac...end view..
   
Hinge side...
   
Was enough room for any dividers, this time around....
Rolleyes   
   
Fancy latch?   Stacked the two boxes up..
   
Dollar bills in the top, change in the bottom?   I think I can close the book on this little box..
Cool
   
Not too bad, for just scraps?
Rolleyes

Thanks for looking in...
Winkgrin
Show me a picture, I'll build a project from that
Reply
#28
Very nice.  I need to start taking on some projects like this.  I'm just getting started in hand tool use and they seem like reasonable things to try to make.

Keep them coming.
Reply


Forum Jump:


Users browsing this thread: 1 Guest(s)

Product Recommendations

Here are some supplies and tools we find essential in our everyday work around the shop. We may receive a commission from sales referred by our links; however, we have carefully selected these products for their usefulness and quality.