Posts: 4,004
Threads: 0
Joined: Nov 2010
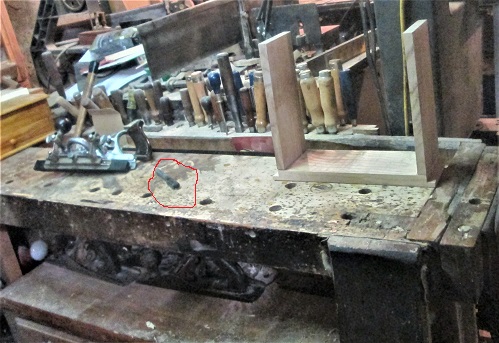
Ok...in order to get "Groovy" today...need to clear the deck for action..
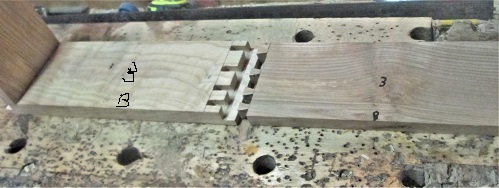
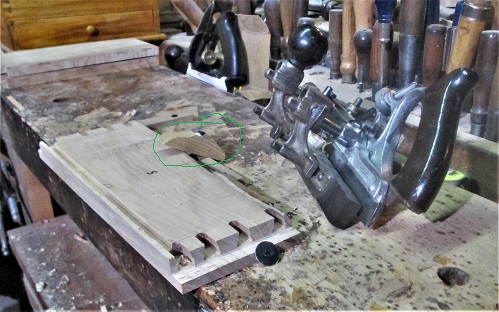
Item circled in red is a Black Sharpie....using that to mark the drawer number on each part, and where a groove needs to go..
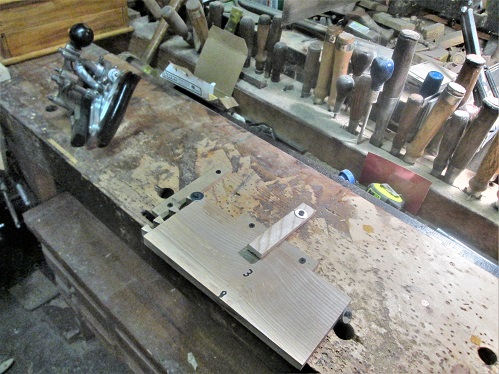
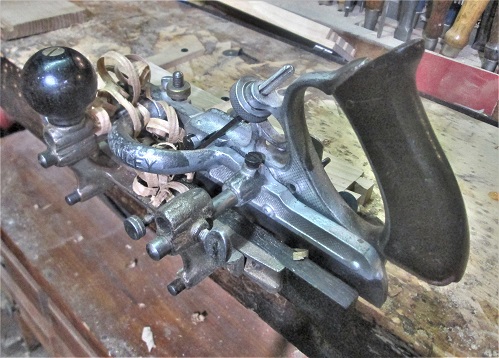
Then set up a jig to hold the part still, long enough for the Stanley 45 to mill a 1/4" x 1/4" groove..
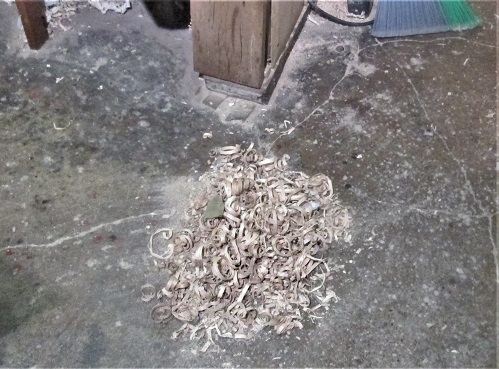
Then start making noodles ..
I had 5 drawer fronts to mill, and, 10 drawer sides to mill. broke the hold down on the jig, made a new one..
That other plane in the background? A KK 4c, because not all these parts were flat. couple of swipes took care of that.
Had an old candle handy, helps the 45 slide in the grooves better. Right knee was complaining...since I do push the planes using my right leg...so..once the last of 15 grooves were done..time to sweep the mess up..
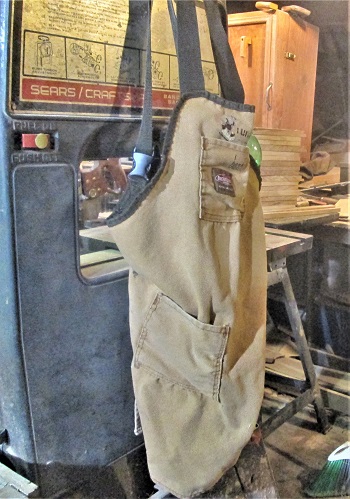
Hang up the shop apron..
And call it a day....about 90 minutes IN the shop..
Tomorrow, I get to mill 5 drawer backs, and 10 drawer slides...tablesaw will be getting a workout.
Stay tuned...
Show me a picture, I'll build a project from that
Posts: 4,004
Threads: 0
Joined: Nov 2010
03-24-2022, 03:29 PM
(This post was last modified: 03-24-2022, 03:30 PM by bandit571.)
Was headed to the shop, last night,was going there to take a few pictures....but, I had to walk by that stack of boards, and the last of the 4' long planks decided to come along.....
Pictures taken...board wanted milled...as I needed 5 drawer back made....wavy edges, ripped those away...drawer back height was 3-5/8" ripped that...wound up with parallel edges...so I could crosscut for rough length...had no idea how deep the dado will be to house them in....
Had a leftover from doing the fronts, it joined the 4 from the new plank...All were 7/8" thick...a bit much for a drawer back....set up the Kerfing Tablesaw...trying for 1/2" thickness...blade won't quite saw deep enough. so
This saw came down from it's rack....did not take very long...looking a bit ugly, though...maybe a quick clean up?
Didn't take very long...just 5 boards..
Now that I know how wide to make the dados...reset the saw, again..
IF this had been just 2 dados, I'd have used hand tools...but..10 dados...yeah.
There was then the matter of runners...need to make them first..THEN the grooves for them to slide in...so
Scraps from milling the drawer back to width..still at 7/8" thick....reset the saw to rip 10 strips about 1/4" or so thick...
That gave me the width of the groove for these to slide in...so..
A few trips over the saw (20!) and then call it a night...plan being to remove the 1/4" deep waste with a Stanley 45....that WAS the plan...
We'll see...stay tuned...
Show me a picture, I'll build a project from that
Posts: 4,004
Threads: 0
Joined: Nov 2010
Results of a very LATE night excursion to the shop...happens when I either get bored sitting around, or just not sleepy..
That pile is over 2" deep....must have done a bit of saw work?
Did a bomb go off? Round up the "Usual Suspects"!
Ok..apparently the tablesaw made a lot of cuts
Then the chisel went to work..
Then the other two flattened things out...
And then checked with a runner...
Looking for any "high spots" they might have missed....
And...all 10 sides were done like this....in one late night escapade ?
See what happens, when I get bored.....
Must have gotten tired, near the end..
These 2 are sides from the SAME drawer...they are supposed to be mirror images of each other? Need to fix one of these 2
Stay tuned...
Show me a picture, I'll build a project from that
Posts: 4,004
Threads: 0
Joined: Nov 2010
Plywood for the bottom of the drawers...bought 1/4" x 24" x 48" panel....need about 10" ripped...
Hmmm, this will be fun...as for where my fat body will be standing..
A little cramped....a thin plywood panel, four feet long, would tend to bend a bit..needed a hold down jig to keep things down at the saw blade..
Results?
Then remove the fence for a bit...make enough cross cuts to make 5 drawer bottoms....1/4" x 10" x 9-3/8" do a test fit...the 10" side was a hair too big....rip fence back onto the saw..trim. NOW, I can clean the saw off, and put it away..for now..
Because there just isn't a whole lot of room here in the shop..
Welcome to The Dungeon Woodworking Shop.
Should be about ready to glue some drawers together...?
And a 2..
And a 3..
And that should be enough, for now....still need to do 2 more drawers. I also need to remember to check for square..with a square..
And, if'n it ain't square, pull until it is....had #1 drawer that wasn't....more on THAT later..
Stay tuned...
Show me a picture, I'll build a project from that
Posts: 4,004
Threads: 0
Joined: Nov 2010
When these come out of the clamps..time for a little fine tuning...
Drawer fronts are planed flat, edges are given a beveled look with the plane,,,then sanded a bit to soften any sharp corners...
The groove for the runners are leveled as needed...router can't quite get all the way to the front of the groove, so
We have ways...then test the fits..
Runners are also fitted to the drawers, and trimmed for length...because,,,
Tain't a lot of room in here...managed to get a few done...
Then come later, lay the case on the other side, and add the runners to match those already done...
Stay tuned...had an issue with the "back" legs of the stand having a bow to them..and NOT in a good way..
Ok, that stick was cut to the exact fit of the front legs, where the drawers will slide in...yeah, both legs had bowed in a bit...decided to leave that stick in place to push the bow back out....took a 3 pound hammer to drive the stick into place. I worked on what drawers I could with the stick in place....then added a back to the case..
Nothing real fancy, just a shelf from a flat-pak desk....
Just a hair thicker than 1/4" (Metric?) then I can remove that spacer bar/stick...and install the last of the runners.
Stay tuned...
Show me a picture, I'll build a project from that
Posts: 4,004
Threads: 0
Joined: Nov 2010
Ok..tasks for today...install handles on all 5 drawers..
Done. Use these to help install the last of the runners..
And make sure all the drawers work freely...
Then start brushing on a coat of Amber Shellac inside and out on the drawers...
Got 2 out of 5 done...always tomorrow, eh.
Hauled a couple brushes and a quart of Kilz Primer to the shop, as I was going to paint the pine parts white, for now..Right knee said it was quitting time..so no painting got done, today....
Might just get this thing done this week?
Stay tuned...
Show me a picture, I'll build a project from that
Posts: 4,004
Threads: 0
Joined: Nov 2010
Rest of the drawers have a coat of Amber Shellac...
Then a can of primer was stirred up...
And brushed onto all the pine sides of the stand...if it will show, it got painted..
And even the plywood top..
Letting all this dry overnight...then see how things look...
Show me a picture, I'll build a project from that
Posts: 4,004
Threads: 0
Joined: Nov 2010
Need to resize a couple pictures, but....white primer was covered up with a light blue (Rattle can) Base and table of the Drill Press was looking a bit "tatty", so they got a dose of gray primer...for now..
And...
Details..
Haven't decided on which vise to install, yet....either that one..or
This Quick Release version...
Stand is done...other than loading up the drawers...Thanks for looking in!
Show me a picture, I'll build a project from that
Posts: 256
Threads: 0
Joined: Feb 2011
04-01-2022, 11:05 AM
(This post was last modified: 04-01-2022, 11:06 AM by Grandpa Dave.)
"Stand is done...other than loading up the drawers..."
Thanks Bandit! ;=)
BTW, nicely done!
If you continue to cut corners, you'll end up going in circles!
It's my thumb so I'll hit it if I want to!
|
