Posts: 4,135
Threads: 0
Joined: Nov 2010
Making a wee bit of sawdust..

1 x 4 x 6' cut in half....two stiles made, and installed..

Then two ends were cut on that mitre box, to 16-7/8" long...and those got installed...
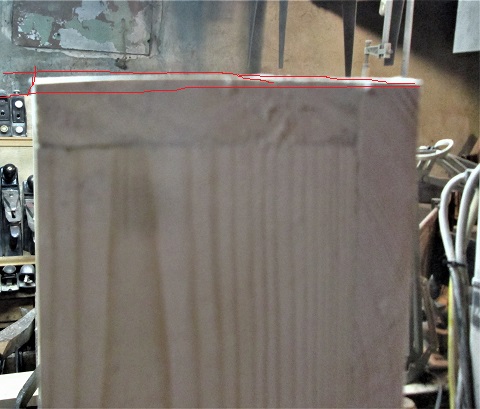
Ends cleaned up, squared up. decided which end will be the "top" of the door, and marked that..

"T" is for Top...one stile was then given a bevel, so the door can close past the other door..
had to use that Stanley No. 7c, Type 9...again..

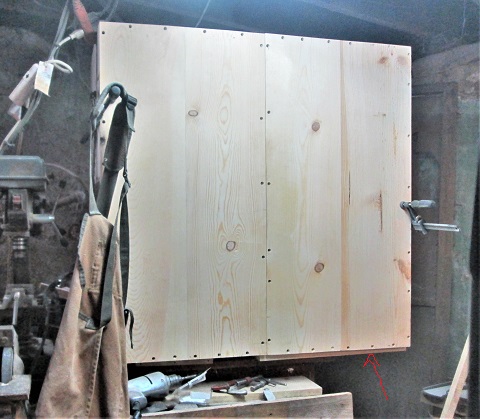
Then add a scrap for the door to sit on, for now, and get a clamp ready...
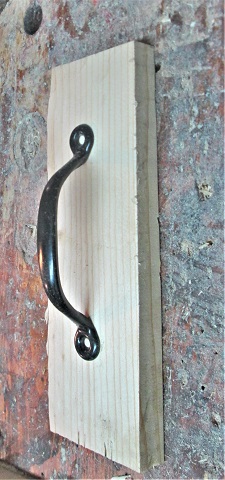
Should keep it out of the way, until I get the hinges bought. Might use something like this..
As the handles for the doors. Thinking piano hinges to hang the doors...install them on the doors, then onto the case...seems the easiest way...
Stay tuned...I also finished that chisel rack today....was a busy day.
Show me a picture, I'll build a project from that
Posts: 4,135
Threads: 0
Joined: Nov 2010
A chisel rack to hang on the inside of the tool cabinet door?
had a few "extras" to sort through, first..

Whittled this done to what stays in the tool well rack, and what will go in the door rack..came up with 7 chisels..

Dug through the stash of scraps, found a few sticks...a thicker one, a not so thicker one, and thin one. The not so thick one was cut up into spacer blocks. Then laid out with the chisels on the thicker strip. A dab of glue under each block, moosh around a bit...working from the ends inward...looked good? Then a bit more glue dabs, and a few clamps..

Let this mess sit overnight....

Then, this morning, removed the clamps...and started to clean things up..
Wanted a nice straight side, to place against the fence on the Mitre Box..and trim the ends square..

didn't have to cut too much off, either...then back to the Stanley #3 to work on the rest of the sides..
Along the way, used a block plane to champfer most of the sharp edges...then a counter bore..
and the pilot holes for 3 screws. Then, did a test run with the chisels...making sure none would hit anything..clamped the rack in the vise..

may come back with a counter sink bit, and work on the tops of the slots a bit....so the chisels will settle in better

And that will do, for now....will have to soak this in a finish...Oak and steel don't play nice together..

Stay tuned

Show me a picture, I'll build a project from that
Posts: 4,135
Threads: 0
Joined: Nov 2010
There are still 3 eggbeater drills hanging up....in a rack right above the top of the bandsaw.....rack is attached to the joist overhead....which is also the joists for the up-stair's flooring to attach to. The drills seem to rattle a bit, when someone walks through the room above the shop...
 ..drills also getting dusty sitting up there...

So...may move the those 3 drills over, and into the new cabinet....Maybe on the inside of one of the doors...hhmmm, make a new rack? Or, recycle the old one?

Now, hammers? How to hang a few....til for them will be torn down, to make room for an improved plane til.

Later, after this cabinet is done, and filled up.....
 I may re-do the plane til, and do without that hammer til....we'll see....

Show me a picture, I'll build a project from that
Posts: 4,135
Threads: 0
Joined: Nov 2010
Hinges have arrived.
 ..film at 2300 hrs...

Show me a picture, I'll build a project from that
Posts: 4,135
Threads: 0
Joined: Nov 2010
Chisel rack installed?

Check.
 Saw hung on the door?

Check. Right door hung..?
2" long screws for the hinge..?
Check
 Left door beveled?
Check
 Left door hung..?
Check
 Handles and a Hook & Eye Latch ( for now) installed ?
Check
 Chisel rack and the handsaw were added to the lefthand door. Bandaid added to the left thumb? Check. Drill bit had jumped out of a pilot hole, and into my thumb.
 Drill bit was then shown the trash can.

was a busy day. Stay tuned, still a bit left to do..

Show me a picture, I'll build a project from that
Posts: 365
Threads: 0
Joined: Nov 2019
(04-01-2020, 07:01 PM)bandit571 Wrote: Drill bit had jumped out of a pilot hole, and into my thumb.
 Drill bit was then shown the trash can. Drill bit was then shown the trash can.

That poor drill bit! It was only doing what it was made for--making a hole, where ever it was pointed!
Looking pretty nice, there, bandit.
Posts: 4,135
Threads: 0
Joined: Nov 2010
had a problem...there was a til above my bandsaw....

gathering dust and spiders....took this thing down, recut the til a bit, added shelf brackets...

may look into a few "keepers" across the slots. Then, I emptied out the Hammer til...

Looks like I have room for one more? While the door was standing open...seems a couple of hitch-hikers showed up..

Ok...then some other saws got moved around, and hung up..

4 coping saws? Each is set up a bit different than the others...and a deep reach one, too. Red shelf is getting filled up, slowly..
Also added a couple keepers for the larger braces ( all I had, at this time..)

Dug up the ONLY Veritas "toy" in my shop....a 3/8" tapered plug cutter....bough it when they first came on the market..

Had to slow the drill press down as slow as it could go...cutter has a bad habit of burning the wood. Made 2 dozen plugs..
Small screwdriver to pop each plug loose, bead of glue around the narrow end, tap in place with a small hammer, watching the grain patterns for the best match..installed 21 plugs...
Look like I need to cut another 2 dozen. letting the glue dry a while, come back with a chisel, and trim flush....maybe a swipe or two with a block plane?
That was about it, for today
 Noticed the other day, the beltsander was feeling a bit..heavy.....opened the filter compartment.....was packed solid in dust, along with the filter....cleaned that mess up...maybe it will work a bit better, now?

Stay tuned....anyone want to see the $0.05 Tour?....

Show me a picture, I'll build a project from that
Posts: 5,353
Threads: 0
Joined: Jan 2014
Location: Santa Maria, Ca
Yes indeed Bandit. All of the shop improvements/modifications definitely
call for a shop tour.
Mark Singleton
Bene vivendo est optimum vindictae
The Laws of Physics do not care about your Politics - Me
Posts: 4,135
Threads: 0
Joined: Nov 2010
04-03-2020, 05:17 PM
(This post was last modified: 04-03-2020, 05:18 PM by bandit571.)
Sharpened the plug cutter, made the rest of the plugs, all eleven of them. Latches are installed...
plugs are installed, trimmed flush, sanded smooth..

A coat of the Famous Witch's Brew was brushed on, then wiped down..

Smelly stuff....seems to be about 50% BLO....stinks. the right hand door has a glue up going on..
Added a strip to keep the planes from sliding out the door...

Corner is filling up...added a few more keepers to get the braces in place..

Chisel rack even got a coat of finish..

Soooo, looks like this is open for Business?

Be sure to close the doors when you are done..

And tip the Tour Driver on the way out

Show me a picture, I'll build a project from that
Posts: 2,426
Threads: 0
Joined: Jan 2008
Location: Irving, Tx
Thanks for the tour, I left a tip, 4th row, right side, window seat.
It is a nice feeling when the tools are in their place. My shop may have been actually clean twice in the last twenty years. But even at its dirtiest, the tools get put away except in rare occasions.
I think you will enjoy having the cabinet.
"I tried being reasonable..........I didn't like it." Clint Eastwood
|


 Drill bit was then shown the trash can.
