10-13-2019, 07:35 AM
I'm putting my Delta Rockwell Super 990 back together. If you saw the thread in which I worked through the King Bolt issue, well, this is that saw.
Saw was made about 1960; I picked it up for $100 four years ago. I have not used it since then; it's been in pieces while I cleaned it up and finally (!) got a new king bolt machined. So now it's going back together and I have pulled the cover off of the motor just to check things out while it's still easy to access.
I have a couple of questions about how it's wired and the start capacitor.
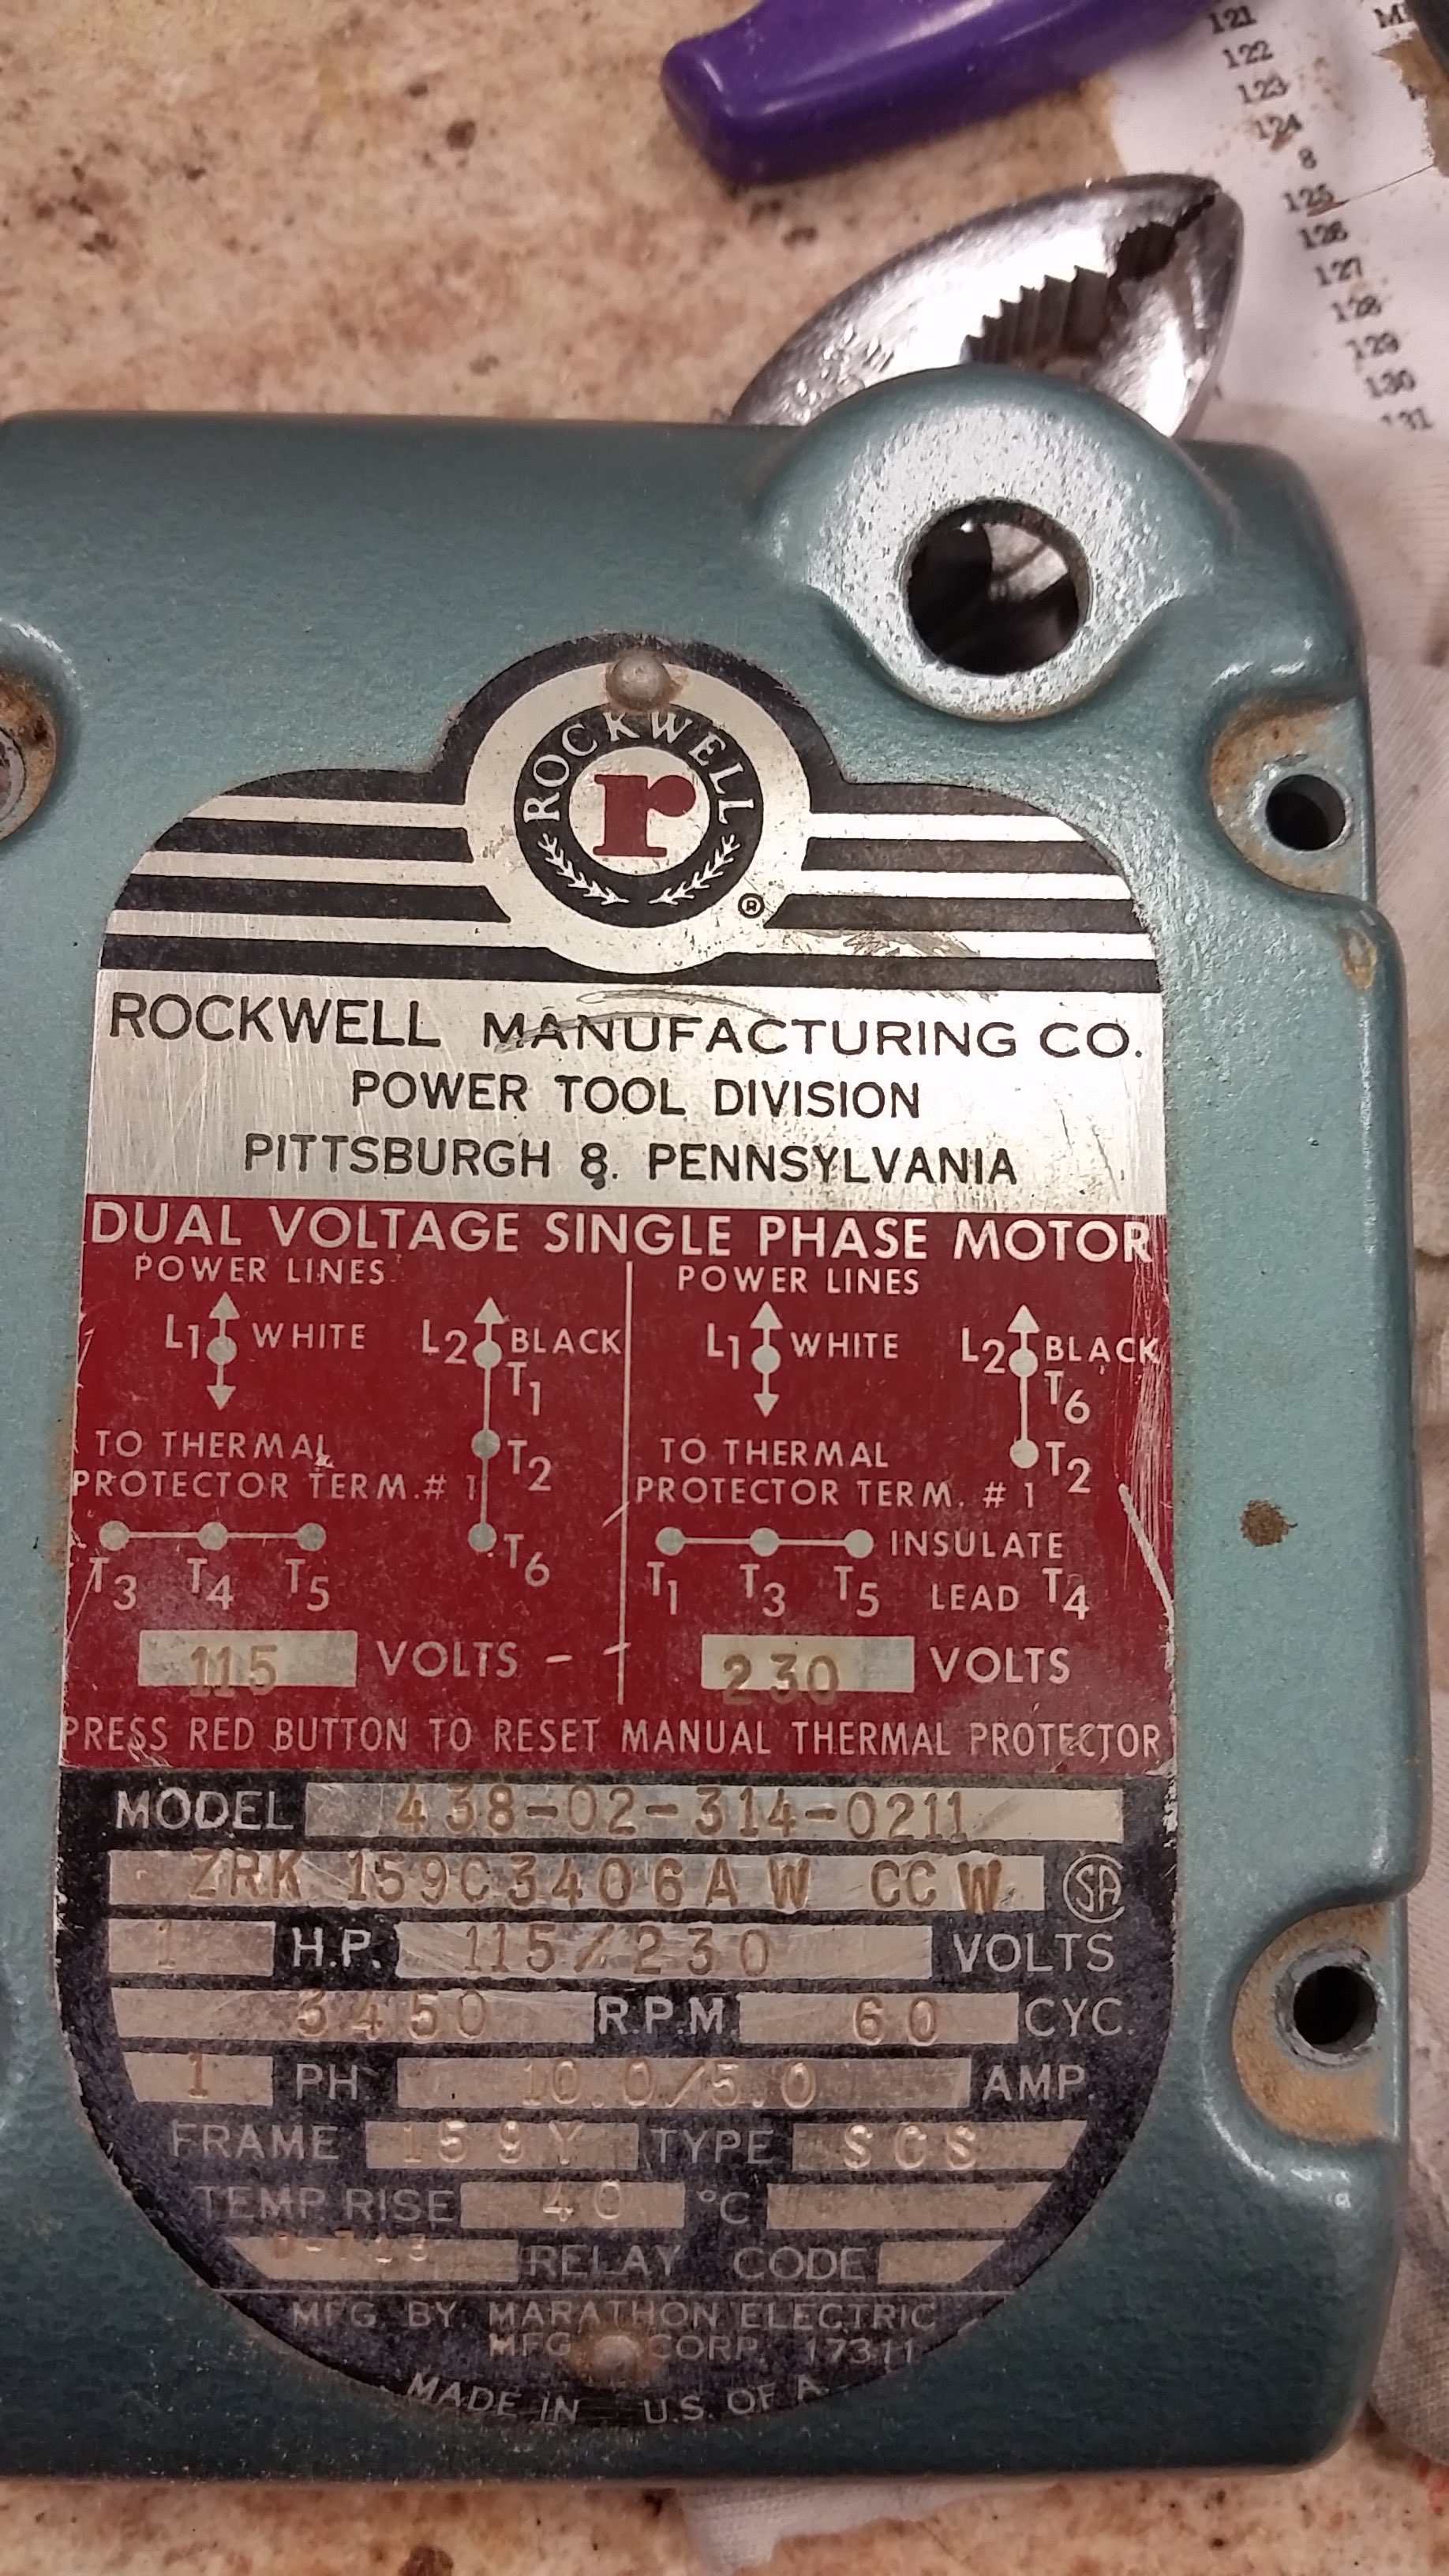
First pic is the saw identiplate. It also has the wiring diagram for voltage setup.


I'm thinking I want 220V service on this machine. I have both 110V and 220V available at the position where the saw will be placed.
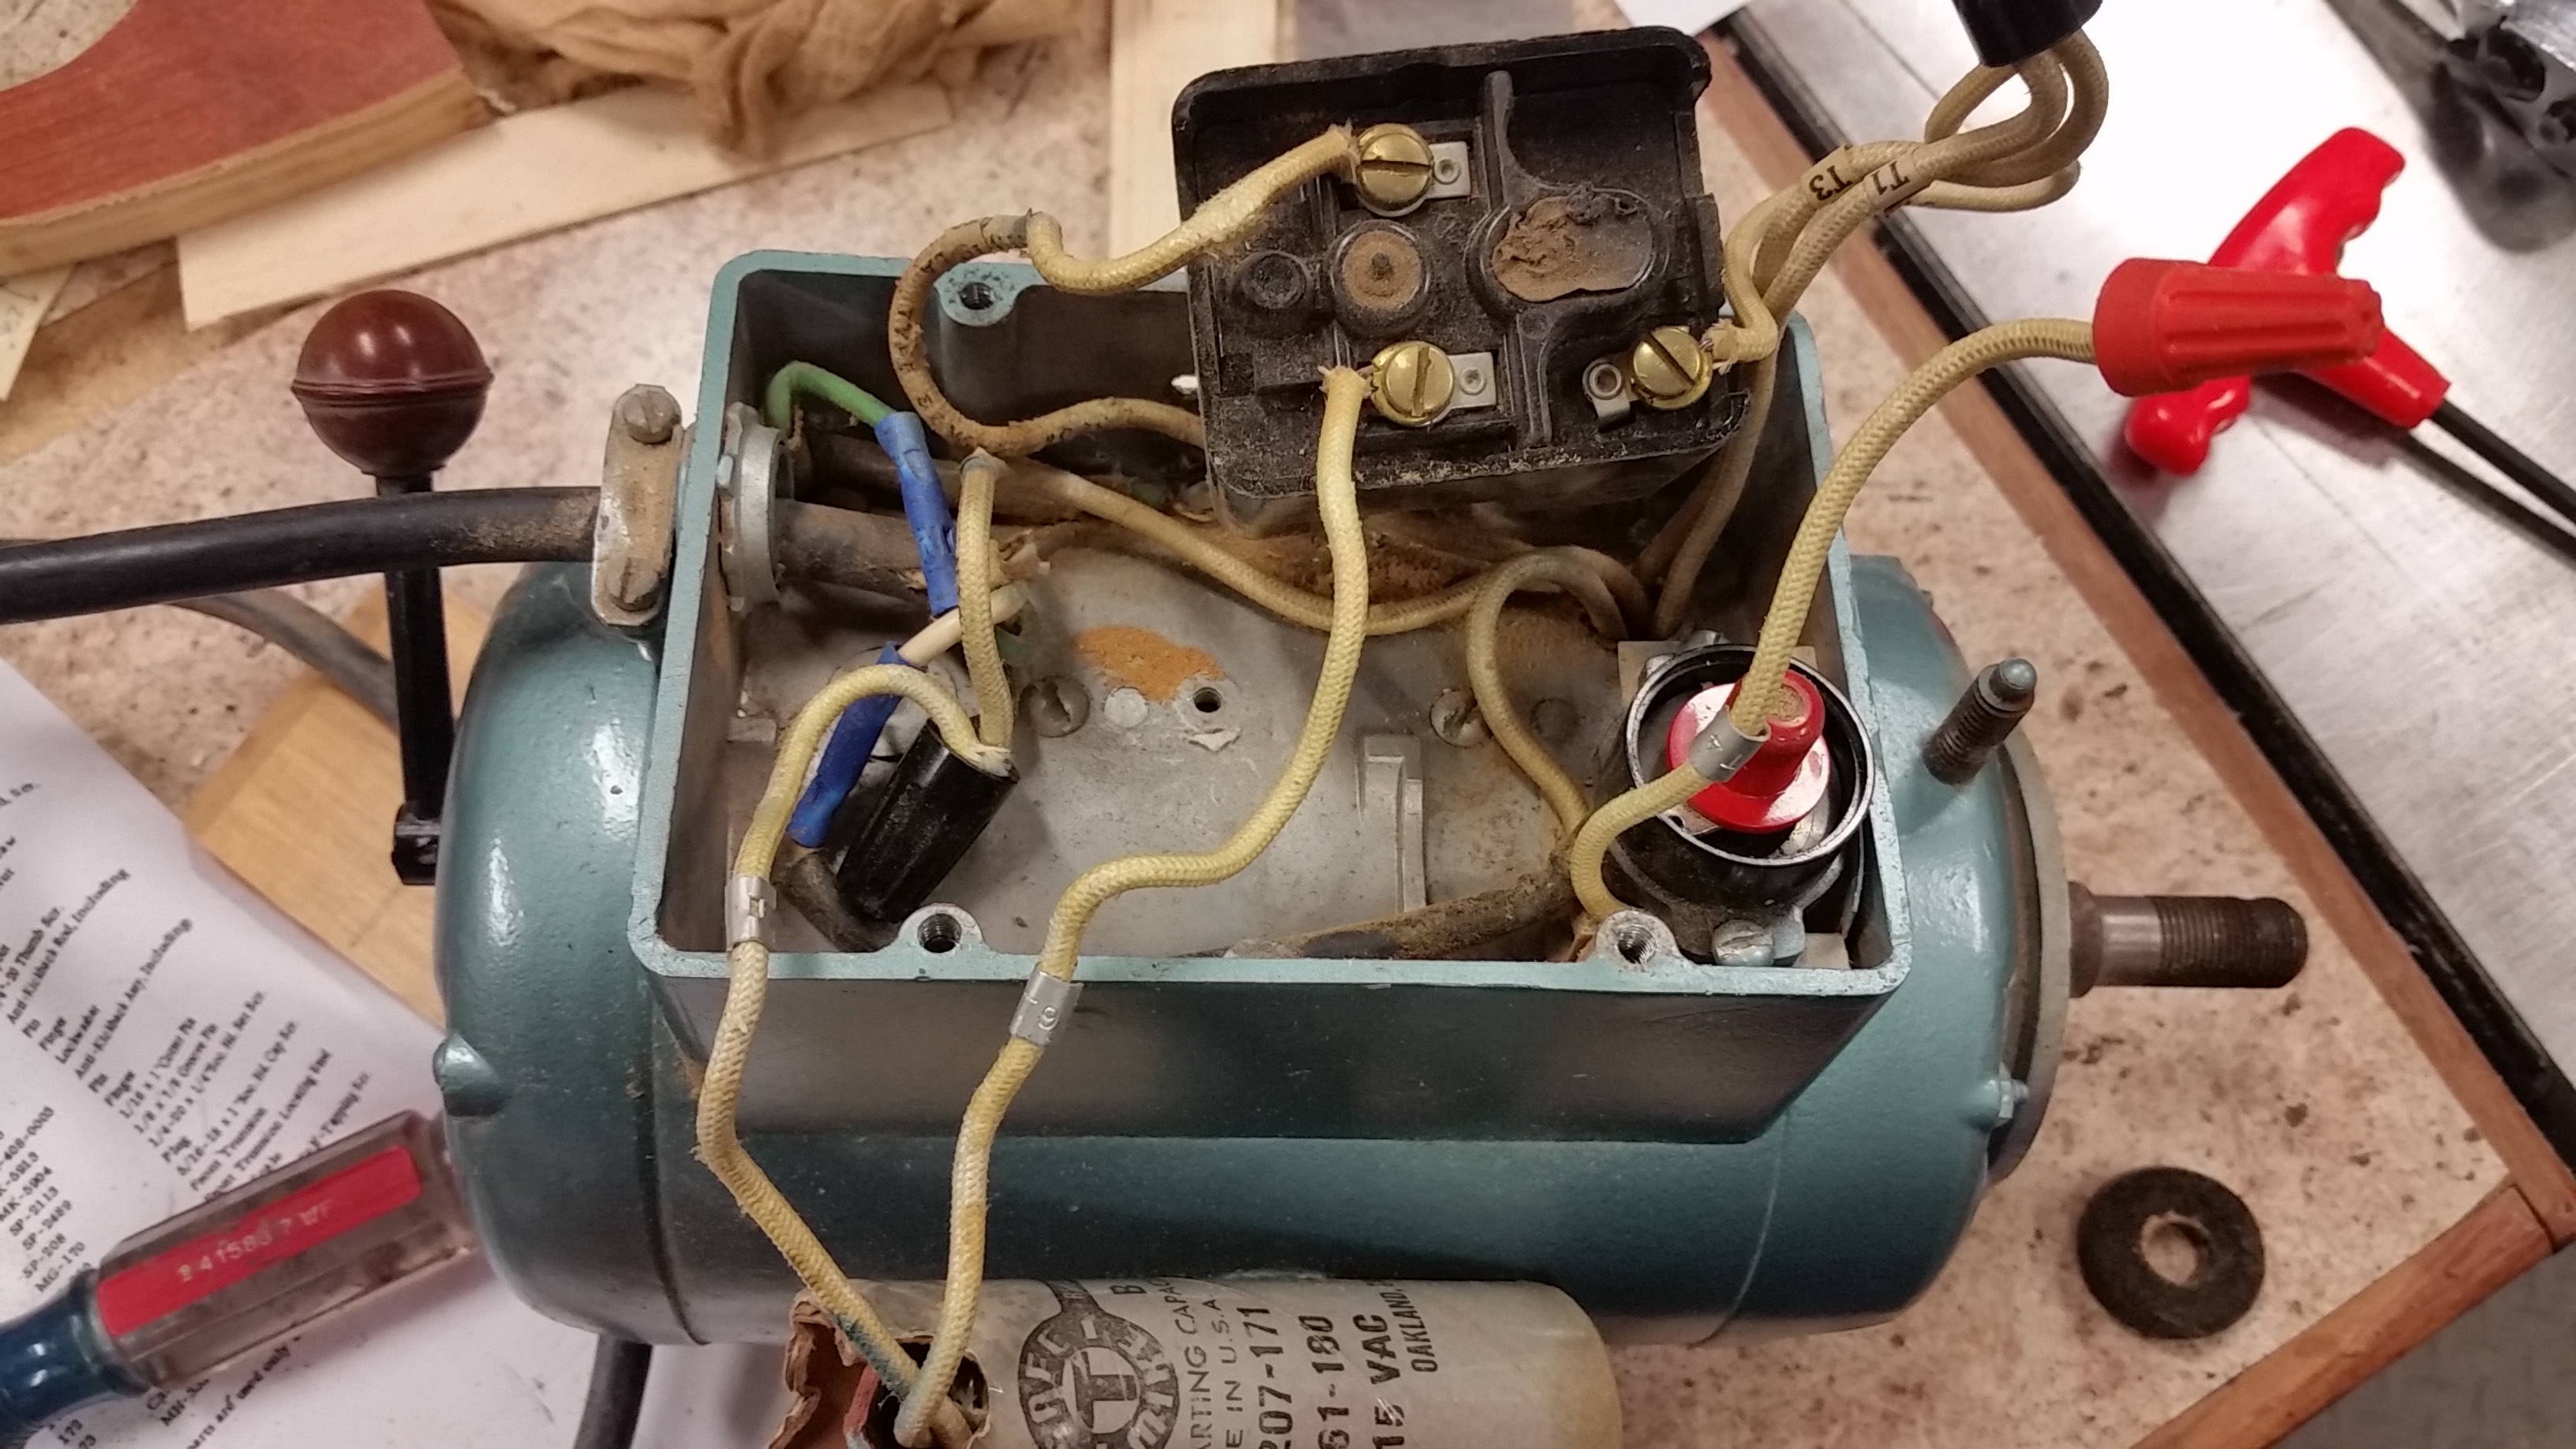
When I bought the saw, it had a standard 110V male plug on the end of the power cord. However, when I compare the existing wiring in the following picture to the diagram, it appears that the wiring inside the box is already set at 220.


You may not be able to see it well in the pic, but all wire seem to be factory-marked and easily identifiable.
T1, T3, and T5 are wired together to the white power lead as shown on the identiplate. T2 and T6 are together with the black power line. T4 is terminated by itself (can be seen near the reset on the right side of the picture.)
I suppose there's a couple of ways this may have occurred. The previous owner have begun rewiring and then decided to sell the saw. Or he could have just planned to kluge a 220V circuit with an improper receptacle so he didn't "have to" buy a new plug.
Question 1: Is this saw already set for 220V operation? I think so, just need to confirm.
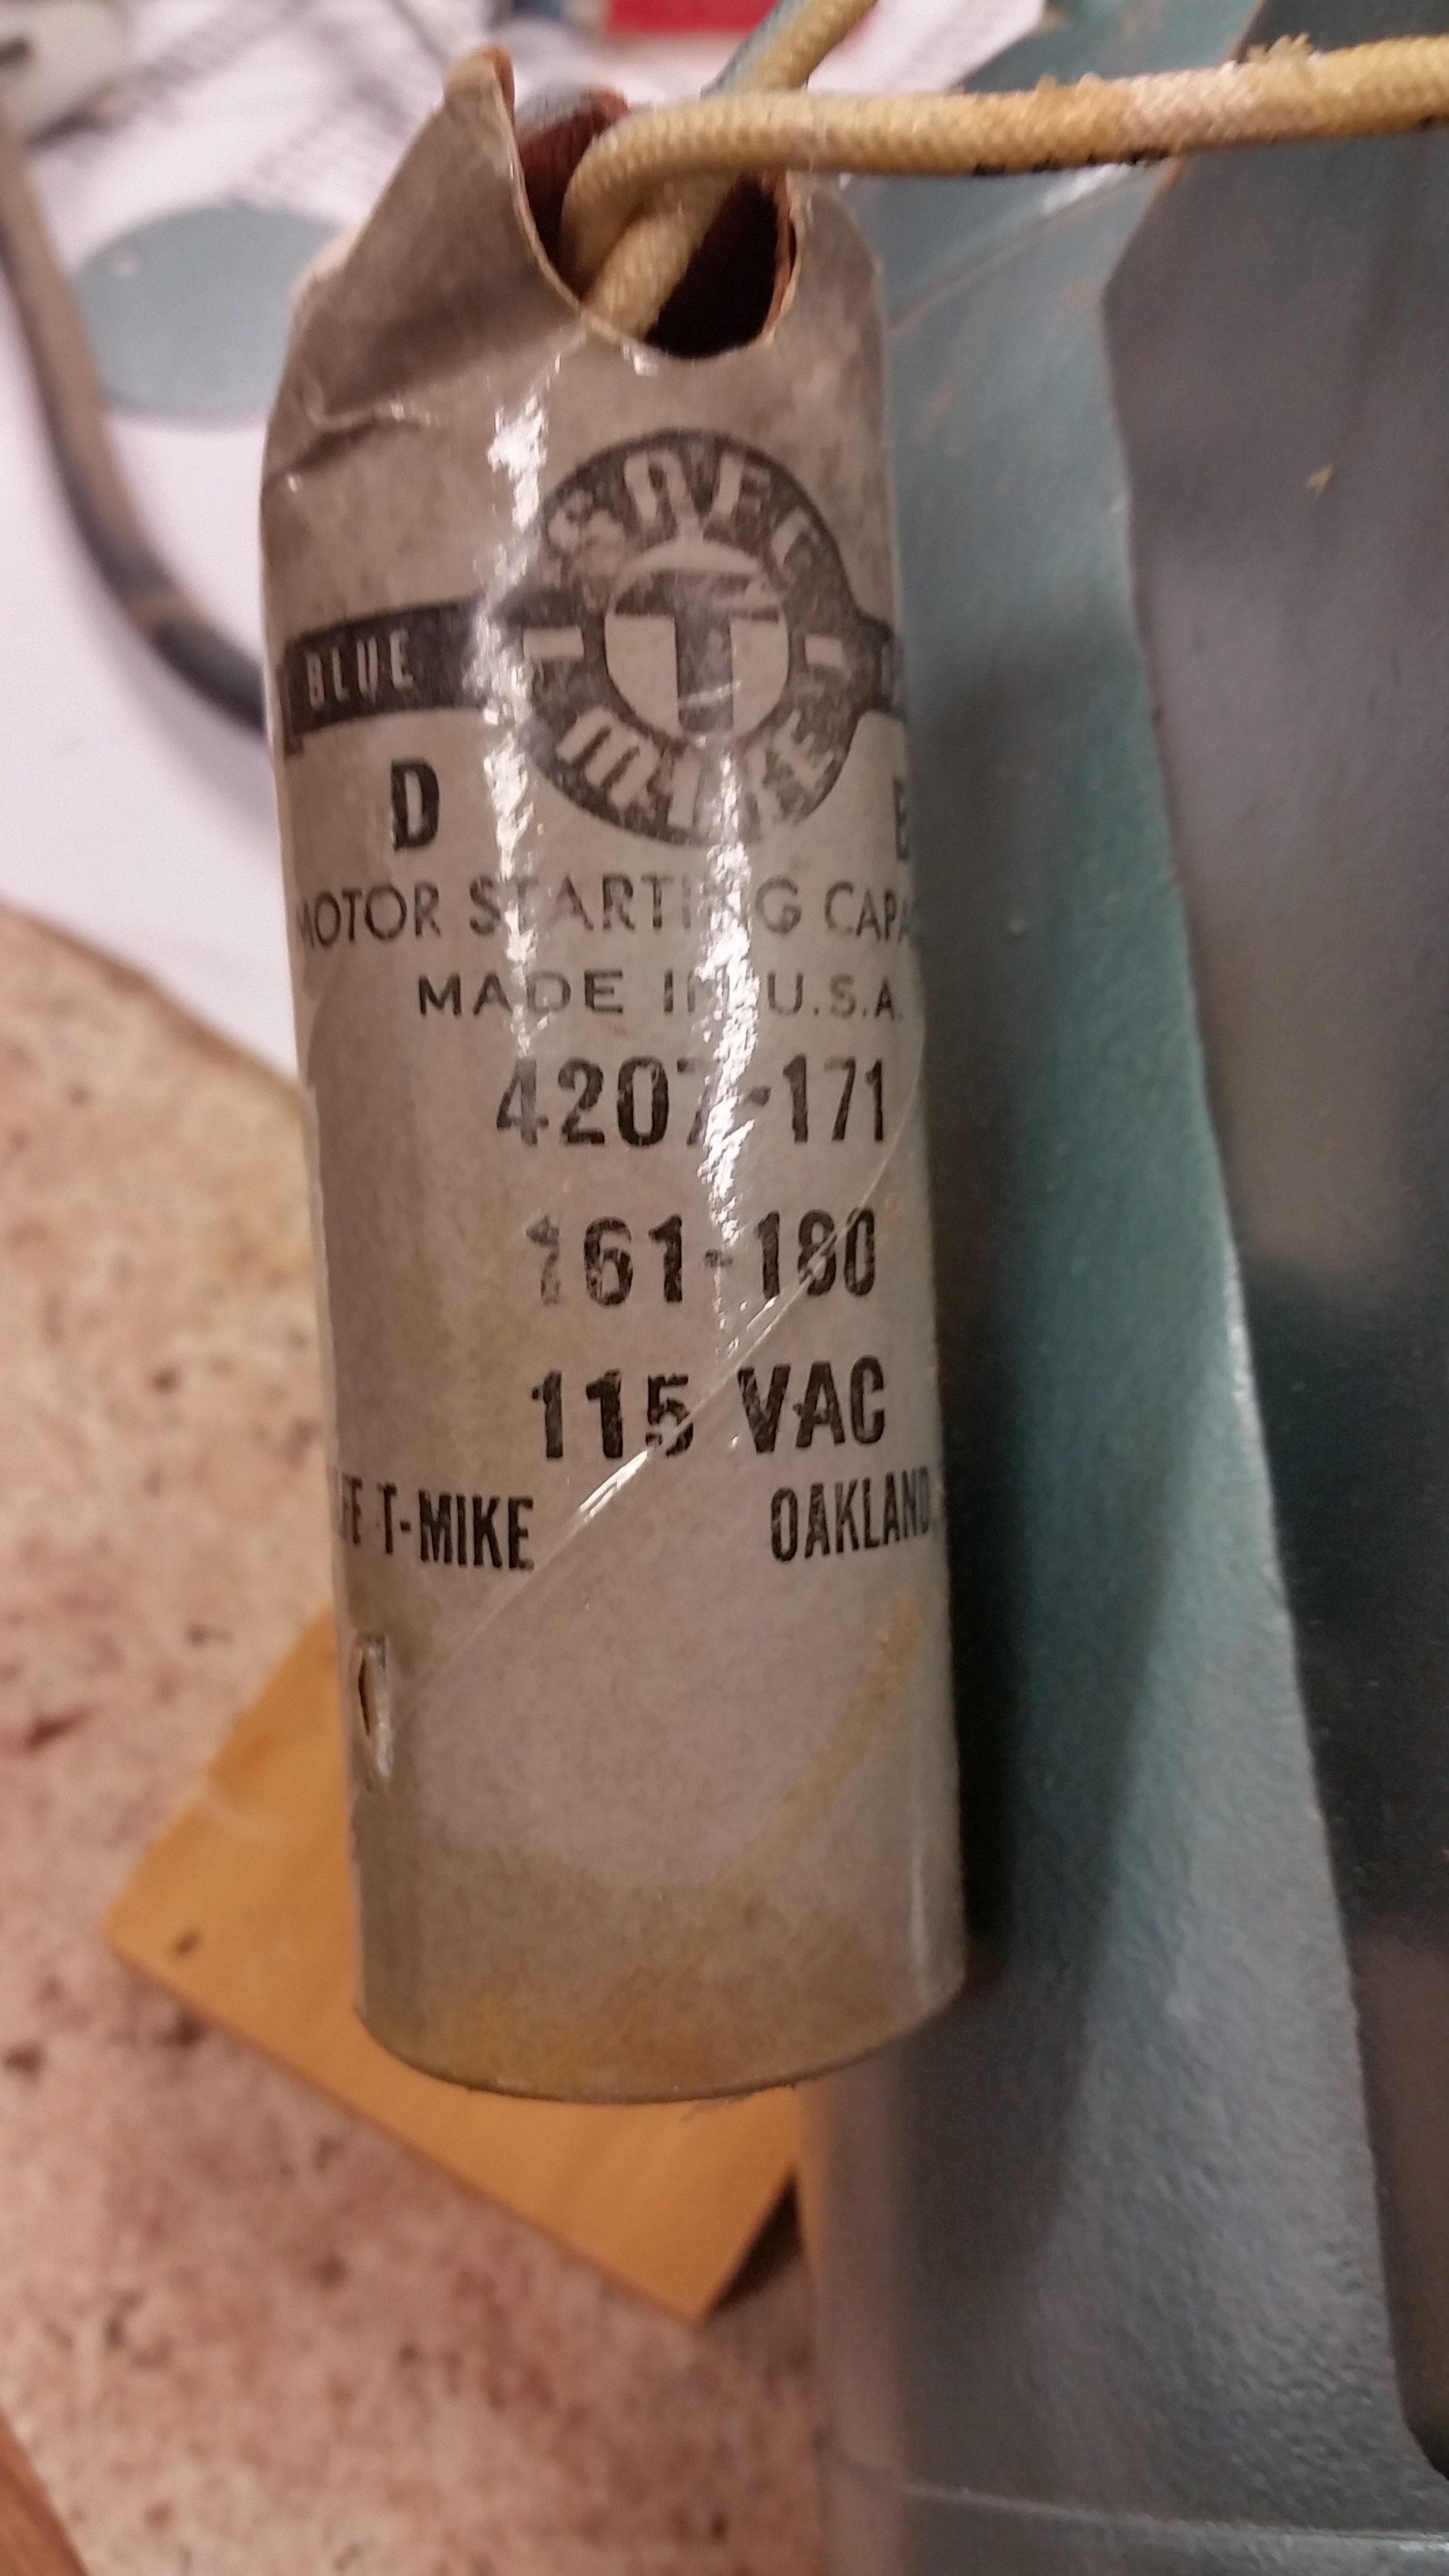
Next pic is the start capacitor. It is not bulging, or leaking anything. Appears fairly clean. But it's marked for 115V.


Question 2: Do I need a different start capacitor to run this motor on 220V? If I do, is there enough info on this label to purchase a standard replacement? I've bought capacitors in the past, and I recall different information being printed on them.
Thanks for any assistance...
Saw was made about 1960; I picked it up for $100 four years ago. I have not used it since then; it's been in pieces while I cleaned it up and finally (!) got a new king bolt machined. So now it's going back together and I have pulled the cover off of the motor just to check things out while it's still easy to access.
I have a couple of questions about how it's wired and the start capacitor.
First pic is the saw identiplate. It also has the wiring diagram for voltage setup.

I'm thinking I want 220V service on this machine. I have both 110V and 220V available at the position where the saw will be placed.
When I bought the saw, it had a standard 110V male plug on the end of the power cord. However, when I compare the existing wiring in the following picture to the diagram, it appears that the wiring inside the box is already set at 220.

You may not be able to see it well in the pic, but all wire seem to be factory-marked and easily identifiable.
T1, T3, and T5 are wired together to the white power lead as shown on the identiplate. T2 and T6 are together with the black power line. T4 is terminated by itself (can be seen near the reset on the right side of the picture.)
I suppose there's a couple of ways this may have occurred. The previous owner have begun rewiring and then decided to sell the saw. Or he could have just planned to kluge a 220V circuit with an improper receptacle so he didn't "have to" buy a new plug.
Question 1: Is this saw already set for 220V operation? I think so, just need to confirm.
Next pic is the start capacitor. It is not bulging, or leaking anything. Appears fairly clean. But it's marked for 115V.

Question 2: Do I need a different start capacitor to run this motor on 220V? If I do, is there enough info on this label to purchase a standard replacement? I've bought capacitors in the past, and I recall different information being printed on them.
Thanks for any assistance...


![[Image: 48908070518_0b12529644_c.jpg]](https://live.staticflickr.com/65535/48908070518_0b12529644_c.jpg)

![[Image: 48914815111_b74a4b5e30_c.jpg]](https://live.staticflickr.com/65535/48914815111_b74a4b5e30_c.jpg)
![[Image: 48914811056_88d2510880_c.jpg]](https://live.staticflickr.com/65535/48914811056_88d2510880_c.jpg)
![[Image: 48915021372_a122fd5ee4_c.jpg]](https://live.staticflickr.com/65535/48915021372_a122fd5ee4_c.jpg)
![[Image: 48915017567_5463fcc618_c.jpg]](https://live.staticflickr.com/65535/48915017567_5463fcc618_c.jpg)
![[Image: 48914290248_cfa2635aaa_c.jpg]](https://live.staticflickr.com/65535/48914290248_cfa2635aaa_c.jpg)
![[Image: 48914822961_f762f0a204_c.jpg]](https://live.staticflickr.com/65535/48914822961_f762f0a204_c.jpg)
