Posts: 4,037
Threads: 0
Joined: Nov 2010
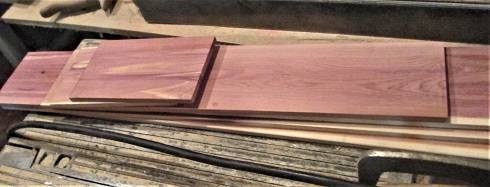
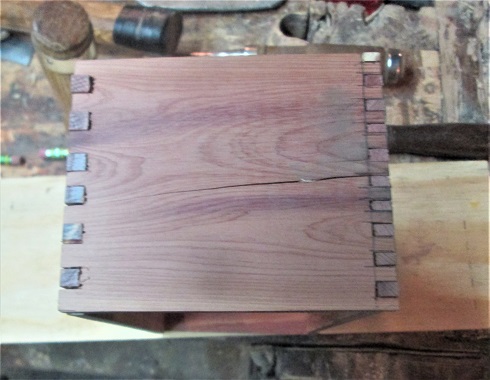
Seems I have a nice supply of thin Aromatic Red Cedar slats.....had to buy a carton of the stuff....to get 4 slats for the bottom of a Blanket Chest project.....Which left a big stack of stuff like this....

Thought about those small souvenir boxes places are always trying to sell.....Thought maybe I'd try a few..
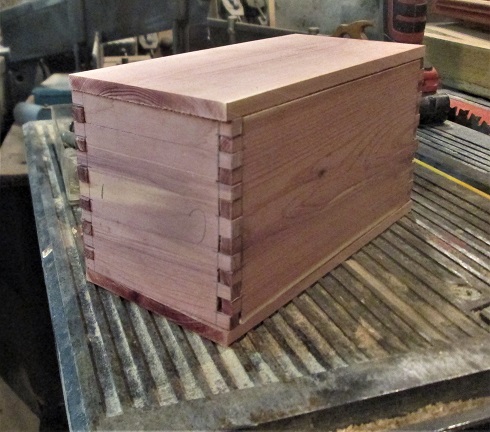
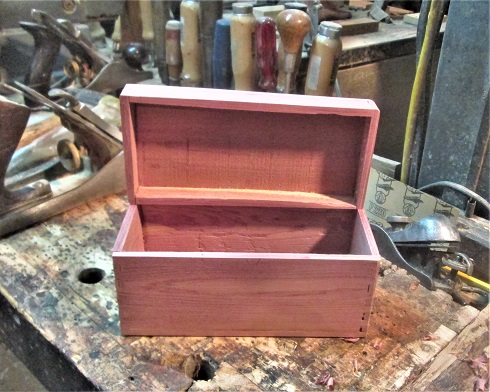
First attempt....after the tongue and grooves were ripped off...was made using finger/box joints...
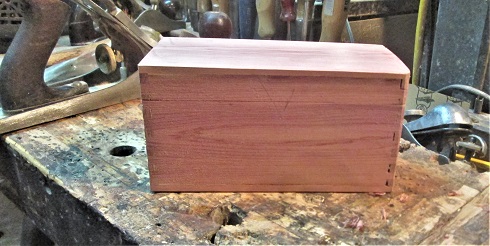
Dry fit....decided to glue the top and bottom in place....after things were cleaned up..
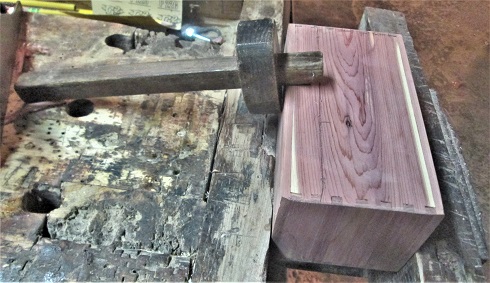
And a marking gauge run around...
So I could slice off the lid..
Plane away the saw marks...try some way too big hinges...
And, of course the last screw used here, split the wood....added a latch, too..no splits there, though...

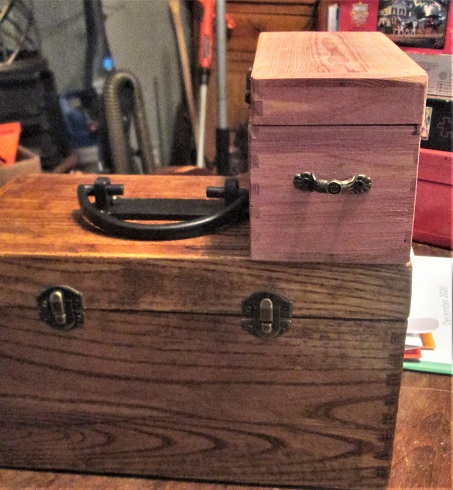
And a handle on each end...
needed a brush to apply a coat of varnish.....
And a lot of "issues" with the finger joints...oops

Decided the next versions will use ...dovetails...
Stay tuned...

Show me a picture, I'll build a project from that
Posts: 4,037
Threads: 0
Joined: Nov 2010
12-17-2020, 01:18 PM
(This post was last modified: 12-17-2020, 01:20 PM by bandit571.)
Cedar Box #2...
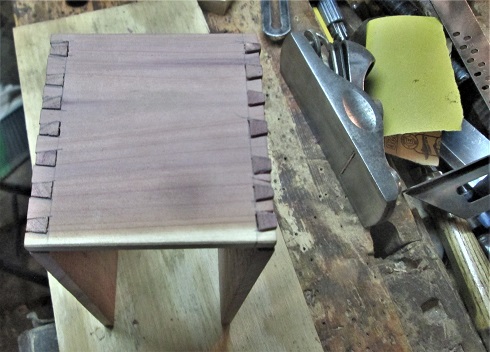
Was out of practice doing them dovetails....even thought a scrollsaw could help...

Pins first, by hand....tails by scrollsaw....well, it was just a thought....Pins on one corner were cut backwards....so that mess was sawn off...
back to Olde School...
Interesting fact...that is an older version of the Stanley Bevel Gauge....the angled end matches the angle of the dovetails I was doing....the newer versions are too...pointy

Made layouts a lot easier. Was finally able to get this glued up..
let it sit a day....then clean and square it up...
And slice the lid off....block plane to remove the saw marks...so the lid will sit a bit better than Version 1 did...
Corners didn't look too bad, either...

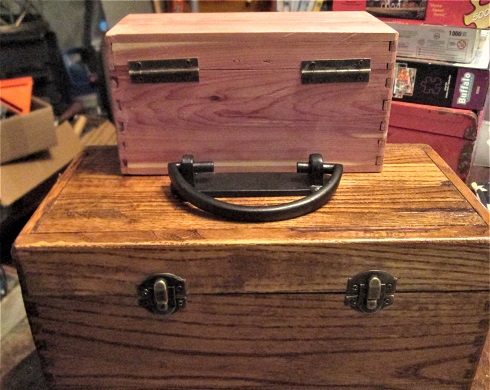
Was out of hinges, latches and handles...Road Trip to Hobby Lobby yesterday....$14 and change...and no wrecks in the snow..

Should last a few boxes. It was cheaper for me to just drive up there, than to pay for them to ship the parts to me...called being FRUGAL, not cheap...
I also remembered to pick up some brushes, while out & about.....

Wondering about a tray of some kind.....splayed out sides...handle down the middle? Or..no handle? Tray bottom a glued up affair? Dovetails on the corners?
Have plenty of stock to work from....carton is sold as Closet Liner.....15 sq ft of 1/4" T&G 4" wide, random length.....smooth one side...$30....

So....maybe a post about working with ( or, around) this stuff?

stay tuned...

Show me a picture, I'll build a project from that
Posts: 295
Threads: 0
Joined: Aug 2008
Location: NW ga
Noticed the angle on the old bevel square but didn't think about it. Good observation. Working with thin woods give me fits, guess I have to learn not to be so heavy hanged
Posts: 4,037
Threads: 0
Joined: Nov 2010
Loaded up a box, and headed to the shop...

Took a couple trips...Box #1....Camera....Brushes....I think I got everything..

Laid out where the hinges will go..
To be followed by another...
Then, since the hinges were out...removed the huge clunky ones from Box #1...and used the smaller hinges to replace them..

Block plane to level the patches, round a few edges.....
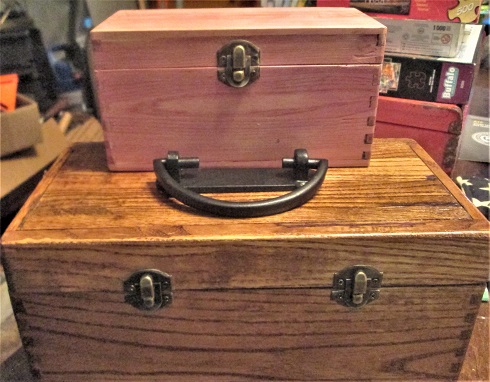
Box #2 also gets a latch....front of the box had a high spot...
had being the operative word..
and then something to carry the box around with...
Then both got a good sanding, a bit more plane work, and more sanding.....then a good wipe down. Then brushed on some varnish...
Just on all the outside surfaces...trying NOT to get any on the insides...
Then set out all the remaining Red Cedar boards...away from the drying varnish...
To sort through for parts for a tray...or 2....
Waiting on the varnish to dry overnight....then rub it out,,and see about a second coat....
as for the Tray?
Stay tuned....

Show me a picture, I'll build a project from that
Posts: 3,536
Threads: 0
Joined: Aug 2007
I use red cedar for a lot of outdoor applications. I made several largish (2'x4') planter boxes and a cold frame about 10 years ago, and they are still going strong.
Posts: 4,037
Threads: 0
Joined: Nov 2010
Second coat has been rubbed out. Smaller of the two boxes has been delivered....Wife's pastor gets a little present each year about this time....larger box is still awaiting a place to go...
Ok...parts for a tray...
Did not like the way the T&G were lining up....ripped those off...trying for about 12" length by 9" width...was able to do a glue up...
trying to install a c clamp onto 2 cauls, while holding the panel and the cauls steady.....and tightening the clamp...FUN

Another short section of plank, was ripped down the center..
Edges were jointed so the 2 will match each other..
These planks have one smooth face, and one a bit....rough....smoother took care of the rough..
Used these "ends" to help lay out the handled sides...
Then drill a 1" diameter hole at one end of the handle....and fire up the scrollsaw..
To get something like this...

And, of course, had to smooth plane the rough side...smooth, again
Waiting on the glue up..
Show me a picture, I'll build a project from that
Posts: 4,037
Threads: 0
Joined: Nov 2010
During Laundry Detail.....clamps removed from the glued up panel....panel was trimmed for square....ripped a bit for width...then over to the bench..

To clean off dried glue, and level the glue joints. one face was already smooth...the other face was very rough sawn....
Stanley No. 3, Type 11 took care of both.....so, maybe Tuesday, I can work on the corner joints?
As soon as I figure out which to use....

Stay tuned...

Show me a picture, I'll build a project from that
Posts: 4,037
Threads: 0
Joined: Nov 2010
12-24-2020, 01:47 PM
(This post was last modified: 12-24-2020, 01:49 PM by bandit571.)
Laundry Detail, good enough for an hour or two in the shop?
 Rounded up a few tools..

Then a bit of layout...pins first, of course..
use a big saw to make a few cuts...

Chop out the waste...
Oops....try better with the next set...at least that will be on the inside...

use the pins to lay out the tails....bandsaw to saw those out...
I might just be getting the hang of doing these...

had an issue with corner #4.....enough that it became Corner #3...and redo #4....
Then lay this mess down on the panel, to see how close a fit I came up with...

So...the next night's Laundry Detail.......
Set things over on the "assembly table" set up some clamps....spread some glue all around...
Dovetails were tight enough to not really need the longer clamps,,,,had plenty of C clamps to use, though...

Towels were dry, so I left this alone for the night....may check on it, later today...
Stay tuned

Show me a picture, I'll build a project from that
Posts: 4,037
Threads: 0
Joined: Nov 2010
Clamps came off today, trying to clean up the glue joints, was a matter of HOW to hold the tray securely enough...as I did have some end grain to plane on the ends of the tray..soooo

handles made things a bit tricky...end grain was sticking out a bit more than the end of the tray was....I also rounded over the edges a bit....then tried the sides...can't use the vise, handles would not take being clamped too well.....while I was using a plane...so
Later added a second clamp...

Around the inside of the handles....I used a dremel sanding drum....to round over the grips a bit....areas where the planes can't get to....Other curved spots around the top edges, a S. Smith & Sons do a bit of work..

Then sanded everything to 320 grit, and then wiped it all nice and clean....then a coat of varnish....and then, on the 2nd try, I got a piece of plexiglass to fit inside the tray..

Letting the still wet varnish "glue" the plexi in place...let this sit until the weekend...be a little busy tomorrow..
Stay tuned....

Show me a picture, I'll build a project from that
Posts: 4,037
Threads: 0
Joined: Nov 2010
And...back to box making...I went through all the remaining Cedar slats.....cut out the worst of the knots...removed the nasty T&Gs from the factory...Then see what I can make...
Well, two fairly long and almost clear slats want to get "curvy" clamped them up in the vise, to flatten the curves...

Then sorted through a few more...got 2 to almost match....
One a lot shorter than the other? Going to be the ends for the next box....but..I needed a second such panel..

Let these 2 panels sit a day..or 2
 ....Then sorted a couple sides for the box...
haven't decided on the exact length...yet
 Plus...i have all of this...
To find a use for....maybe compartments inside the box? Bottom of the box will be some 1/4" plywood....
Stay tuned....

Show me a picture, I'll build a project from that
|

