| Welcome, Guest |
You have to register before you can post on our site.
|
| Forum Statistics |
» Members: 53,421
» Latest member: mgmartino
» Forum threads: 65,096
» Forum posts: 1,008,247
Full Statistics
|
| Online Users |
There are currently 335 online users.
» 3 Member(s) | 329 Guest(s)
Bing, Facebook, Google, lincmercguy, Kizar_Sozay
|
|
|
| (Sorta) Dutch Tool Chest completed |
|
Posted by: msweig - 04-24-2020, 05:45 PM - Forum: Woodworking Hand Tools
- Replies (7)
|
 |
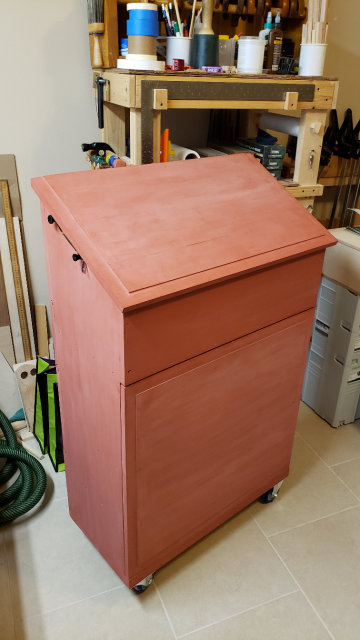
I don't think I've actually posted any pictures of this project. I finished the shell and started outfitting the top over a year ago. But I didn't finish with the tool placement because I wanted to use it for a bit to see if some of what I did was annoying, and I was struggling with the placement of tools on the lid. After using it (sporadically, I've got kids) for a year, I determined that a few things I had in the lower compartment needed to be up top (namely the rulers and squares, as I frequently want to grab those for quick things around the house, and having to take off the front panel to access them was...annoying.
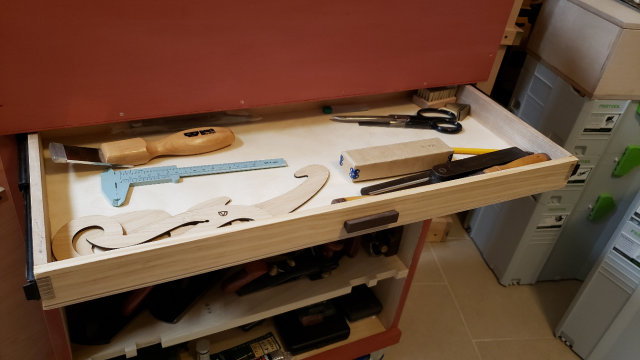
This is a "Sorta" dutch tool chest because there is no way someone is going to pick this thing up. I liked the style and that it would be easier to build than a full size tool chest. But, I have no plans on taking it out of the shop, and I didn't see the point in making a smaller one and needing to stoop to access everything, or always having it sit on my sawhorse and never be able to use that. So I made it taller/with more sections in the lower portion. This seemed to work out well (if I'm not moving it out of the shop there was no reason to make the lower compartment separate like Christopher Schwarz did on one of his). I also went with a shallow drawer in the lower section. I like this, other than needing to remove the front panel to access. In hindsite it might have made more sense to have the drawer come all the way out flush with the front, and attach the front panel in a different way than the two sliding locks, but this works and I don't see myself taking the effort to change it

Made with poplar and milk paint (red of some sort, don't recall the actual color name).
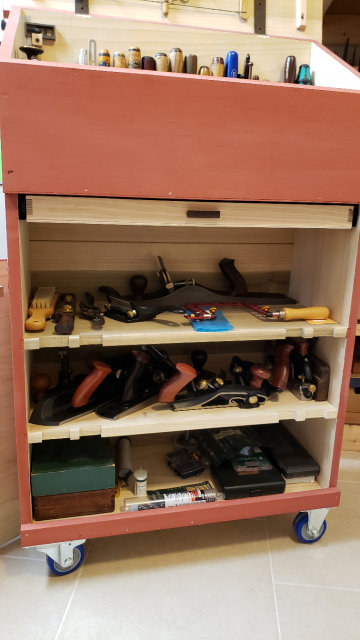
Opened up:

Lower section. I still have some tools to put in here, but this is primarily the "tetris this stuff in here section" so I'm not worried that I haven't got it all in yet. This part shouldn't be difficult compared to the top

The shallow drawer:
Next post will have details on the top.
|

|
|
| dewalt impact driver only runs full speed |
|
Posted by: JDuke - 04-24-2020, 12:26 PM - Forum: Woodworking Power Tools
- Replies (3)
|
 |
I have a dewalt dcf885 that only runs full speed
It’s supposed to be continuous variable speed and the two other DeWALT impacts that I have work with variable speed based on how far trigger is pulled, but this one is all or nothing.
I have tried blowing some electrical contact cleaner into the switch without benefit. And have taken it apart to inspect the brushes and they look fine.
Any ideas for fixes?
Duke
|

|
|
| Laguna ResawKing 1/2" vs. 3/4"? |
|
Posted by: LongLook - 04-24-2020, 07:40 AM - Forum: Woodworking Power Tools
- Replies (11)
|
 |
The Laguna products are now on sale at 10% off and I'm considering a Laguna ResawKing blade for my 1412 bandsaw. I've never tried a 3/4" blade before and am curious if anyone has had problems tensioning the 3/4" on the 1412. I know Laguna says the saw will handle a 3/4" but without any direct experience I'm looking for others experience before ordering either the 1/2" or the 3/4".
I have been resawing using 1/2" Laguna ProForce and Woodslicers but find I need to do some significant planing or sanding with either. Either of those gives me good results as far as lack of drift, etc., so the saw performs well (as long as I use a sharp blade).
|

|
|
| Carbide lathe tools |
|
Posted by: gear jammer - 04-23-2020, 05:03 PM - Forum: Woodturning
- Replies (14)
|
 |
I have been traditional tools since I started. I bought a carbide tool and I'm having trouble holding it. It has a round shaft and I try to cut ever so lightly I still get a catch. My grip is not the best in the world. I never have that trouble with my traditional tools.
Should I have gotten a square shank rather than round? I bought a hollower and haven't even tried it yet.Afraid it may be just as hard to hold. Again round shafted.
|

|
|
| "CELTIC LACE" |
|
Posted by: Splinterz25 - 04-23-2020, 01:54 PM - Forum: Woodturning
- Replies (82)
|
 |
Hello once again everyone I'm embarking on a new piece and Thought I would share the process.
The last time I did a carved edge piece "Celtic Pride" I had many people ask how I did the carving and was able to keep it so even; I do not have any tricks other than a very good lay out and remove very small bits at a time we will get to that another time.
This piece will be entirely different both the carving and the bowl; I've already started the blank making process and It's like nothing I've ever done before so it may have problems even fail all together but I will show everything as best I can threw the whole process.
To start off with the piece will be made from Walnut & Curly Maple and Oak veneer.
I started off making Walnut staves ( I will not go into making the Staves look it up on Youtube) I do my stave's in a very unconventional way.
Once they were made I glued the Oak veneer to one side the same side of each wedge and got them cleaned up and ready to glue into a blank. (blank in photos)
Once dry I drilled a clean 1 1/2" hole in the center so my chuck would fit and chucked it up and turned it inside and outside just cleaning the outside up and getting the angle I want on the inside. This will accepted the next piece the Curly Maple set of staves that has to match the angle exactly for gluing.
The Curly Maple staves were cut 1" thick then band sawed in half to save material giving me 1/2" thick or there about staves. It is much harder to glue these up at 1/2" thick so I don't recommend doing them this way, I only did this because I was short on this material, and most of this will be turned very thin anyway. The Curly Maple is the rim of the bowl and will be carved with the lace pattern latter on in the project.
So this is where this project is now I just matched the Maple to the Walnut section and glued them together on the lathe. I'll post some photos and if you have any questions please ask and I'll answer them the best I can.
PS there's a few photos of my saw w/ my jig used for cutting the staves, I have not taken the time to make an elaborate saw jig for this that is why I say look it up on YouTube.
|

|
|
| Free is for me. |
|
Posted by: briman87 - 04-23-2020, 01:19 PM - Forum: Woodworking
- Replies (8)
|
 |
I always take a look on letgo, offerup and facebook marketplace for cheap older tools. It seems like most people my age (32, 33 in July) inherit tools from there grandfather or father and just let them go for next to nothing. As a newbie to woodworking and just bought a house I am finally able to get more tools. I saw on the facebook marketplace that someone had tools marked for free. Some looked older like some hand says and bit brace while others were somewhat new maybe early 90's late 80's. I messaged him to see if they were still available and he said they are first come first serve and at the curb. I was about 30 minutes away so I asked if he would hold the saws and the bit brace for me and he said he would. Got in the car and drove down and picked up the saws and bit brace. Yesterday after let them sit in the car for a few days to let any germs or bacteria that could be on them to be gone I took them out and down to my basement shop. After looking at them more one was an E.C Atkins Rip Saw no. 51, medallion is missing so not sure how to date it, one was a Disston tenon saw judging by the medallion it was made between 1917-1940 can't make out a number on the blade I have to clean it up a bit. And a saw that looks like a miter saw that says LU Dell quality tools made in usa etched on the blade. Not sure about that one. The bit brace will have to be cleaned up but could see that it was a miller falls no. 422 brace. I will update with some pictures once I clean them up a bit.
Moral of the post is check out the letgo, offerup and facebook marketplace as you never know what you will get
|

|
|
| Stain or outdoor paint to protect plywood |
|
Posted by: gmcman - 04-23-2020, 11:13 AM - Forum: Woodworking
- Replies (6)
|
 |
I'm going to replace the plywood sides on my landscape trailer. I bought the trailer with the current plywood sides and it appears to be a type of stain which shows the wood grain and actually looks good.
I thought about outdoor paint but this would simply cover all the grain but likely a better alternative.
I will also run a length of 1/2" wide aluminum to cover the exposed edge of the plywood to help keep water off the edges.
For the most part of weatherproofing, would a deck stain and sealer work about as good as outdoor paint? I understand this won't last 20 years but even 5 or 6 years is fine with reapplying.
With regards to plywood, what actually is the preferred method to keep it protected from weather other than keeping it dry.
I know I'm overthinking this but looking for the ideal stain/paint to protect the wood.....still about $100 worth of wood.
Thanks.
|

|
|
| Hey 2Beast - Raising Paver Walk |
|
Posted by: brnhornt - 04-23-2020, 10:28 AM - Forum: Home Improvement
- Replies (9)
|
 |
Hey gang. I have a sagging front walk issue and looking for some opinions. This was a project that we were going to completely rip out and replace with the fantastic help of 2Beast's crew with the design, however that money was moved into replacing a larger patio on the back of the house. So now I'm back to trying to fix this. Here's an overview of the whole thing:
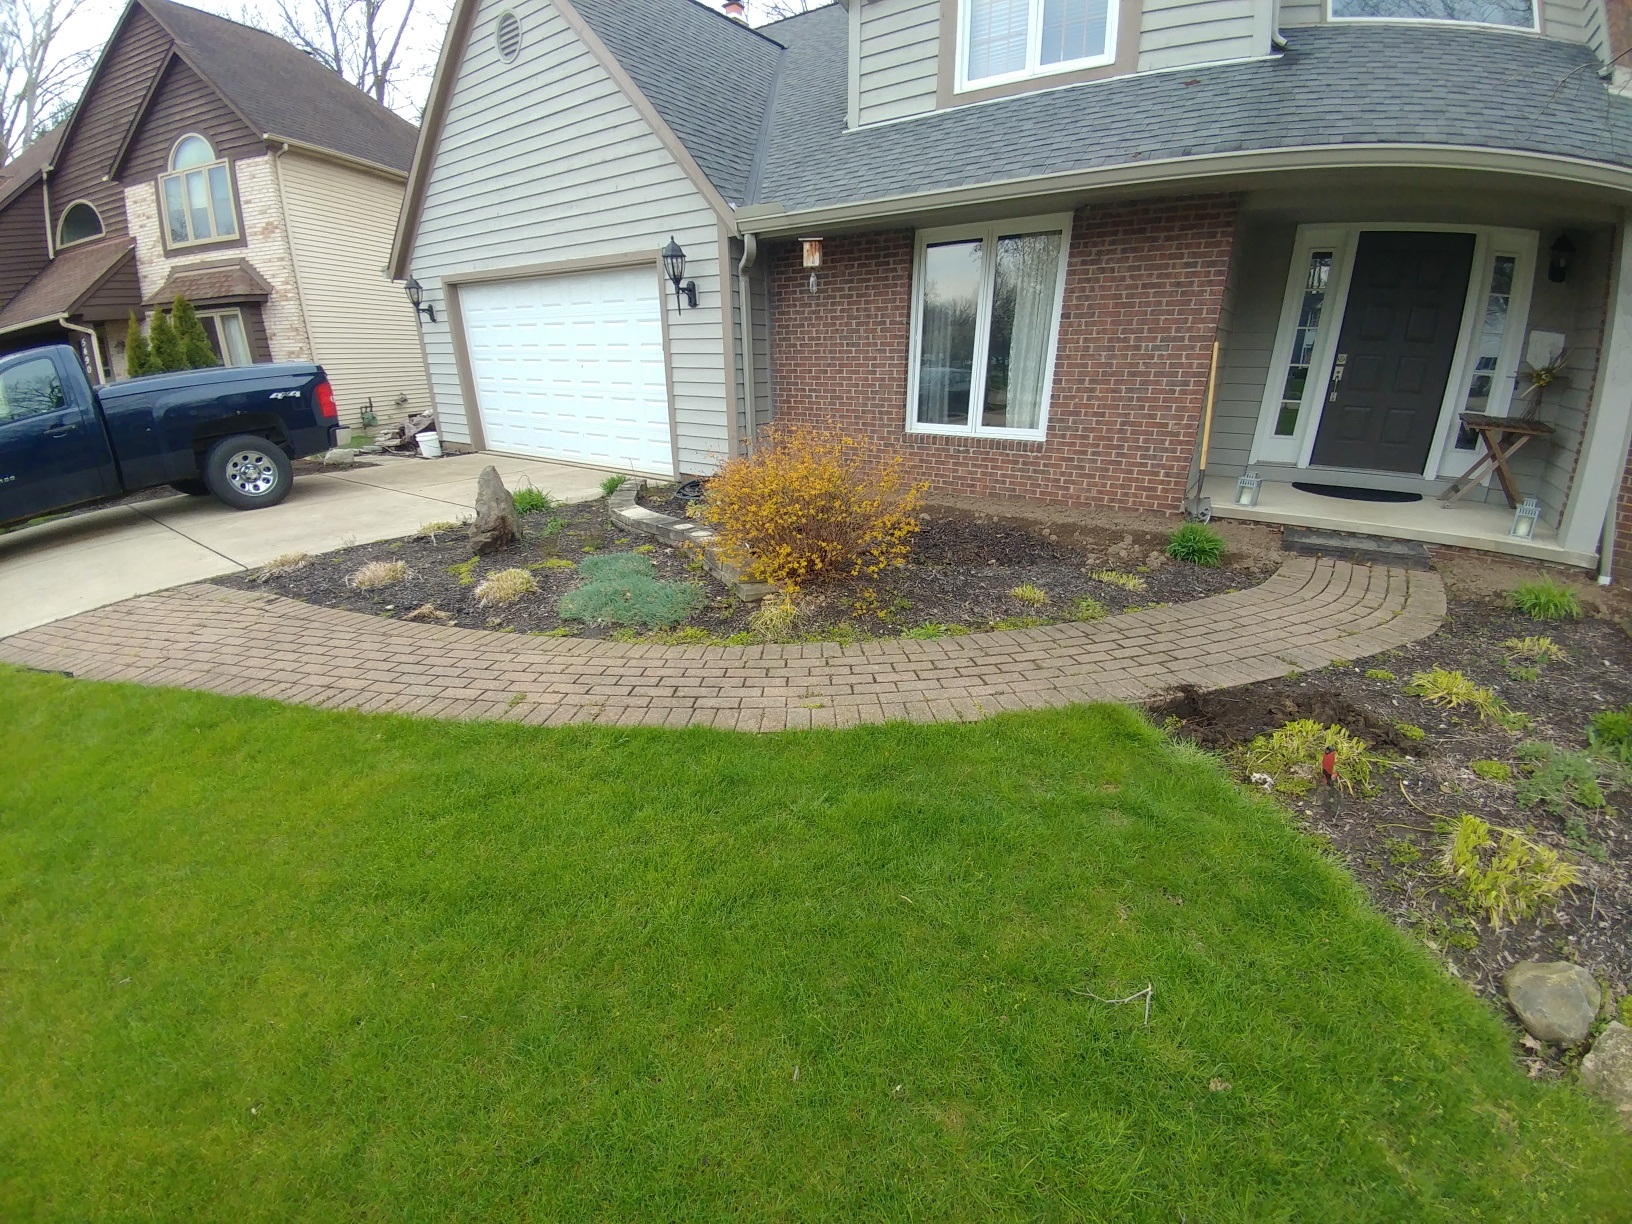
The driveway side has settled about 1/4 to 1/2 of an inch. The middle section is fairly good. The side by the front porch is the problem. I built a simple step out of a 2x4 and some plywood, but you can see it needs to come up the full 2 inches over on that side:
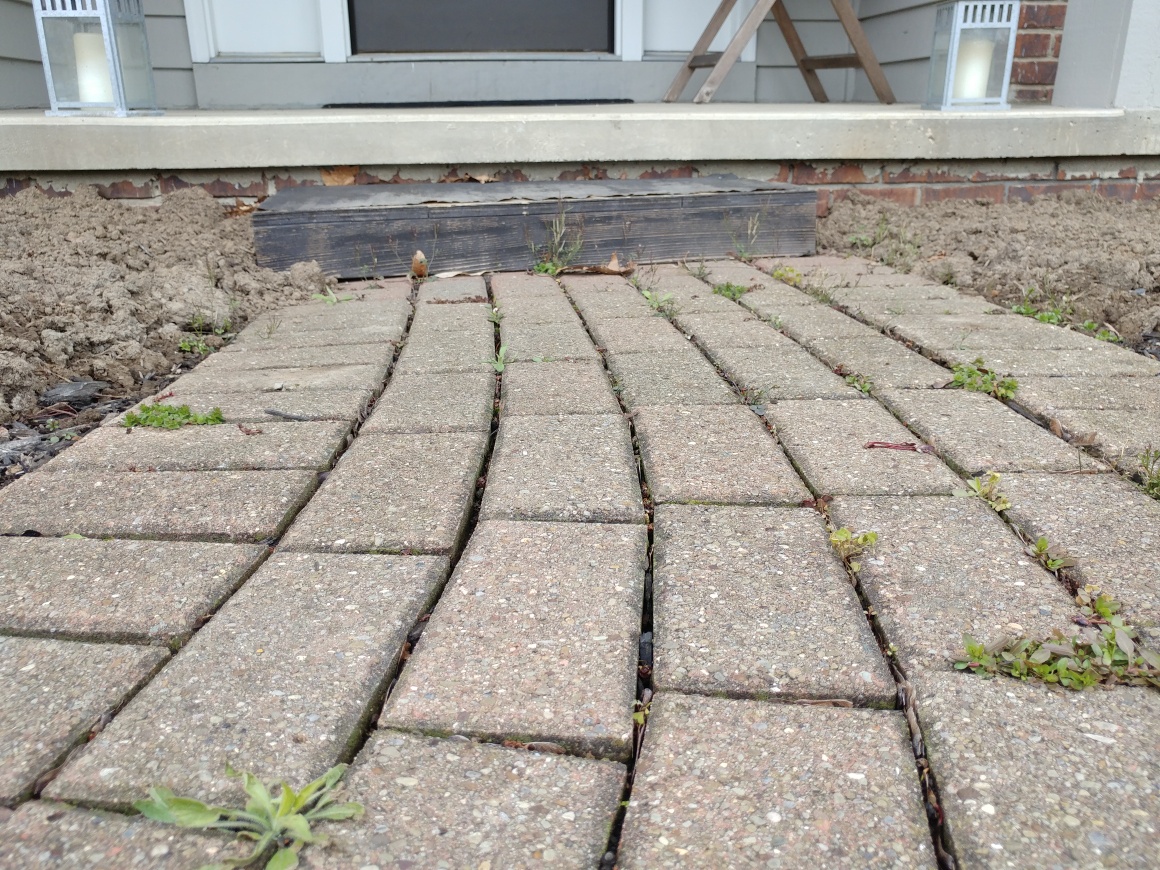
It looks like these pavers have been set onto a 4" concrete pad. I have only dug in one space....but I would think it's natural to assume it's 4" all around:

I had a concrete leveling company out the other day, and he was a touch worried about trying to raise the pad. But mentioned that if I verified it was 4" think, it should be ok. Looking around 500 bucks for them to do that.
Any other ideas? The pavers are old and showing their age, but still serviceable, so I really don't want to rip them out and start anew. Is pumping the pad up the best way? Or, is pulling the pavers, cleaning the pad, and then putting down crushed lime or some other aggregate, and set the pavers back down a way to go?
Only downside I can think to the aggregate idea is the walkway was originally being held in by plastic and rebar. That has shifted and many of the joints have opened up. Since there is concrete, I was going to use adhesive and glue down the solider course and let the middle float. If I level with aggregate I'd obviously have to move back to an outside/external anchor of some sorts.
Thanks for any input!
|

|
|
|


